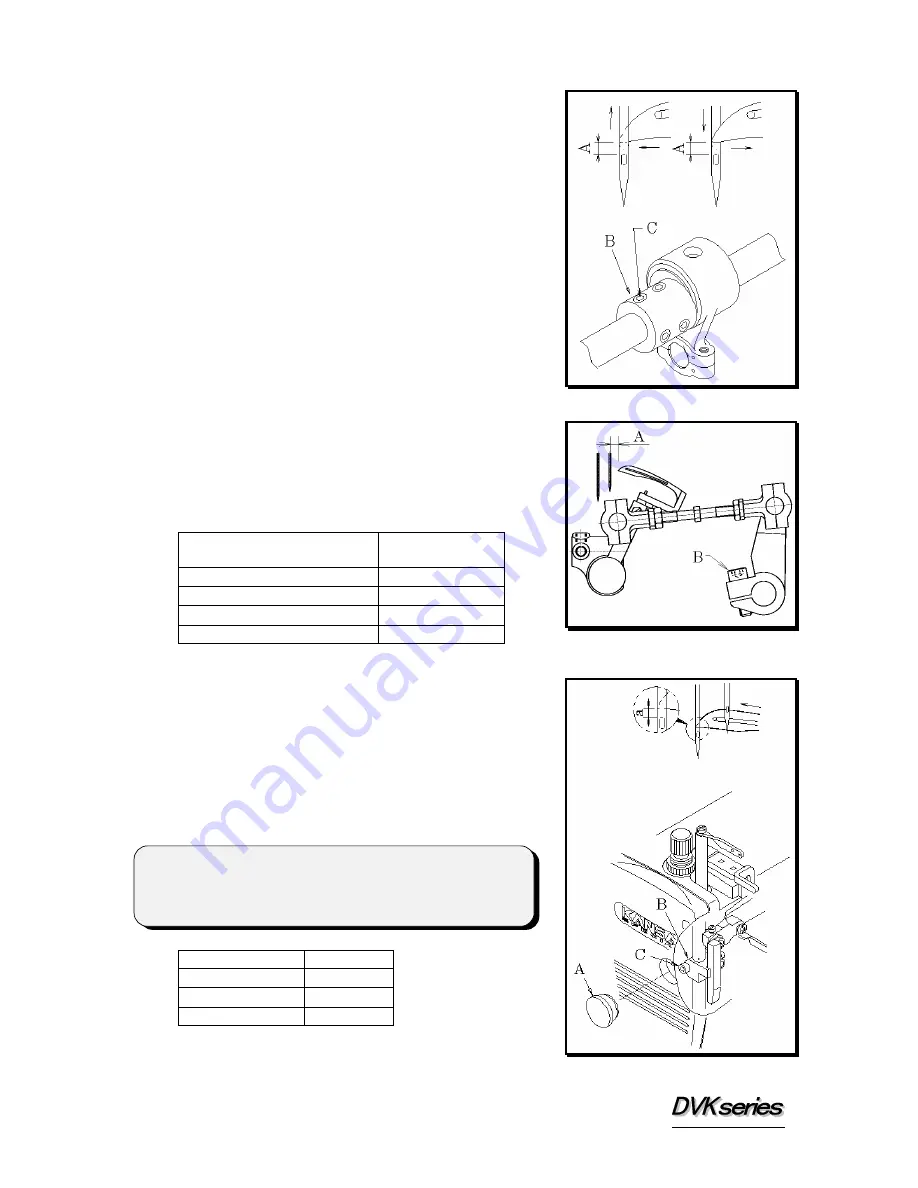
5-2 Looper left-to-right movement
When the point of the looper moves from the right/left
to the left/right, distance A from the top of the left
needle's eye to the point of the looper at the left side of
the left needle should be equal (see the illustration on
the right). To make this adjustment, remove the
machine cover, loosen three screws C on looper
eccentric B and then shift looper eccentric B by
turning the machine pulley while holding looper
eccentric B.
5-3 Looper setting distance
When the looper is at the extreme right end of its
travel, adjust distance A from the point of the looper
to the right side of the right needle. This distance
varies by model and/or gauge size (see the table below).
Adjustment is made by loosening screw B.
Model (gauge size)
Setting distance
A (mm)
P
,
PMD
,
MLH (1/8
,
5/32)
5.2
P
,
PMD
,
(3/16
,
7/32
,
1/4)
4.4
B
,
BK
,
PBK
4.0
EHD 5.0
5-4 Needle height
When the point of the looper has reached the left side
of the left needle with the machine pulley turned in
the operating direction, adjust distance a from the top
of the left needle's eye to the point of the looper on the
back side of the needle. This distance varies by
model and/or gauge size (see the table below).
The adjustment is that raise needle bar up or down by
remove rubber caps A and loosen the screw C.
Model A
(mm)
P
,
PMD
,
MLH
1.2~1.5
B
,
BK
,
PBK
0~0.5
EHD 2~2.5
< Note >
After the above adjustment is made, install the needle
plate and then check to make sure each needle drops
correctly into the center of the each needle drop hole.
6


