


6
13
14
15
16
17
18
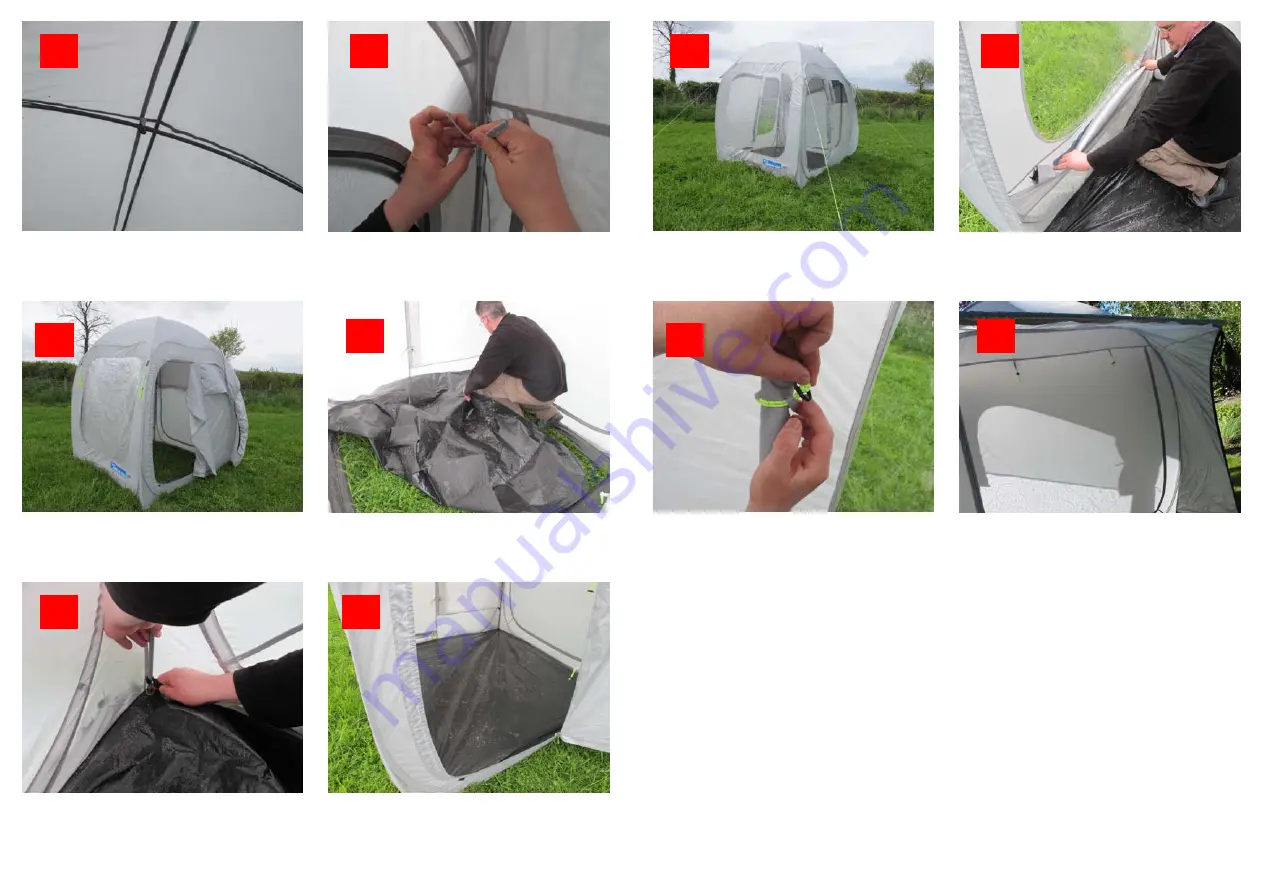
Repeat the process with the second
pole. The poles should cross at the
apex of the awning.
Locate the tie tapes sewn into the cor-
ners of the awning and tie securely to
the adjacent poles.
The awning should now look like this.
Take the groundsheet inside the awning
and locate one of the plastic clips that
are sewn to each corner
Clip to the bottom of one of the poles
Repeat with the other three corners until
the groundsheet looks like this.
7
19
20
21
22
Guy the awning out.
The front window blind can be rolled
down into the pocket below the window
The doors and side window covers can
be zipped open and secured using the
ties provided
The tunnel, at the rear of the awning,
can be connected to your camper van
using three different methods:
Guy Line Method
This is the quickest method. Throw the guy lines, attached to the top corners of the tunnel, over
the vehicle and either peg down on the other side or tie to the wheels.
Pole & Clamp
This is the most secure method for vehicles that have a gutter running the length of the vehicle.
The rear tunnel has a sleeve sewn along its length into which the supplied steel pole slides. The
pole then rests in the vehicle’s gutter and is secured using the clamps supplied.
Beading
Travel Pods come with an 6mm beading sewn along the length of the rear tunnel. The beading
can be clipped to the vehicle gutter using ‘figure of 8’ profile (not supplied) or attached to the
vehicles awning rail (if fitted). It will be easier to do this using an optional driveaway kit (available
from you dealer).


