background image


19


5.3


Adjust the frequency of the NSG sparks 

The NSG functions only when the gas fire is hot. This is why the appliance only activates the 
NSG after it has been operating for 10 minutes.  
 
The NSG generates sparks according to the flame height: as a 
result, the higher the flames (maximum setting), the more 
sparks. The default setting of the fire is ‘SPo’ (sparks off). Once 
the fire is in use, it saves the last programme selected. 
 
Adjusting the frequency of the sparks 
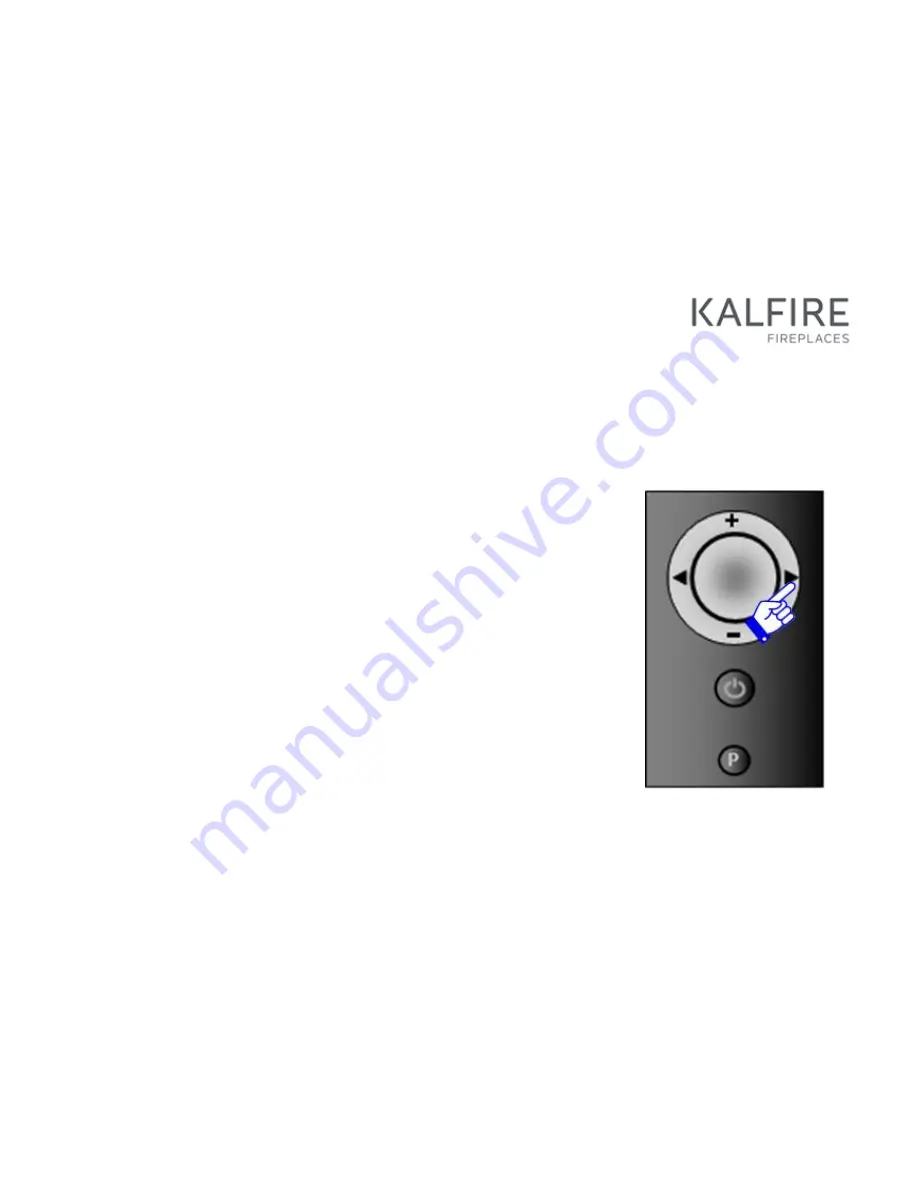
Select the forward arrow button (  ) to access the NSG 
programme. The screen displays ‘ SPo’ at the top left. Using the 
+ or – buttons, you can change this by selecting from settings 
SPo to SP8. 


Summary of Contents for GP105/59F

Page 1: ...User s guide Closed gas fire with Prestige burner English V11 2016_NL ...

Page 2: ...GP75 59F GP80 55C GP85 55S GP105 59F GP110 55C GP115 55S GP105 79F GP110 75C GP115 75S GP60 59F GP65 55C GP70 55S GP60 79F GP65 75C GP70 75S GP80 54T GP85 50R ...

Page 3: ...ng the iMatch remote control 9 5 Using the LED lighting and NSG 17 6 NSG Natural Spark Generator 21 7 Using the iMatch interface via a smartphone or tablet 24 8 Troubleshooting 26 9 Maintenance 36 10 Changing to another type of gas 40 11 Warranty terms 40 12 Certificate of compliance 44 13 Wiring diagram 45 ...

Page 4: ...he installer should adhere to general installation and operation codes the provisions of urban planning regulatory authorities and national and European standards Key general usage instructions The fire and remote control should be used only for the purpose they are intended and in compliance with this user s guide Maintenance and servicing should be performed exclusively by certified professional...

Page 5: ...eakage of smoke or fumes formation of carbon monoxide Switch off the gas fire immediately Shut off the gas valve Open the doors and windows Contact a certified installer If the flames are suddenly extinguished when the fire is operating no matter what the cause wait for 3 minutes before switching the fire back on Fire hazard Ensure that curtains or any other flammable materials are at a distance o...

Page 6: ...in the door or if the glass has not yet been installed The heat generated by the fireplace s convection system can cause dust particles or the smoke from cigarettes candles or oil lamps to discolour walls or ceilings Thus it is advisable to ensure sufficient ventilation in the room where the fire is installed The fireplace is intended to be used only as a fire to provide ambiance and as a result s...

Page 7: ...wn the button on the remote control for around 10 seconds This emergency stop definitively cancels the heat controlling device pre empting automatic reignition 2 24 hour safety After 3 consecutive automatic ignition attempts without any flame being detected the system will be blocked code A08 In this case it is possible to use the remote control to try to unblock the fire a further 2 times before ...

Page 8: ...ocked code A08 In this case it is possible to use the remote control to try to unblock the fire a further 2 times before the system is locked for 24 hours lock out code F08 3 Overpressure safety device The closed gasfire is equipped with an overpressure safety device to minimise the risk of damage in the event of an explosive ignition ...

Page 9: ...eaction time so the fire may not respond instantaneously If the screen of the remote control illuminates after a button is pressed this indicates that the RF signal has been sent 4 1 Inserting the batteries A battery compartment at the back of the remote control holds two AA batteries these are supplied with the appliance Slide the battery cover downwards to open the compartment Insert the two bat...

Page 10: ...ng the signal 4 Indicates the height of the flame or the intensity of the lighting hybrid fire 5 Indicates that the fire is ignited if the symbol is flashing this indicates that a heating change or an ignition or reignition attempt is in progress 6 Indicates that the ECO mode is activated 7 Indicates that the batteries need to be replaced 8 Indicates the ambient temperature of the room or signals ...

Page 11: ...a problem 10 Indicates that the fire is in thermostat mode 11 Indicates that the fire is in manual mode default mode A buttons and B left and right buttons C centre button D on off button E P parameter configuration button B D A C E ...

Page 12: ...tton The minutes will then begin to flash Use the or buttons to change the minutes then confirm the change by pressing 3 The number indicating the day of the week will then begin to flash Select the number 1 for Sunday 2 for Monday and so on then confirm your choice by pressing To exit the parameters menu press P Wait for 30 seconds while the information is transmitted ...

Page 13: ...n WARM displayed at the top left of the screen begins to flash indicating that the request has been confirmed After several seconds a beep indicates that ignition is starting up and WAIT displays on the screen After about 20 seconds the burner ignites A beep confirms the completion of ignition and WAIT stops flashing The fire is on 3 To switch off the fire hold down the button for around 2 seconds...

Page 14: ...ated and 1 the lowest flames 2 Use or to adjust the flame height as desired When the button is released the flame height is indicated by the number of horizontal bars The ECO mode has a modulating effect on flame height This mode is activated by setting the flame height to 9 using the button After confirming the desired flame height the display will continue to flash for several seconds while the ...

Page 15: ...s consumption by around 40 To select this modulating effect use the remote control to set the flame height to 9 The double flame icon will display on the screen 4 7 Choosing between thermostat mode and manual mode 1 Press the P button until the symbol or the symbol begin to flash 2 Press P again to select the symbol of your choice 3 Press to exit the menu 4 In thermostat mode the desired temperatu...

Page 16: ...te control measures the room temperature allowing the strength of the fire to be adjusted accordingly To ensure an accurate temperature reading make sure the remote control is outside of the fire s radiation range ...

Page 17: ...n a number of ways to vary the lighting effects 5 1 Changing the LED lighting effects The different parameters controlling the LED lighting allow the oscillation intensity and colour to be set Select the configuration of your choice 1 Press until P1 P2 or P3 appears in the centre of the screen 2 Select several times until the desired P setting appears Wait until the main screen displays ...

Page 18: ... of the screen 3 Press to increase light intensity This button also serves to activate the LED lighting 4 Select to decrease light intensity This button also serves to deactivate the LED lighting The horizontal bars at the bottom of the screen indicate the level of brightness of the LED lights The different settings allow the incandescence and colour of the LED bulbs to be varied according to the ...

Page 19: ...ding to the flame height as a result the higher the flames maximum setting the more sparks The default setting of the fire is SPo sparks off Once the fire is in use it saves the last programme selected Adjusting the frequency of the sparks Select the forward arrow button to access the NSG programme The screen displays SPo at the top left Using the or buttons you can change this by selecting from s...

Page 20: ... sparks per hour SP2 2 sprays of sparks per hour SP3 3 sprays of sparks per hour SP4 4 sprays of sparks per hour SP5 5 sprays of sparks per hour SP6 6 sprays of sparks per hour SP7 10 sprays of sparks per hour SP8 random sprays of sparks 1 per minute ...

Page 21: ... and on the NSG setting selected see Chapter 13 Refills of Natural Spark Powder are available from Kalfire A container of Natural Spark Powder completely fills the cartridge The opening to refill the NSG is located at the right front of the hearth under a piece of ceramic charcoal or at the right back under a ceramic log depending on the type of fire See the table below ...

Page 22: ...P80 55C GP90 55S Kalfire GP 105 59F GP110 55C GP115 55S Kalfire GP 105 79F GP110 75C GP115 75S At the right front of the hearth under a piece of ceramic charcoal Kalfire GP60 59F GP65 55C GP70 55S Kalfire GP60 79F GP65 75C GP70 75S Kalfire GP80 54T and GP85 50R At the right back of the hearth under a ceramic log ...

Page 23: ...e packaging of the container of Natural Spark Powder Possible reasons for an absence of sparks If no sparks are generated this could be due to the following reasons The Natural Spark Powder cartridge is empty There is no power supply to the NSG check that the NSG is correctly connected see diagram below The NSG pump and or coil is defective contact Kalfire ...

Page 24: ...lows the fire to be controlled via a smartphone or tablet application The application can be used with an iPhone iPad or Android smartphone and can be downloaded free from application download platforms 1 Select the fire you want to control 2 Decrease flame height 3 Increase flame height 4 Select LED lighting hybrid model only 5 Name of selected fire 5 1 3 9 7 2 8 4 6 ...

Page 25: ...25 6 Select configuration menu 7 Switch fire on or off 8 Select ECO mode 9 Add a fire ...

Page 26: ...ion indicated by E this type of malfunction is linked to communication problems between any of the printed circuit boards and the remote control They are resolved automatically by re establishing the remote control s link with the fire s technical unit Press once 4 Signal malfunction indicated by NOLK 0 of 1 or a flashing RF icon this type of malfunction arises when the remote control cannot commu...

Page 27: ... used natural gas or propane butane In the case of natural gas the burner will make 3 automatic ignition attempts while in the case of propane butane it makes only 1 attempt If ignition fails the error code A08 appears immediately and ER Error displays at the top left of the screen Using the remote control 2 more ignition attempts can be tried or 1 attempt in the case of propane butane If this new...

Page 28: ... be tried Hold down the button until OK begins to flash at the top left of the screen 8 3 Unblocking the fire after a code F failure e g 08F After a period of 24 hours the burner will unlock automatically If the power to the appliance is turned off this safety measure will not be triggered This is strictly forbidden and could put your safety at risk ...

Page 29: ...ch error codes Error code Cause Solution The batteries have run out Replace the batteries see section 12 1 NOLK 0 appears in the centre of the screen Control error no link Press until NOLK displays at the top left ...

Page 30: ...all black button that you will need to push down at a later step Hold down the button on the remote control until NOLK 0 displays and then release the button if NOLK 1 displays select again until NOLK 0 displays Then hold down the small black button in the technical unit until the yellow indicator light begins to flash rapidly Immediately within 10 seconds press and hold it down until LINK begins ...

Page 31: ...rol and the fire If the indicator light on the burner control in the technical unit is not flashing Check the voltage in your home If the voltage is correct you should contact your installer in order to detect a possible fault in the 24V transformer or the burner control If the indicator light on the burner control in the technical unit is flashing Bring the remote control as close as possible to ...

Page 32: ...ck that there is no contact between the ionisation rod the symbol on the burner and the Kal Glow or the furnishings in the fire Check that the cable is correctly plugged into the technical unit see ionisation in section 20 Wiring diagram If the error code still displays contact your installer The ionisation cable may be damaged or improperly connected to the ionisation rod ...

Page 33: ...e is defective In either case contact your installer 08A Lack of ionisation detection during ignition If no flame is visible during ignition and no spark appears at the ignition rod the V symbol on the burner in the fire Check the fire to ensure that there is no contact between the ignition rod the V symbol in the burner and the other elements Check that the cable is correctly plugged into the tec...

Page 34: ...or improperly connected to the burner or the ignition transformer may be defective 51A Disappearance of ionisation signal while the fire is operating Check the fire to ensure that there is no contact between the ignition rod the V symbol in the burner and the other elements If the problem persists contact your installer ...

Page 35: ...e between the wifi router and the iMatch remote control is too great Position your wifi router and iMatch interface in the technical unit so they are closer together There is a configuration error in the application settings Check the wifi settings Delete the fire or room from the application Restart the iMatch interface and try again ...

Page 36: ...immediately serviced Ask your installer about the possibility of a maintenance contract 9 2 Maintenance instructions The maintenance instructions can be downloaded using the QR code located next to the product nameplate The instructions give details regarding annual maintenance and the installation of the fireplace furnishings These maintenance instructions can also be downloaded from http goo gl ...

Page 37: ...g a cleaning product for ceramic glass Do not use corrosive or abrasive products to clean any part of the fire Damage to the paint is not covered by the warranty Minor deterioration can be touched up with a special Kalfire heat resistant paint that is available from your installer 9 4 Removing the glass Step 1 Fold the metal frame at the top of the fire upwards This does not apply to corner or 3 s...

Page 38: ...ed model the handles are located under the mantle and should be pulled gently upwards and outwards Step 3 Push in the metal protective strip at the left and right sides With a corner model just push in the protective strip for the large glass panel With a 3 sided model skip this step ...

Page 39: ...refully and completely from the fire In a 3 sided model the glass falls slightly forwards and can be taken straight out of the groove 9 5 Replacing the glass To replace the glass follow the instructions from step 4 in reverse order Latch the handles following the instructions in step 2 The metal protective strips step 3 automatically push out into place Fold the metal frame downwards to hold in th...

Page 40: ...are using high quality materials If despite this any faults or defects should appear the following warranty terms are applicable 1 Before the installation of the fire the certified installer must ensure that the smoke discharge flue is in good condition and functions correctly All gas fires must be installed by a certified installation professional in compliance with applicable national and where ...

Page 41: ...o right to compensation for the inability to use the gasfire 6 The repair or replacement of components covered by the warranty do not in any circumstances extend the total period of the warranty 7 If a malfunction should arise during the warranty period due to a fault in the manufacturing or the materials Kalfire will send a replacement component to the installer free of charge however will not co...

Page 42: ...eriod only in the Benelux countries Germany and France 11 In the case of an on site service visit outside of the warranty period all parts labour and travel expenses are to be paid by the customer The warranty is not applicable in the following cases 1 If the warranty terms detailed in the previous points are not complied with in full or in part 2 If any modifications are made to the appliance wit...

Page 43: ...imed has been caused by external factors e g impact lightning flooding or dropping or overheating of the fire occurring during transport storage or mounting 8 If the fire has been handled or used incorrectly or carelessly 9 If the replacement parts have been repaired or supplied by another manufacturer or by an uncertified supplier 10 If the warranty certificate and the original dated proof of pur...

Page 44: ...EC Type Examination Certificate No E1398 5643 and comply with the essential requirements applicable to Directive 2009 142 GP75 59F GP80 55C GP85 55S GP105 59F GP110 55C GP115 55S GP105 79F GP110 75C GP115 75S GP60 59F GP65 55C GP70 55S GP60 79F GP65 75C GP70 75S GP80 54T GP85 50R Date 1st of December 2016 Beijko van Melick Engineer and Doctor of Science Managing Director Kalfire B V ...

Page 45: ...45 13 Wiring diagram ...

Page 46: ...t without the prior written consent of Kalfire Kalfire reserves the right to modify this guide Kalfire gives no guarantee implicit or explicit concerning the contents of this guide Any risks related to implementing the instructions in this guide are the sole responsibility of the user Copyright 2016 Kalfire B V Belfeld the Netherlands ...

Page 47: ......

Page 48: ......

Reviews: