4
3. Start up.
Recording your training sessions:
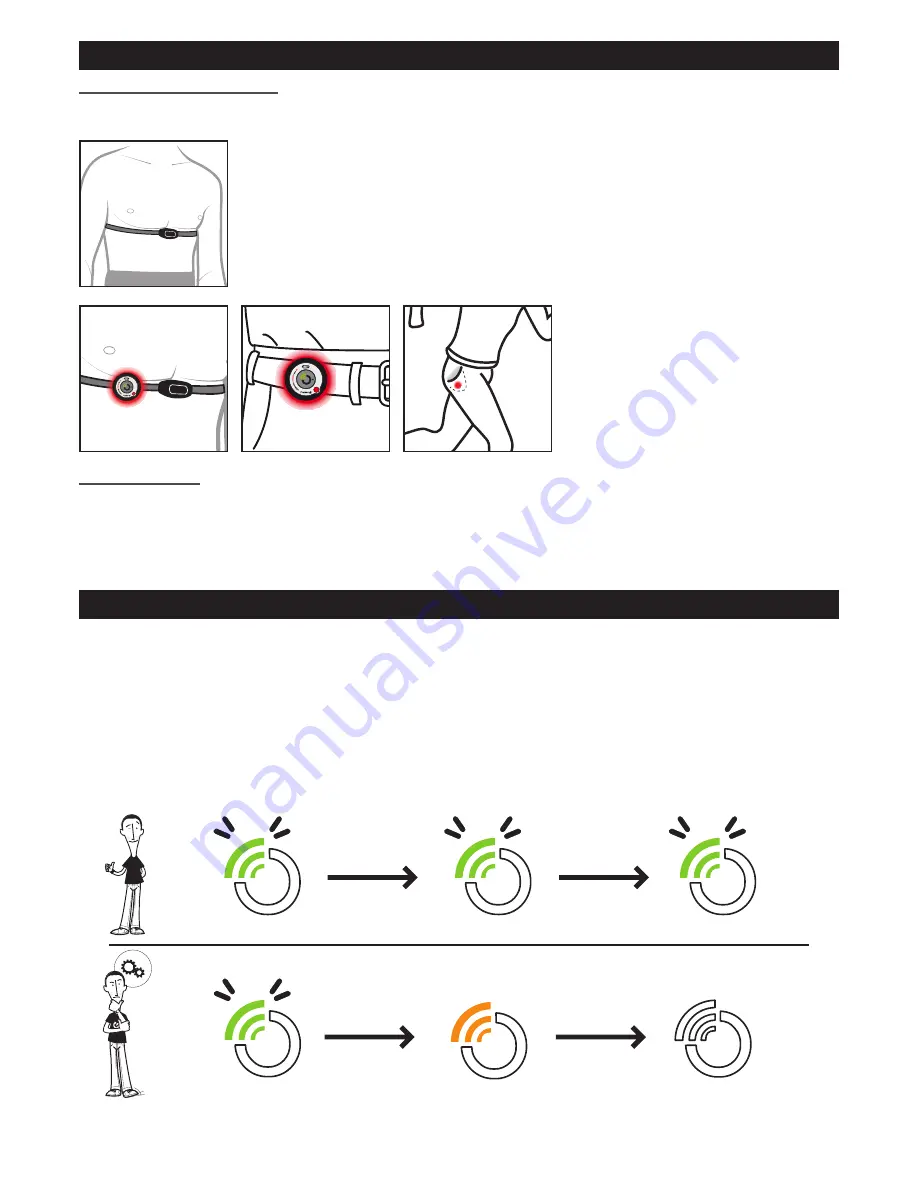
1. Set up your heart rate monitor chest belt. To do this, please refer to the notice on your heart rate monitor.
2. Press the Cardio Connect BUTTON briefly to turn the unit on, and place it next to your chest
belt to enable it to connect. Refer to paragraph 4 below to check that the connection has
been established successfully.
3. Attach the device to the chest belt or clip
it to your belt. You can also detach the
removable clip and slip the heart rate
logger into your pocket.
Start your exercises.
4. To finish recording the data, press the BUTTON and hold it down for two seconds until the orange diode starts
to flash, then release.
Comment:
The unit has a range of 10cm (4 inches) during signal search and 80cm (31,5 inches) once a signal has been received.
4. Connection to the chest belt.
This product is compatible with heart rate chest belts transmitting analogue signals on 5.3 KHz supplied with the
following models:
CW Kalenji 100 and CW Kalenji 300 Heart Wear, only those models identified with the “Cardio Connect Compatible”
mark.
300 coded, 500 coded, 700 coded,
CW Aptonia F300, F500,
CW Géonaute T500, T500 codé, T700, T700 codé.
The unit will automatically search for the signal emitted by the belt whenever you turn it on. The electro-luminescent diode
will indicate the connection status.
GREEN flashes quickly
Connection being established
GREEN flashes for 3 seconds
Connection made
GREEN flashes slowly
Saving in progress
GREEN flashes quickly
Connection being established
ORANGE flashes for 3 seconds
Connection failure


