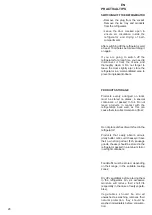
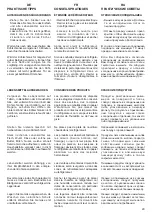
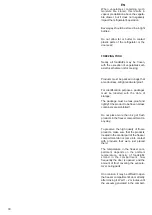
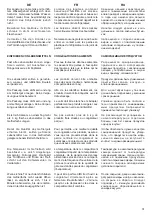
background image

25

RU

FR

DE

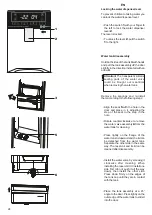
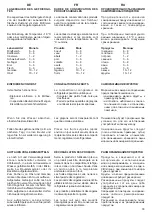
Um zu verhindern, dass Kinder Wasser 

nehmen, können Sie den Wasserspen-

derhebel verriegeln.

  • Den Schalter nach links drücken


1

um  den  Wasserspenderhebel 

2

  zu 

verriegeln

  • Um  den  Hebel 

2

  zu  entriegeln, 

ziehen  Sie  den  Schalter 

1

  nach 

rechts.

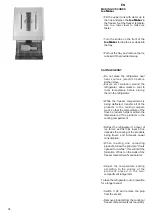
Demontage des Wassertanks

Der Hebel ist verriegelt.

Verriegeln  des  Wasserspenderhe-

bels

Halten Sie beide Seiten des Tanks 

3

 mit 

den  Händen  fest  und  ziehen  Sie  die 

Tankbaugruppe leicht von der Tür in die 

angegebene Richtung 

4.

  • Drücken  Sie  den  Flansch  der 

Wassertankabdeckung  leicht  nach 

oben, und die Abdeckung kann vom 

Wassertank  abgenommen  werden. 

Trennen Sie die andere Seite auf die 

gleiche  Weise.  Der  Tank  und  sein 

Deckel können nach der Demontage 

gereinigt werden.

Entfernen  Sie  die  Dichtungen  und 

bringen Sie sie gemäß den folgenden 

Schritten wieder an:

  • Installieren  Sie  das  Wasserventil, 

indem Sie es nach der Reinigung im 

Uhrzeigersinn  drehen.  Installieren 

Sie beim Installieren der Tankabdec-

kung zuerst die eine Seite (drücken 

Sie sie nicht ganz an) und dann die 

andere Seite. Drücken Sie fest auf 

die Kanten des Tankdeckels, damit 

sie in den Tank passen.

  • Installieren Sie die gesamte Wasser-

tankbaugruppe in einem Winkel von 

45° zur Tür wieder. Drücken Sie den 

äußeren  Rand  des  Wassertanks 

leicht nach unten, damit er in die Tür 

passt.

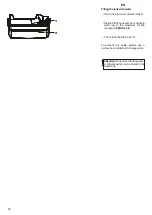
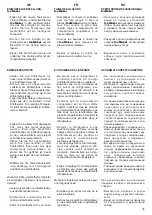
  • Die Dichtung 

5

 auf das Loch in der 

Tür  ausrichten  und  sie  einsetzen. 

Stellen  Sie  dabei  die  Stufe  der 

Dichtung auf die Stufe im Loch ein.

.

  • Um  die  Wasserventilbaugruppe 

6


zur Reinigung aus dem Wassertank 

zu  entfernen,  schrauben  Sie  sie 

gegen den Uhrzeigersinn ab.

  • Poussez l'interrupteur 

1

 avec votre 

doigt vers la gauche pour verrouiller 

le levier du distributeur d'eau 

2

.

  • Pour  déverrouiller  le  levier 

2

,  tirez 

l'interrupteur 

1

 vers la droite.

.

Démontage du réservoir d'eau

Tenez  les  deux  côtés  du  réservoir 

3


avec  les  mains  et  retirez  légèrement 

l'ensemble réservoir de la porte dans le 

sens indiqué par une flèche 

4

.

Retirez  les  joints  et  réinstallez-les  en 

suivant les étapes suivantes:

Verrouillage du levier du distributeur 

d'eau

Pour empêcher les enfants de prendre 

de  l'eau,  vous  pouvez  verrouiller  le 

levier du distributeur d'eau.

Le levier est verrouillé.

  • Alignez le joint 

5

 avec le trou de la 

porte  et  placez-le  dedans,  en 

ajustant  le  pas  du  joint  sur  le  pas 

dans le trou.

  • Tournez  dans  le  sens  inverse  des 

aiguilles  d'une  montre  pour  retirer 

l'ensemble du réservoir d'eau 

6

 du 

réservoir d'eau pour le nettoyage.

  • Appuyez légèrement sur la bride du 

couvercle du réservoir d'eau vers le 

haut  et  le  couvercle  peut  être 

détaché du réservoir d'eau. Séparez 

l'autre côté de la même manière. Le 

réservoir  et  son  couvercle  peuvent 

être nettoyés après le démontage.

  • Installez  le  réservoir  d'eau  en  la 

vissant  dans  le  sens  des  aiguilles 

d'une  montre  après  le  nettoyage. 

Lors de l'installation du couvercle du 

réservoir,  installez  d'abord  un  côté 

(ne le poussez pas complètement), 

puis  installez  l'autre  côté. Appuyez 

fermement sur les bords du bouchon 

du réservoir jusqu'à ce qu'ils soient 

en contact avec le réservoir.

  • Réinstaller  l'ensemble  du  réservoir 

d'eau  à  45°  de  la  porte.  Appuyez 

légèrement sur le bord extérieur du 

réservoir  d'eau  pour  l'adapter  à  la 

porte.

.

  • Чтобы  извлечь  для  очистки  узел 

водяного клапана 

6

 из резервуара 

для  воды,  выкрутите  его  против 

часовой стрелки.

  • Слегка  надавите  на  фланец 

крышки  резервуара  для  воды 

вверх  и  крышку  можно  будет 

отделить от резервуара. Отделите 

другую сторону тем же способом. 

Резервуар  и  его  крышку  можно 

очистить после разборки.

  • Установите  водяной  клапан, 

ввернув  его  по  часовой  стрелке 

после  очистки.  При  установке 

крышки  резервуара  сначала 

установите  одну  сторону  (не 

нажимайте  на  нее  полностью), 

затем установите другую сторону. 

Плотно  прижмите  края  крышки 

бака,  чтобы  они  прилегали  к  

резервуару.

  • Совместите  уплотнение 

5

  с 

отверстием в двери и поместите в 

него, подогнав ступеньку уплотне-

ния к ступеньке в отверстии.

Снимите уплотнения и установите их 

заново,  выполнив  следующие 

действия:

  • Установите резервуар в сборе под 

углом 45° к двери. Слегка нажмите 

на внешний край резервуара для 

воды, чтобы он вошел в дверцу.

Возьмитесь за обе стороны резерву-

ара 

3

  руками  и  слегка  снимите 

резервуар с дверцы в направлении, 

указанном стрелкой 

4

.

Рычаг заблокирован.

Блокировка  рычага  диспенсера 

воды

Чтобы  воспрепятствовать  детям 

пользоваться  диспенсером,  вы 

можете заблокировать его рычаг.

  • Сдвиньте переключатель 

влево, 

чтобы  заблокировать  рычаг 

диспенсера воды 

2

.

  • Чтобы  разблокировать  рычаг 

2

потяните  перек лючатель 

1


вправо.

Разборка резервуара для воды

В н и м а н и е !

  П р о з р а ч н ы е 

силиконовые  уплотнительные 

детали  водяного  клапана  могут 

б ы т ь   о т к р ы т ы   п р и   с н я т и и 

резервуара для воды.

!

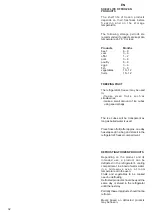
Achtung!

  Die  transparenten 

S i l i k o n d i c h t u n g s t e i l e   d e s 

Wasserventils  könnten  beim 

Entfernen  des  Wassertanks 

zwischenzeitlich  herausgezogen 

werden.

Attention! 

Les pièces d'étanchéité 

en silicone transparent du réservoir  

d'eau pourraient être retirées entre-

temps  lors  du  retrait  du  réservoir 

d'eau.

!

!

Summary of Contents for KS 80 Series

Page 1: ...D EMPLOI EN EN EN DE DE DE FR FR FR RU RU RU KS 80 KS 80 FRIDGE FREEZER COMBINATION FRIDGE FREEZER COMBINATION K HL GEFRIER KOMBINATION K HL GEFRIER KOMBINATION COMBIN S R FRIG RATEUR CONG LATEUR COM...

Page 2: ...spond to the main demands of the security hygiene and environment protection according to the directives of the EU which is con rmed with certi cates DIN ISO 9001 ISO 1400 ac cording to the standards...

Page 3: ...stehende K hlger te sind nicht f r die Verwendung als Einbauger te bestimmt FR CHERS CLIENTS Mercid avoirachet ceproduitKaiser Nous sommes convaincus que vous avez fait le bon choix Ce produit de haut...

Page 4: ...L TIPS 28 Switching o the refrigerator 28 Location drawing 18 USE 20 BRIEF DESCRIPTION 18 Making ice cubes IceMaker 34 Freezing fruit 32 Defrosting frozen products 32 Products storage 28 WHAT TO DO IF...

Page 5: ...t wenden 45 WAS IST WENN 43 Mise la terre 9 SOMMAIRE INSTRUCTIONS D INSTALLATION 7 Installation 9 Connexion lectrique 7 Programmateur lectronique 21 Sch mas des dispositifs 19 PR CAUTIONS DE S CURIT 1...

Page 6: ...ust not break the yellow green earth wire The socket or switch must be easily reach The supply voltage corresponds to the speci cations on the data plate on the front of the oven The mains supply has...

Page 7: ...ouverture minimale de 3 mm entre les contacts Assurez vous que l interrupteur a une capacit su sante pour la puissance indiqu e sur la plaque d une che utilisez uniquement des c bles et des prises ap...

Page 8: ...ce the refrigerator in a dry ventilated place protected from direct sunlight and at a su cient distance from heat sources such as a kitchen stove radiator etc If this condition cannot be met use a sui...

Page 9: ...n ventil l abri des rayons directs du soleil et une distance su sante des sources de chaleur telles qu une cuisini re un radiateur etc Si cette condition ne peut tre satisfaite utilisez une plaque iso...

Page 10: ...not standing on a power cable Alteration of device parts is prohib ited Avoid damaging the capillary tube visible in the rear wall recess for the compressor The capillary tube must not be bent unbent...

Page 11: ...ankes nicht mit anderen Warten Sie mindestens 2 Stunden bevor Sie den K hlschrank ein schalten dies hilft Probleme w hrend des Betriebs zu vermeiden 2 5 N e r e m p l a c e z l e s p i e d s d alignem...

Page 12: ...e handles for theArt Deco and Belle poque lines Align the handle fasteners holes 2 with the corresponding protrusions of the upper and lower holders at the same time Check that the handles are securel...

Page 13: ...en entsprechenden Vorspr ngen der oberen und unteren Halterungen aus Ziehen Sie die Gri schrauben mit dem Inbusschl ssel fest an 2 Art Deco Belle poque Art Deco Belle poque 1 3 Installation des poign...

Page 14: ...hildren or disabled persons do not use the device Do not allow children to sit on the elements that slide out or to hang on the doors The manufacturer is not liable for any damage resulting from failu...

Page 15: ...URIT Le fabricant d cline toute responsabili t pour dommage r sultant du nonres pect des instructions fournies dans ce manuel d utilisation prenez soin de prendre note de toutes les informations relat...

Page 16: ...the refrigerator was used for several minutes the volume of the room must be at least 4 m Slopping refrigerant can get into eyes causing severe injury To dispose of the device to bring it to a scrap y...

Page 17: ...ftet werden der Raum muss mindestens 4 m gro sein Produits congel s Les glaces les cubes de glace etc du compartiment cong lateur ne devrait en aucun cas tre mis directement dans la bouche car les bas...

Page 18: ...ghtly from this description however the functions and mode of operation remain the same Cooked foods should not be placed in the refrigerating chamber until cooled down to room temperature Long storag...

Page 19: ...ette chambre de r frig rateur sp ciale tr s e cace a t mise au point pour un meilleur stockage de la viande du poisson et des pizzas Il permet de conserver trois fois plus longtemps ses go ts et ses p...

Page 20: ...control key 8 Display lock icon Functions Select the desired function by touching the key 9 Holiday Mode the fridge runs at 8 C while the freezer operates at 15 C The icon 7 lights up INTELLIGENT SYS...

Page 21: ...CHE 11 Sens du commutateur de verrouil lage pour enfants 7 Ic ne de fonction Vacances 9 Touche de fonction 8 Ic ne de verrouillage de l cran Nettoyer les pi ces lectriques du r frig rateur uniquement...

Page 22: ...ge mode has been turned on Door open alarm The default temperature of the freezer is 18 C Fridge temperature control The default temperature of the fridge is 5 C The indicator 3 shows the correspon de...

Page 23: ...s erforderlich die Taste 6 f r 3 Sekunden gedr ckt zu halten L indicateur 3 indique la temp rature correspondante Fonction Super Refroidissement le compartiment de refroidissement atteint la temp ratu...

Page 24: ...tep in the hole Install the water valve by screwing it clockwise after cleaning When installing the reservoir lid install one side rst do not push it all the way down then install the other side Press...

Page 25: ...r du distributeur d eau 2 Pour d verrouiller le levier 2 tirez l interrupteur 1 vers la droite D montage du r servoir d eau Tenez les deux c t s du r servoir 3 avec les mains et retirez l g rement l e...

Page 26: ...pen the inlet cover of water tank 1 Filling the tank with water Then close the inlet cover 1 Slowly ll the tank with pure drinking water up to the maximum ll line marked with MAX 2L 2 MAX 2L 1 2 Atten...

Page 27: ...es Wassertanks 1 Remplissez le r servoir d eau Ouvrez le couvercle d entr e du r servoir d eau 1 Remplissez lentement le r servoir d eau potable pure jusqu la ligne de remplissage maximum marqu e MAX...

Page 28: ...on inside the refrigerator and drying of both compartments SWITCHING OFF THE REFRIGERATOR Remove the plug from the socket Remove the ice tray and products from the refrigerator Products evenly arrange...

Page 29: ...RATEUR Retirez la che de la prise lectrique Retirer le bac glace et les produits du r frig rateur Laissez la porte ouverte pour assurer la circulation de l air l int rieur du r frig rateur et s cher...

Page 30: ...packed in bags that are odourless airtight and waterproof Beverages should be stored in air tight bottles FREEZING FOOD Nearly all foodstu s may be frozen with the exception of vegetables such as let...

Page 31: ...et s adapter parfaitement au produit congeler Les conteneurs en verre sont interdits Pour permettre une meilleure qualit de cong lation des produits assurez vous que les produits situ s dans la parti...

Page 32: ...as strawberries o al 1 2 pork 3 6 The ice cubes will be transparent as long as boiled water is used Place frozen fruit after approx one day has elapsed in a bag and store it in the refrigerator s fre...

Page 33: ...zubereitete Speisen k nnen Sie jedoch wieder einfrieren DUR E DE CONSERVATION DES PRODUITS SURGEL S La dur e de conservation des produits surgel s d pend de leur fra cheur avant la cong lation et de l...

Page 34: ...to drop the ice cubes into the tray Do not place the refrigerator near heat sources electric heaters kitchen stove While the freezer compartment is being defrosted transfer all of the products to the...

Page 35: ...eeren K hl und Gefrierbereich K hl und Gefrierbereich von innen Ne placez pas le r frig rateur proximit sources de chaleur radiateurs lectriques cuisini re Lors du chargement et du d charge ment des p...

Page 36: ...Never place the refrigerator upside down or on its side Make sure that air vents are not blocked To move the refrigerator grip it at the bottom and carefully lift it making sure that the tilt does no...

Page 37: ...er le liquide frigori que dans un endroit bien ventil loin des sources ammes Ne pas endommager le tuyau d entr e liquide frigori que waschen und trocknen lassen alle Ausstattungselemente Schubla den T...

Page 38: ...gents such as washing powder abrasive cleansers alkaline agents chemically treated wipes solvents alcohol or hot water to wash the refrigerator as they may damage the paint or plastic parts If you are...

Page 39: ...h zu reinigen Ne jamais laver le r frig rateur avec du liquide in ammable comme l alcool le k ros ne la benzine les diluants ou solvants des agents chimiques abrasifs tels que les d tergents les acide...

Page 40: ...to damage it get into the refrigerator If this is the case remove the protector and wash the drain pipe NOTES The plug is securely inserted in the socket There is an earth lead The drain pipe is not...

Page 41: ...urezvous que Le c ble d alimentation n est pas endommag La che est bien ins r e dans la prise lectrique Der Stecker steckt sicher in der Steckdose gelangt Wasser in den K hlschrank Entfernen Sie in di...

Page 42: ...er speeds than earlier models A few simple defects can be removed by the user corresponding to the advices in this operating instruction When the refrigerator is on it may produce creaking sounds espe...

Page 43: ...nschalten des K hlschranks h her ist dauert die D connectez l alimentation lec trique Certaines erreurs simples peuvent tre corrig es par l utilisateur car corres pondant aux conseils pr sents dans ce...

Page 44: ...mains The weather is hot and humid minutes to drop BEFORE CALLING THE SERVICE CENTER The door is not properly closed Perhaps there are leaking products inside the refrigerator Make sure that the cord...

Page 45: ...ele Lebensmittel V ri ez ce qui suit L eau se forme dans le r frig rateur Bruit excessif La temp rature n a pas t correcte ment ajust e sement prend plus de temps La surface du compresseur est chaude...

Page 46: ...he doors and left them open for a long time Is there enough space between the refrigerator and the wall The plug is not securely inserted in the socket Perhaps you have placed hot products in the refr...

Page 47: ...ns la prise lectrique Les produits stock s dans le r frig rateur cong lent La temp rature dans la pi ce est trop lev e ou la porte du r frig ra teur a t laiss longtemps ouverte La porte n est pas corr...

Page 48: ...ng Perhaps you have set the tempera ture regulator to the lowest values Perhaps the refrigerator s seal has become soiled worn out cracked or is not properly secured The refrigerator is storing many w...

Page 49: ...t Le r frig rateur a t r cemment teint pour une longue p riode Il y a des produits avec forte odeur dans le r frig rateur Peut tre que le joint du r frig rateur est sale us ssur ou n est pas correctem...

Page 50: ...be used at ambient temperatures ranging from 16 to 32 C Note More data information please scan the QR code on the energy label this refrigerating appliance is intended to be used at ambient temperatu...

Page 51: ...F r weitere Dateninformatio nen scannen Sie bitte den QR Code auf dem Energielabel cet appareil de r frig ration est destin tre utilis des temp ra tures ambiantes comprises entre 16 et 38 C Subtropic...

Page 52: ...wipe the refrigerator body except the door sealing strip lt is forbidden to ush the refrigerator directly with water which will a ect electrical insulation properties etc After cleaning connect the po...

Page 53: ...er brennbaren oder giftigen Reini gungs ssigkeiten zu reinigen Avant le nettoyage teignez toujours l interrupteur d alimentation d branchez la prise d alimentation Nettoyage Pr cautions pour le nettoy...

Page 54: ...ood in an insulated bag and place quickly in the freezercompartment Packaging must not be damaged Freeze fresh and undamaged food only Store at 18 C or colder Avoid opening the freezer compartment doo...

Page 55: ...n Frisches Essen einfrieren L emballage ne doit pas tre endommag Si possible transportez les aliments surgel s dans un sac isotherme et placez les rapidement dans le compartiment cong lateur Pour fair...

Page 56: ...ent These times vary depending on the type of food The food that you freeze can be preserved from 1 to 12 months minimum at 18 C Food Storage time Bacon casseroles milk 1 month Bread ice cream sau sag...

Page 57: ...ois minimum 18 C Dur es de conservation recomman d es des aliments surgel s dans le compartiment cong lateur RU FR DE 1 12 18 C 1 2 3 4 6 12 Alimentation Dur e de conserva tion Bacon plats cuisin s la...

Page 58: ...ergy saving tips Note Food is not allowed to touch directly all surfaces inside the appli ance lt has to be wrapped separately in aluminum sheet or in cellophane sheet or in airtight plastic boxes Pre...

Page 59: ...sauberen weichen Tuch ab und lassen Sie den K hlschrank auf nat rliche Weise trocknen Pendant le nettoyage assurez vous qu aucune eau ne p n tre dans l interrupteur le panneau de com mande la lampe d...

Page 60: ...y with water which will a ect electrical insulation properties etc lt is forbidden to clean the refrigera tor with metal wipers ware brushes coarse abrasive cleaners strong alkaline detergents or amma...

Page 61: ...ellicule plastique ou d une feuille farcis juste avant la cuisson sinon une intoxication alimentaire peut survenir Es ist verboten den K hlschrank direkt mit Wasser zu sp len da dies die elektrischen...

Page 62: ...t and vegetables Whole sh and llets should be used on the day of purchase Until required refrigerate on a plate loosely covered with plastic wrap waxed paper or foil lf storing overnight or longer tak...

Page 63: ...gumes Ne r frig rez pas les avocats jusqu ce qu ils soient m rs les bananes et les mangues R chau ez les restes une seule fois et jusqu ce qu ils soient chauds Bei niedrigen Temperaturen treten unerw...

Page 64: ...wo light sources of energy e ciency class F Food Location Butter cheese Upper door rack Eggs Door rack Fruit vegetables salad Crisper M e a t s a u s a g e cheese milk Lowest shelf crisper D a i r y p...

Page 65: ...m a g e Support de porte sup rieur ufs Porte bagages Fruits l gumes salade Bac l gumes Viande saucisse fromage lait Plateau inf rieur bac l gumes Produits laitiers conserves bo tes Zone sup rieu re ou...

Page 66: ...al and can be re used or recycled DISPOSING OF THE PACKAGING DISPOSING OF OLD APPLIANCES The symbol on the product or on its packaging indicates that this product may not be treated as household waste...

Page 67: ...le bureau municipal de votre ville avec votre service d limination des d chets m nagers ou avec le magasin o vous avez achet le produit D I S P O S I T I O N D A P PA R E I L S ANCIENS Entsorgen Sie...

Page 68: ...st entfernt oder ge ndert wurde 5 Alle M ngelanspr che werden von der zust ndigen Kundendienststelle nur nach einer entsprechenden Qualit tspr fung des Produktes und nach der Erstellung eines Gutachte...

Page 69: ...e held liable 4 Repairs that qualify under this warranty guarantee are completely free including the cost of labour and materials transportation is determined by the relevant Kaiser servicing centre W...

Page 70: ...t correspondant du produit et apr s la pr paration d un rapport 2 Les produits qui ont t utilis s avec des d fauts non r solus ou qui ont t entretenus par des services non approuv s 10 La responsabili...

Page 71: ...5 3 8 1 12 2 8 2 3 6 7 4 6 3 10 4 9 5 7 1 c...

Page 72: ...5 8 4 1 12 7 8 10 6 3 2 1 3 9 3 2 4 5 6 7...

Page 73: ...allateur Installer Installateur Telefon Phone T l phone The product s is sold in their original packaging or tested in my presence Operating Instructions are supplied and explained I am satisfied with...

Page 74: ...800 500 69 65 8 499 110 79 23 E Mail service kaiser ru Internet http kaiser ru 331 50 77 331 50 78 496 55 44 044 044 391 03 00 127238 46 IT NL RU UA ELESCO EUROPA GmbH The Service Solution Company La...

Page 75: ...ang zur Verf gung Der Einsatz des Kundendiensts ist im Rahmen der jeweils lokal geltenden Herstellergarantiebedingungen kostenlos Die Mindestdauer der Garantie Herstellergarantie f r Privatverbraucher...

Page 76: ...ie sich bitte an den Verk ufer Wir behalten uns das Recht vor die nderungen in der Konstruktion und in der Herstellungstechnologie der Ger te vorzunehmen Die Verp ichtungen zu nderungen oder zu Verbes...

Page 77: ......

Page 78: ...grenzen auf dem Markt DIRECTIVE 2014 35 EU OF THE EUROPEAN PARLIAMENT AND OF THE COUNCIL of 26 February 2014 on the harmonisation of the laws of the Member States relating to the making available on t...

Page 79: ...i 2011 zur Beschr nkung der Verwendung bestimmter gef hrlicher Stoffe in Elektro und Elektronikger ten DIRECTIVE 2011 65 EU OF THE EUROPEAN PARLIAMENT AND OF THE COUNCIL of 8 June 2011 on the restrict...

Page 80: ...elves Drinks cartons and bottles Position full containers closer to the hinge in order to reduce the strain on the door Middle door shelves Jams jars small bottles tubes and eggs Assessment of the imp...

Page 81: ...rs of operation or when the freezer reaches 28 C The program runs 150 minutes maxi mally then turns o automatically the set temperature returns to the last one before the super fridge mode has been tu...

Page 82: ...gy Labeling EPREL The product database can be found at https eprel ec europa eu screen home Please select the category Fridges freezers and wine storage In the left field under Brand or Trademark type...

Page 83: ...erantwortung f r die eventuellen Irrt mer und Druckfehler und beh lt sich das Recht vor ohne Ank ndigung im Design und bei der Einrichtung die notwendigen nderungen die keinen negativen Einfluss auf d...

Page 84: ...www kaiser olan de OLAN Haushaltsger te Berlin Germany...

Reviews: