


Auto Accompaniment
The auto accompaniment function puts a full band at your fingertips. Using it, all you have to do is play
the chords with your left hand as you perform, and the selected accompaniment style matching your
music will automatically play along, instantly following the chords you play. With auto accompaniment,
a solo performer can enjoy playing with the backing of an entire band or orchestra.
The digital piano features 100 styles featuring a variety of different musical geners.
Try selecting some of the different styles and play with the auto accompaniment.
Using auto accompaniment
1
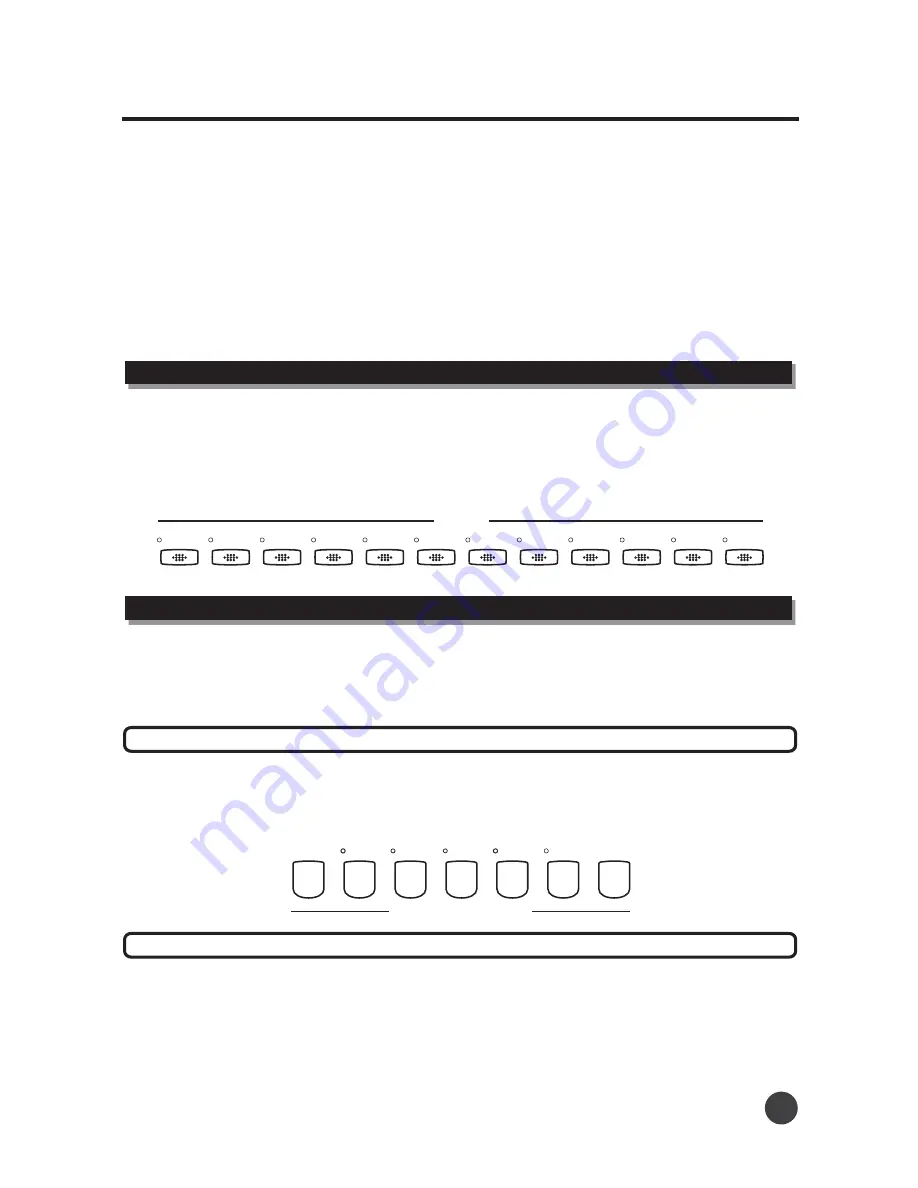
Select a style
.
The styles are divided into
different groups. Press the
style button
,
nd use the
style.
12
named
to directly select the style
a
the data dial to select other
Auto Accompaniment
There are various types of Auto Accompaniment sections that allow you to vary the arrangement of the
accom-paniment to match the song you are playing. The different types are: Intro, Main, Fill-in and
Ending. By switching among them as you play, you can easily produce the dynamic elements of a
professional-sounding arrangement in your performance.
Accompaniment sections
Sync section
Press the [Sync] button. Now press any note or chord in the left part of the keyboard, and the introduction
will begin in that "key".
8 BEAT
16 BEAT
BALLAD
BALLAD
DISCO
ROCK
BLUES
RHUMBA
COUNTRY
TANGO
WALTZ
MARCH
MARCH
SWING
STYLE
Metro
Start
Stop
Start
Stop
Sync
Fade
in/out
Fade
in/out
AUTO ACCOMPANIMENT
A Fillin1
-
A Fillin1
-
B Fillin2
-
B Fillin2
-
Intro
Ending
Intro
Ending
This is used for the beginning of the song. When the intro is finished ,the accompaniment will shift to the
main section. The length of the introduction differs from style to style.
Press the [Sync] button , then press the [INTRO/ENDING] button. Now press any note or chord in the
left part of the keyboard, and the introduction will begin in that "key".
1
Intro section
06


