background image

XV-M555BK [B, E, EV] EN
LVT0391-003A

Warnings, Cautions and Others

1.

CLASS 1 LASER PRODUCT

2.

DANGER: Visible laser radiation when open and interlock failed or
defeated. Avoid direct exposure to beam.

3.

CAUTION: Do not open the top cover. There are no user service-
able parts inside the Unit; leave all servicing to qualified service
personnel.

IMPORTANT for the U.K.

DO NOT cut off the mains plug from this equipment. If the
plug fitted is not suitable for the power points in your home
or the cable is too short to reach a power point, then obtain
an appropriate safety approved extension lead or consult
your dealer.

BE SURE to replace the fuse only with an identical
approved type, as originally fitted.

If nonetheless the mains plug is cut off ensure to remove
the fuse and dispose of the plug immediately, to avoid a
possible shock hazard by inadvertent connection to the
mains supply.

If this product is not supplied fitted with a mains plug then
follow the instructions given below:

IMPORTANT.

DO NOT make any connection to the terminal which is
marked with the letter E or by the safety earth symbol or
coloured green or green-and-yellow.

The wires in the mains lead on this product are coloured in
accordance with the following code:

Blue :        Neutral
Brown :     Live

As these colours may not correspond with the coloured
markings identifying the terminals in your plug proceed as
follows:

The wire which is coloured blue must be connected to the
terminal which is marked with the letter N or coloured black.

The wire which is coloured brown must be connected to the
terminal which is marked with the letter L or coloured red.

IF IN DOUBT - CONSULT A COMPETENT ELECTRICIAN.

Caution ––

 button!

Disconnect the mains plug to shut the power off
completely. The 

 button in any position do not

disconnect the mains line.The power can be remote
controlled.

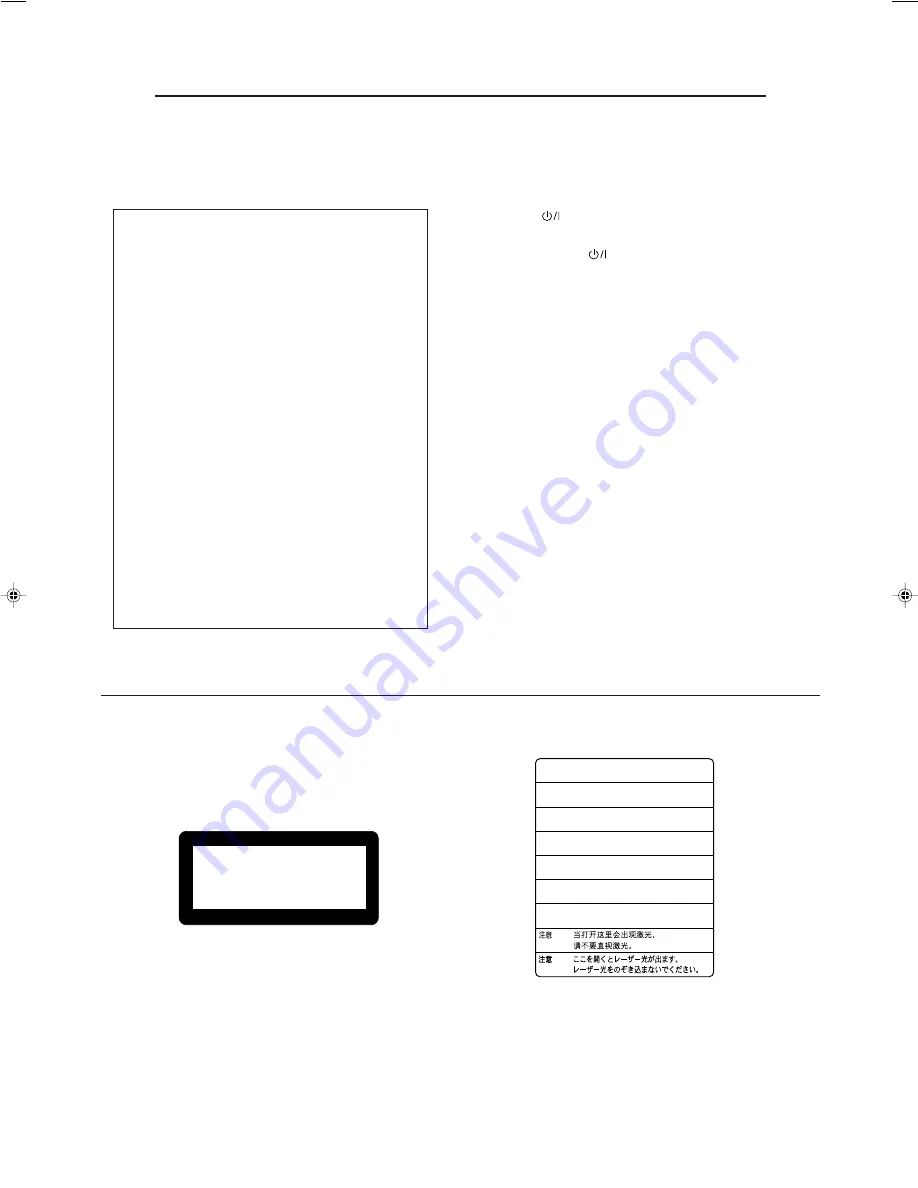
CLASS      1
LASER      PRODUCT

1

CLASSIFICATION LABEL, PLACED ON REAR NECLOSURE

2

WARNING LABEL, PLACED INSIDE THE UNIT

CAUTION - 

LASER RADIATION WHEN OPEN.
DO NOT STARE INTO BEAM.

ATTENTION RAYONNEMENT LASER EN CAS D’OUVERTURE.

NE PAS REGARDER DANS LE FAISCEAU.

VORSICHT LASERSTRAHLUNG, WENN ABDECKUNG GEÖFFENET.

NICHT IN DEN STRAHL BLICKEN.

ADVARSEL LASERSTRÅLING VED ÅBNING.

SE IKKE IND I STRÅLEN.

ADVARSEL LASERSTRÅLING NÅR DEKSEL ÅPNES.

STIRR IKKE INN I STRÅLEN.

VARNING

LASERSTRÅLNING NÄR DENNA DEL ÄR ÖPPNAD.
STRRA EJ IN I STRÅLEN.

VARO!

AVATTAESSA OLET ALTTIINA LASERSÄTEILYLLE.
ÄLÄ TUIJOTA SÄTEESEEN.

˚

Caution: Proper Ventilation
To avoide risk of electric shock and fire and to protect from
damage.
Locate the apparatus as follows:
Front:

No obstructions open spacing.

Sides:

No obstructions in 3 cm from the sides.

Top:

No obstructions in 5 cm from the top.

Back:

No obstructions in 15 cm from the back

Bottom:

No obstructions, place on the level surface.

CAUTION
To reduce the risk of electrical shocks, fire, etc.:

1.

Do not remove screws, covers or cabinet.

2.

Do not expose this appliance to rain or moisture.

IMPORTANT FOR LASER PRODUCTS

REPRODUCTION OF LABELS

Summary of Contents for XV-M555BK

Page 1: ...CANCEL 3D PHONIC THEATER POSITION RM SXVM555E REMOTE CONTROL TV ch TV VOL 1 2 3 4 5 6 7 8 9 10 0 10 SHIFT TV VIDEO TV DVD ENTER MENU TITLE RETURN CHOICE DISPLAY TIME XV M555 DVD PLAYER STANDBY STANDBY ON SHUTTLE DVD VIDEO CD CD DVD3 DVD2 DVD1 DISC TITLE CHAP RESUME DVD DIMMER THEATER POSITION 3D PHONIC DIGEST STROBE ZOOM 3 2 1 STOP PAUSE PLAY SKIP DOLBY D I G I T A L EACH PLAY EXCHANGE Introductio...

Page 2: ...loured blue must be connected to the terminal which is marked with the letter N or coloured black The wire which is coloured brown must be connected to the terminal which is marked with the letter L or coloured red IF IN DOUBT CONSULT A COMPETENT ELECTRICIAN Caution button Disconnect the mains plug to shut the power off completely The button in any position do not disconnect the mains line The pow...

Page 3: ...k TIME SEARCH 22 Introduction Page 1 Preliminary Knowledge Page 4 Getting started Page 12 Basic operations Page 17 Advanced operations Page 20 To locate a desired scene from the opening scene digest display DIGEST 23 Special picture playback To advance a still picture frame by frame 24 To display still pictures STROBE 24 To playback in slow motion SLOW 25 To zoom a scene ZOOM 25 Changing the playb...

Page 4: ...al output only 7 3D Phonic function You can enjoy surround sound with your 2 channel system Other functions 7 Triple disc trays You can insert up to three discs in the unit and can playback them continuously 7 Multi language subtitles and sound You can select a subtitle or sound language from those recorded on the DVD disc 7 Multi disc playback You can enjoy Audio CD discs and Video CD discs as we...

Page 5: ...ISC 1 SLOW PREVIOUS SELECT NEXT SLOW DISC 3 PLAY MODE SUBTITLE AUDIO ANGLE DIGEST STROBE ZOOM CANCEL 1 2 3 4 TV DVD ENTER MENU TITLE RETURN CHOICE DISPLAY TIME To playback titles or tracks in random order RANDOM You can play titles or tracks on the discs inserted in random order by using the Random function 7 While stopped 1 Press PLAY MODE The play mode menu appears on the TV screen 2 Use CURSOR ...

Page 6: ...t near a heating device When you re away When away on travel or otherwise for an extended period of time remove the plug from the wall outlet Do not insert foreign objects into the unit Do not insert wires hairpins coins etc into the unit Do not block the vents Blocking the vents may damage the unit Care of the cabinet When cleaning the unit use a soft cloth and follow the relevant instructions on...

Page 7: ...load discs To insert remove discs press the 0 OPEN CLOSE button located on the right of the tray corresponding to disc number 7 0 OPEN CLOSE buttons 17 Used to open and close disc trays 1 to 3 respectively When after opening the DVD1 tray another 0 OPEN CLOSE button is pressed the DVD1 tray is first closed then the other DVD tray selected is opened 8 1 through 3 DISC buttons with indicators 18 Use...

Page 8: ...EATER POSITION button SHIFT button Infrared signal emitting window DVD TV button 8 PAUSE button SELECT button MENU button for DVD ENTER button DISPLAY TIME button _ ANGLE button for DVD AUDIO button CANCEL button ZOOM button for DVD Video CD TV ch buttons DISC 2 DISC 1 SLOW PREVIOUS SELECT NEXT SLOW DISC 3 PLAY MODE SUBTITLE AUDIO ANGLE DIGEST STROBE ZOOM CANCEL 3D PHONIC THEATER POSITION RM SXVM5...

Page 9: ...ictures Numeric buttons 10 Mainly used to select a title track number or a TV channel Also used to enter a time for the Time search and a chapter number for the Chapter search 3D PHONIC button 32 Produces a simulated surround effect THEATER POSITION button 31 Selects a picture character from 4 settings SHIFT button 16 33 35 38 Used together with other keys for activating their second functions TV ...

Page 10: ...Function indicator Activated function indicators light up 1VIDEO OUT jack 12 Outputs a composite video signal 2S VIDEO OUT jack 12 Outputs an S video signal 3AV OUT 13 Standard 21 pin SCART connector feeds the video and audio signal The video output signal is selected from composite COMP and Y C by the COMP Y C switch The audio signal is same as AUDIO OUT 4AUDIO OUT jacks LEFT RIGHT 12 Outputs ste...

Page 11: ...g displays The Opening display appears automatically in some conditions At the bottom the following information are indicated depending on the unit s status NOW READING The unit is now reading the disc information TOC REGION CODE ERROR The DVD disc loaded cannot be played because the region code of the disc does not match the unit CHANGE DISC 1 The unit is now changing the disc tray to DISC 1 OPEN...

Page 12: ...een the DVD function status display and the disc time display and off For a Video CD or Audio CD disc pressing the DISPLAY TIME button switches the disc time display on and off CD CONTROL REPEAT A B REPEAT TIME SEARCH VCD CONTROL REPEAT A B REPEAT TIME SEARCH PBC CALL During Audio CD playback During Video CD playback To prevent the monitor from burning out SCREEN SAVER A television monitor screen ...

Page 13: ...pt its operation appears on your television screen Operations are occasionally unacceptable even if is not displayed Note that some operations may not be accepted For example some discs may not allow rapid advance reverse or slow motion playback How to use numeric buttons To select a track title number To select a number between 1 and 10 Press the corresponding button for the number To select a nu...

Page 14: ... CD Chapter 1 Chapter 2 Chapter 3 Chapter 1 Chapter 2 Title 1 Title 2 Track 1 Track 2 Track 3 Track 4 The DVD Logo is a trademark TM DVD VIDEO Video CD Audio CD Non playable discs DVD ROM DVD RAM DVD Audio DVD R DVD RW CD R CD ROM PHOTO CD CD RW CD EXTRA CD G CD TEXT Playing back discs listed as Non playable discs in the table above may generate noise and damage speakers This unit can play back au...

Page 15: ...t the audio outputs to your separate audio equipment See the following pages Getting started Connect the unit to a TV equipped with stereo audio input and video input jacks using the supplied audio video cables If your TV has a monaural audio input instead of stereo you need to use an optional audio cable which converts stereo audio output to monaural If your TV has an S video input you should con...

Page 16: ...r amplifier or receiver Audio cable not supplied The unit Amplifier or receiver White Red White Red To connect to a TV with the SCART connector You can enjoy using the unit by simply connecting it to your television set with a 21 pin SCART cable To hear audio sound with better quality connect the audio output to your audio equipment See below Connect the unit s AV OUT connector with your TV s SCAR...

Page 17: ...udio equipment using an optional digital cable Audio cable not supplied The unit Optical digital cable not supplied White Red White Red To connect the power cord When all the audio video connections have been made insert the smaller plug of the supplied AC power cord to the unit s AC IN connector then insert the other end to the wall outlet Make sure that plugs are inserted firmly The STANDBY indi...

Page 18: ...mpartment and press down lightly The batteries will last about six months with normal use If the functions of the remote control become erratic replace the batteries See below for more information Precaution Remove the batteries from the remote control if it is not going to be used for a long period of time Remove dead batteries and dispose of them properly Never leave dead batteries lying around ...

Page 19: ...gnal Turns the TV on or off Changes the TV channels Adjusts the TV volume Selects the TV channels For some TVs pressing 10 while holding down SHIFT functions as the RETURN and pressing 10 while holding down SHIFT functions as the _ _ _ button Switches input mode either TV or VIDEO The remote control unit is initially set for operating a JVC TV If there is more than one code listed for the manufact...

Page 20: ...be set in the unit You may insert a disc into any of the disc trays 1 through 3 1 Press 0 OPEN CLOSE located on the right of the tray corresponding to disc number The corresponding disc tray opens 2 Place the disc in the tray 3 Press 0 OPEN CLOSE to close the disc tray To insert an 8 cm disc place it in the inner recess With the label side up The unit can playback DVD Audio CD and Video CD discs o...

Page 21: ...0 0 10 SHIFT TV VIDEO TV DVD ENTER MENU TITLE RETURN CHOICE DISPLAY TIME To stop playback completely Press 7 The unit stops playback To stop playback temporarily Press 8 The unit pauses playback To continue playback press DISC1 DISC2 DISC3 With a DVD disc or a Video CD disc with PBC function the unit does not automatically playback the next disc To playback the next disc in such a case press the c...

Page 22: ... To resume playback When RESUME on the SYSTEM page of the preference display is set to ON the unit memories the position on a disc where you interrupt playback last time and resumes playback from that position next time you press See Page 38 When the unit memorizes the resume position RESUME is displayed in the display window 7 When the disc you interrupted playback last time remains selected and ...

Page 23: ...bout menu Normally a DVD disc which contains more than one title may have a title menu which lists the titles In this case the menu appears on the TV screen by pressing the TITLE button Some DVD discs may also have a different menu which appears by pressing the MENU button See the instructions of each DVD disc for its particular menu 2 Use CURSOR 2 3 5 to select a desired item then press ENTER The...

Page 24: ...isplay window When appears on the TV screen The title or track you have selected is not contained in the disc This function does not work during Video CD playback with PBC function NOTES 3D PHONIC DISC PROGRAM KARAOKE EACH REMAIN DVD VCD RANDOM RESUME REPEAT 1A B THEATER TRACK TITLE TRACK DIGEST STROBE ZOOM CANCEL 3D PHONIC THEATER POSITION RM SXVM555E REMOTE CONTROL TV ch TV VOL 1 2 3 4 5 6 7 8 9...

Page 25: ...ng the chapter number in step 3 To turn off the play mode menu Press PLAY MODE NOTES To locate a desired position in the current title or track TIME SEARCH You can play a disc from the desired position by specifying the elapsed time from the beginning of the current title or track using the TIME SEARCH function Note that some DVD discs do not contain time information and the TIME SEARCH function c...

Page 26: ...Press 2 Press 3 Press 4 GO TO _ _ _ _ _ GO TO 2 _ _ _ _ GO TO 2 3 _ _ _ GO TO 2 3 4 _ _ To locate a desired scene from the opening scene digest display DIGEST The unit can display the opening scene of each title or chapter on a DVD or each track of a Video CD You can select a desired scene from those displayed on the TV screen DISC 2 DISC 1 SLOW PREVIOUS SELECT NEXT SLOW DISC 3 PLAY MODE SUBTITLE ...

Page 27: ... 7 While paused still 1 Press 8 Each time you press 8 the still picture advances to the next frame Pressing returns to the normal playback mode To display still pictures STROBE DISC 2 DISC 1 SLOW PREVIOUS SELECT NEXT SLOW DISC 3 PLAY MODE SUBTITLE AUDIO ANGLE DIGEST STROBE ZOOM CANCEL 1 2 3 4 TV DVD ENTER MENU TITLE RETURN CHOICE DISPLAY TIME DISC 2 DISC 1 SLOW PREVIOUS SELECT NEXT SLOW DISC 3 PLA...

Page 28: ...e sized image 2 Use CURSOR 2 3 5 to move the zoomed in scene To pause zoom play Press 8 To resume zoom play press To return to normal playback Press ZOOM ZOOM To zoom a scene ZOOM DISC 2 DISC 1 SLOW PREVIOUS SELECT NEXT SLOW DISC 3 PLAY MODE SUBTITLE AUDIO ANGLE DIGEST STROBE ZOOM CANCEL ENTER MENU TITLE 1 2 3 4 TV DVD RETURN CHOICE DISPLAY TIME 1 1 1 2 1 Press 8 then press or 1 To play forward sl...

Page 29: ... by a DISC 1 3 button and then the title or track by the numeric buttons Up to 18 titles or tracks can be programmed by repeating this procedure REPEAT PROGRAM RANDOM 1 7 13 2 8 14 3 9 15 4 10 16 5 11 17 6 12 18 1 7 13 3 33 2 8 14 2 22 3 9 15 1 1 4 10 16 2 15 5 11 17 6 12 18 When you specify a wrong selection Press CANCEL The last selection programmed is erased To clear the program Press 7 3 4 Pre...

Page 30: ...ept Video CD playback with PBC 1 Press PLAY MODE The play mode menu appears on the TV screen 2 Use CURSOR 2 3 to move to REPEAT then press ENTER Each time you press ENTER the repeat mode changes as follows The selected repeat mode appears on the TV screen During DVD playback DISC 2 DISC 1 SLOW PREVIOUS SELECT NEXT SLOW DISC 3 PLAY MODE SUBTITLE AUDIO ANGLE DIGEST STROBE ZOOM CANCEL 1 2 3 4 TV DVD ...

Page 31: ...g Audio Video CD playback REPEAT ALL REPEAT PROGRAM RANDOM REPEAT ALL No indication off While stopped REPEAT ALL all disc repeat REPEAT 1 current track repeat No indication off for DVD Point B for Audio CD Point A for Video CD Point B Point A Point B Point A To repeat a desired part A B REPEAT 7 During playback 1 Press PLAY MODE The play mode menu appears on the TV screen 2 Use CURSOR 2 3 to move ...

Page 32: ...nually press ENTER When appears on the TV screen The current scene is not recorded from multiple angles 1 3 2 3 3 3 NOTES Viewing from multiple angles You can enjoy a variety of scene angles if the DVD disc contains multi angle parts where multiple cameras were used to shoot the same scene from different angles At the beginning of multi angle parts appears on the TV screen To select a scene angle ...

Page 33: ...ct the subtitle language as well as the audio language sound included on a disc For Video CD discs you can select the audio channel s To select the subtitle language SUBTITLE 7 During DVD playback 1 Press SUBTITLE The Subtitle selection display appears on the TV screen DISC 2 DISC 1 SLOW PREVIOUS SELECT NEXT SLOW DISC 3 PLAY MODE SUBTITLE AUDIO ANGLE DIGEST STROBE ZOOM CANCEL 1 2 3 4 TV DVD ENTER ...

Page 34: ...dio for 10 seconds To turn off the Audio selectin display manually press ENTER When appears on the TV screen You cannot select the audio NOTES Selecting the picture character You can select the quality of the image from among four options OFF 1 2 and 3 according to the type of programming picture tone or personal preferences To select the picture character THEATER POSITION THEATER 1 THEATER 2 THEA...

Page 35: ...8 9 10 0 10 SHIFT TV VIDEO 1 2 Selected effect mode The 3D phonic function works correctly when playing back discs recorded in the Dolby Surround or Dolby Digital 5 1 CH format It also works when playing back discs other than those above but does not provide the correct effect The 3D Phonic function does not affect the DTS or Dolby Digital bitstream signal from the DIGITAL OUT jack The sound effec...

Page 36: ...ime for Video CD playing with PBC 3 1 25 25 PBC DISC TRACK TIME Disc number Current track number Time PBC on status 2 To change the time display mode only for Audio CD or Video CD without PBC press DISPLAY TIME while holding down SHIFT The time display mode cycles as below EACH REMAIN current track remaining time EACH current track elapsed time TOTAL disc elapsed time TOTAL REMAIN disc remaining t...

Page 37: ...on the TV screen DISC 2 DISC 1 SLOW PREVIOUS SELECT NEXT SLOW DISC 3 PLAY MODE SUBTITLE AUDIO ANGLE DIGEST STROBE ZOOM CANCEL 1 2 3 4 TV DVD ENTER MENU TITLE RETURN CHOICE DISPLAY TIME 1 The current selections of the camera angle audio language and subtitle language are displayed To turn off the DVD function status display Press DISPLAY TIME twice ENGLISH ENGLISH 1 2 1 2 1 2 ...

Page 38: ... the TV screen There are four preference pages LANGUAGE AUDIO DISPLAY and SYSTEM To turn the page move to the desired tab using CURSOR 2 3 2 Move to select the item you want to set by using CURSOR 5 3 Press CURSOR 2 3 to select the setting you want To cancel display of the preference display press RETURN CHOICE while holding down SHIFT or move to EXIT and press ENTER For details about each setting...

Page 39: ...er with a built in DTS Dolby Digital or MPEG multichannel decoder DOLBY DIGITAL PCM When you connect to the digital input of a Dolby Digital decoder or an amplifier with a built in Dolby Digital decoder DIGITAL AUDIO OUTPUT PCM Lo Ro ON EXIT DOWN MIX COMPRESSION AUDIO DISPLAY SYSTEM LANGUAGE DOLBY DIGITAL PRESS KEY Playback discs DVD with 48 kHz 16 bit linear PCM DVD with 48 kHz 20 24 bit linear P...

Page 40: ...nly when playing back a disc recorded with DOLBY DIGITAL 1CH or 2CH The setting is not effective for other discs The Compression function does not work when the 3D PHONIC function is activated NOTES DIGITAL AUDIO OUTPUT PCM Lo Ro ON EXIT DOWN MIX COMPRESSION AUDIO DISPLAY SYSTEM LANGUAGE DOLBY DIGITAL PRESS KEY MONITOR TYPE You can select the monitor type to match your TV when you playback DVD dis...

Page 41: ...g while stopped starts playback from the beginning of the disc AUTO STANDBY OFF OFF EXIT RESUME AUDIO DISPLAY SYSTEM LANGUAGE AV COMPULINK MODE PRESS KEY AUTO STANDBY OFF OFF EXIT RESUME AUDIO DISPLAY SYSTEM LANGUAGE AV COMPULINK MODE PRESS KEY The monitor screen of a projector or projection TV is easily burned out if the screen saver mode is set to OFF and a static picture is displayed for a long...

Page 42: ...move to Country Code then use CURSOR 2 3 to select the country code and press ENTER The country code whose standards were applied to rate the DVD video disc should be selected See Appendix B Country code list for parental lock DISC 2 DISC 1 SLOW PREVIOUS SELECT NEXT SLOW DISC 3 PLAY MODE SUBTITLE AUDIO ANGLE DIGEST STROBE ZOOM CANCEL 3D PHONIC THEATER POSITION RM SXVM555E REMOTE CONTROL TV ch TV V...

Page 43: ...t password using the numeric buttons 0 to 9 If you enter the wrong password WRONG RETRY appears on the TV screen and you cannot go to next step The Parental lock is released and the unit starts playback When you enter the wrong password more than 3 times in step 2 above moves to NO automatically and CURSOR 5 do not work NOTE PARENTAL LOCK Temporary Level Change This DISC can t play now PASSWORD YE...

Page 44: ...rrectly and such a disc may cause the player to malfunction Label side Do not damage the label side stick paper to or use any adhesive on its surface Storage Make sure that discs are kept in their cases If discs are piled on top of one another without their protective cases they can be damaged Do not put discs in a location where they may be exposed to direct sunlight or in a place where the humid...

Page 45: ... the copyguard function is activated Connection is incorrect Input selection of amplifier is incorrect The audio signal is derived from the unit s DIGITAL OUT Disc is dirty MONITOR TYPE is not correctly set Television is not correctly set Microcomputer malfunction due to lightning or static electricity Moisture condensation caused by a sudden change of temperature or humidity Remedy Plug in secure...

Page 46: ...Abkhazian AF Afrikaans AM Ameharic AR Arabic AS Assamese AY Aymara AZ Azerbaijani BA Bashkir BE Byelorussian BG Bulgarian BH Bihari BI Bislama BN Bengali Bangla BO Tibetan BR Breton CA Catalan CO Corsican CS Czech CY Welsh DA Danish DZ Bhutani EL Greek EO Esperanto ET Estonian EU Basque FA Persian FI Finnish FJ Fiji FO Faroese FY Frisian GA Irish GD Scots Gaelic GL Galician GN Guarani GU Gujarati ...

Page 47: ...ugal PW Palau PY Paraguay QA Qatar RE Réunion RO Romania RU Russian Federation RW Rwanda ES Spain ET Ethiopia FI Finland FJ Fiji FK Falkland Islands Malvinas FM Micronesia Federated States of FO Faroe Islands FR France FX France Metropolitan GA Gabon GB United Kingdom GD Grenada GE Georgia GF French Guiana GH Ghana GI Gibraltar GL Greenland GM Gambia GN Guinea GP Guadeloupe GQ Equatorial Guinea GR...

Page 48: ...VICTOR COMPANY OF JAPAN LIMITED J VC 1099AOMUBNJEM EN ...

Reviews: