background image

G-1

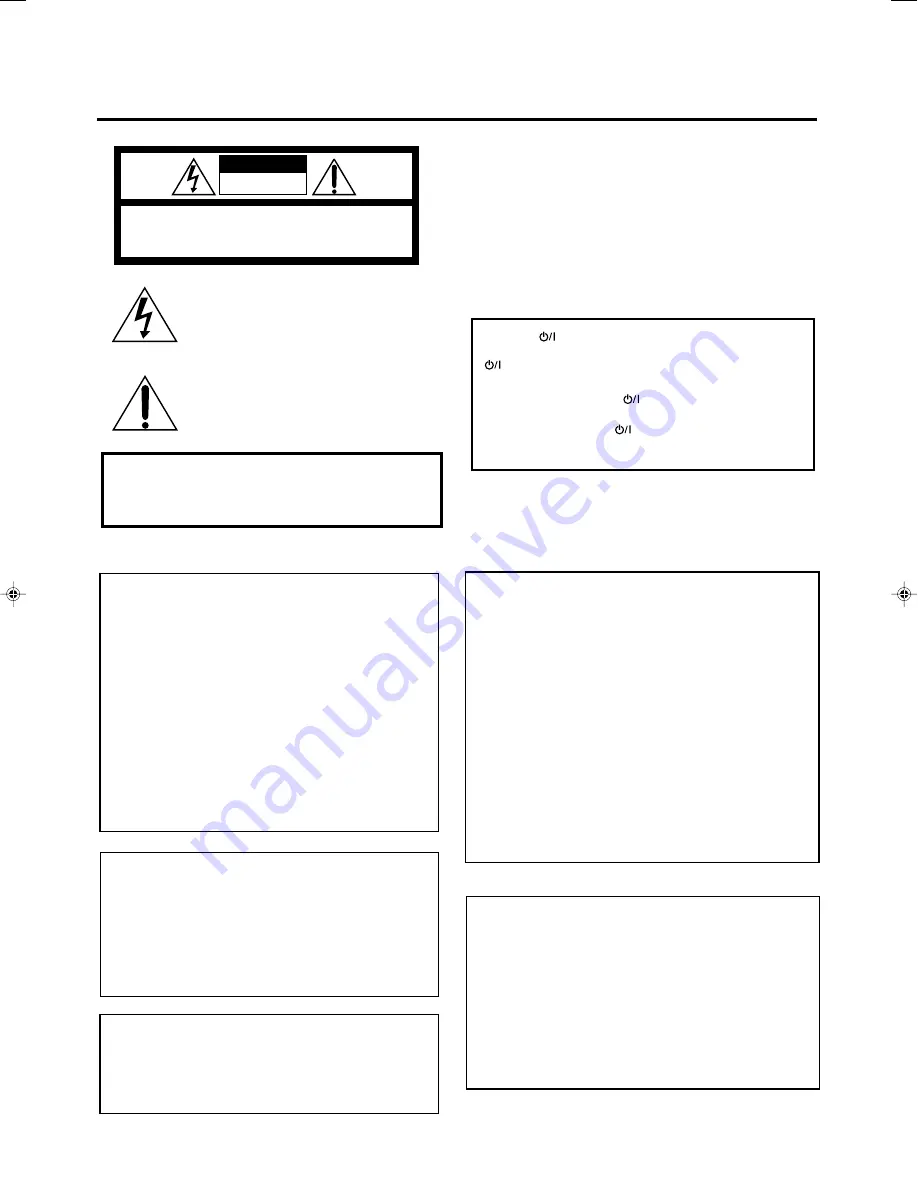
CAUTION

To reduce the risk of electrical shocks, fire, etc.:

1.

Do not remove screws, covers or cabinet.

2.

Do not expose this appliance to rain or moisture.

ATTENTION

Afin d’éviter tout risque d’électrocution, d’incendie, etc.:

1.

Ne pas enlever les vis ni les panneaux et ne pas ouvrir le
coffret de l’appareil.

2.

Ne pas exposer l’appareil à la pluie ni à l’humidité.

Warnings, Cautions and Others/
Mises en garde, précautions et indications diverses

Caution––

 STANDBY/ON button!

Disconnect the mains plug to shut the power off completely. The

 STANDBY/ON button in any position does not disconnect

the mains line. The power can be remote controlled.

Attention––Commutateur 

 STANDBY/ON!

Déconnecter la fiche de secteur pour couper complètement le

courant. Le commutateur 

 STANDBY/ON ne coupe jamais

complètement la ligne de secteur, quelle que soit sa position.  Le
courant peut être télécommandé.

Note to CATV system installer:

This reminder is provided to call the CATV system installer’s
attention to Section 820-40 of the NEC which provides guide-
lines for proper grounding and, in particular, specifies that the
cable ground shall be connected to the grounding system of the
building, as close to the point of cable entry as practical.

For Canada/pour Le Canada

THIS DIGITAL APPARATUS DOES NOT EXCEED THE CLASS B
LIMITS FOR RADIO NOISE EMISSIONS FROM DIGITAL
APPARATUS AS SET OUT IN THE INTERFERENCE-CAUSING
EQUIPMENT STANDARD ENTITLED “DIGITAL APPARATUS,”
ICES-003 OF THE DEPARTMENT OF COMMUNICATIONS.
CET APPAREIL NUMERIQUE RESPECTE LES LIMITES DE
BRUITS RADIOELECTRIQUES APPLICABLES AUX APPAREILS
NUMERIQUES DE CLASSE B PRESCRITES DANS LA NORME
SUR LE MATERIEL BROUILLEUR; “APPAREILS
NUMERIQUES”, NMB-003 EDICTEE PAR LE MINISTRE DES
COMMUNICATIONS.

  CAUTION:         TO REDUCE THE RISK OF ELECTRIC SHOCK.
                         DO NOT REMOVE COVER (OR BACK)
                      NO USER SERVICEABLE PARTS INSIDE.
  REFER SERVICING TO QUALIFIED SERVICE PERSONNEL.

RISK OF ELECTRIC SHOCK

DO NOT OPEN

The lightning flash with arrowhead symbol, 
within an equilateral triangle is intended to 
alert the user to the presence of uninsulated 
"dangerous voltage" within the product's 
enclosure that may be of sufficient 
magnitude to constitute a risk of electric 
shock to persons.

The exclamation point within an equilateral 
triangle is intended to alert the user to the 
presence of important operating and 
maintenance (servicing) instructions in the 
literature accompanying the appliance.

CAUTION

WARNING: TO REDUCE THE RISK OF FIRE 
OR ELECTRIC SHOCK, DO NOT EXPOSE 
THIS APPLIANCE TO RAIN OR MOISTURE.

For the main unit / Pour l’appareil principal

CAUTION: 

TO PREVENT ELECTRIC SHOCK, MATCH WIDE 

BLADE OF PLUG TO WIDE SLOT, FULLY INSERT

ATTENTION: 

POUR EVITER LES CHOCS ELECTRIQUES, 

INTRODUIRE LA LAME LA PLUS LARGE DE LA FICHE DANS LA 
BORNE CORRESPONDANTE DE LA PRISE ET POUSSER 
JUSQUAU  FOND

For U.S.A.

This equipment has been tested and found to comply with the 
limits for a Class B digital device, pursuant to part 15 of the FCC 
Rules.  These limits are designed to provide reasonable 
protection against harmful interference in a residential 
installation.
This equipment generates, uses and can radiate radio 
frequency energy and, if not installed and used in accordance 
with the instructions, may cause harmful interference to radio 
communications. However, there is no guarantee that 
interference will not occur in a particular installation. If this 
equipment does cause harmful interference to radio or 
television reception, which can be determined by turning the 
equipment off and on, the user is encouraged to try to correct 
the interference by one or more of the following measures:
Reorient or relocate the receiving antenna.
Increase the separation between the equipment and receiver.
Connect the equipment into an outlet on a circuit different from 
that to which the receiver is connected.

For the remote control:

This device complies with Part 15 of the FCC Rules. Operation 
is subject to the following two conditions: (1) This device may 
not cause harmful interference, and (2) this device must accept 
any interference received, including interference that may 
cause undesired operation.

Changes or modifications not expressly approved by the 
manufacturer for compliance could void the user’s authority to 
operate the equipment.

For the remote control / Pour la télécommande

This device complies with RSS-210 of Industry Canada Rules. 
Operation is subject to the following two conditions: (1) This 
device may not cause interference, and (2) this device must 
accept any interference, including interference that may cause 
undesired operation of the divice.

Cet appareil est conforme au règlement CNR-210 de l’industrie 
du Canada. L’utilisation de ce dispositif est autorisée seulement 
aux conditions suivantes: (1) il ne doit pas produire de brouillage 
et (2) l’utilisateur du dispositif doit être prêt à accepter tout 
brouillage radioélectrique reçu, même si ce brouillage est 
susceptible de compromettre le fonctionnement du dispositif.

Safety_8040[J]_D.p65

04.4.21, 11:51

1

Summary of Contents for RX-8040B

Page 1: ...low the Model No and Serial No which are located either on the rear bottom or side of the cabinet Retain this information for future reference Model No Serial No LVT1198 001A J RX 8040B AUDIO VIDEO CONTROL RECEIVER INSTRUCTIONS ...

Page 2: ...iterature accompanying the appliance CAUTION WARNING TO REDUCE THE RISK OF FIRE OR ELECTRIC SHOCK DO NOT EXPOSE THIS APPLIANCE TO RAIN OR MOISTURE For the main unit Pour l appareil principal CAUTION TO PREVENT ELECTRIC SHOCK MATCH WIDE BLADE OF PLUG TO WIDE SLOT FULLY INSERT ATTENTION POUR EVITER LES CHOCS ELECTRIQUES INTRODUIRE LA LAME LA PLUS LARGE DE LA FICHE DANS LA BORNE CORRESPONDANTE DE LA ...

Page 3: ...all outlet always pull the plug not the AC power cord Do not handle the AC power cord with wet hands If you are not going to operate the receiver for an extended period of time unplug the AC power cord from the wall outlet Multi room operations Do not use the remote control outdoors or install the speakers outdoors When operating the receiver from a place where you cannot see the receiver for exam...

Page 4: ...Preset Tuning 31 Selecting the FM Reception Mode 31 Basic Settings 32 Quick Speaker Setup 32 Basic Setting Items 33 Basic Procedure 34 Setting the speakers 34 Setting the speaker distance 35 Setting the bass sounds 35 Selecting the main or sub channel 36 Setting the digital input terminals 37 Setting the component video input 38 Setting the Zone 2 Speakers 2 38 Memorizing the volume level for each...

Page 5: ...utton 24 56 h VOLUME buttons 17 18 21 24 28 29 56 j MUTING button 24 29 56 Remote s display window 1 ZONE 1 indicator Lights up when you press a button on the remote control with the ZONE 1 ZONE 2 selector set to ZONE 1 This remote control can be used only for Zone 1 operations 2 ZONE 2 indicator Lights up when you press a button on the remote control with the ZONE 1 ZONE 2 selector set to ZONE 2 ...

Page 6: ...UT DIGITAL FM AM TUNING FM AM PRESET FM MODE MEMORY TUNER CONTROL 5 7 3 8 9 p q w e a s d f g h t y u i o TV SOUND DBS VIDEO VCR 2 VCR 1 DVD DVD MULTI AM FM TAPE MD CDR CD PHONO S VIDEO DIGITAL VIDEO L AUDIO R VIDEO 4 6 r D EQ INPUT ATT SLEEP VOLUME ONETOUCH OPERATION 3D PHONIC NEO 6 VIRTUAL SB MIDNIGHT MODE AUTO MUTING TUNED STEREO LINEAR PCM DIGITAL L SUBWFR LS RS C R S LFE DUAL DIGITAL AUTO ANA...

Page 7: ... s INPUT ANALOG button 22 INPUT ATT button 23 d MIDNIGHT MODE button 23 f INPUT DIGITAL button 22 g TUNER CONTROL buttons FM AM TUNING 5 buttons 30 FM AM PRESET 5 buttons 31 FM MODE button 31 MEMORY button 31 h VIDEO input jacks 11 DIGITAL optical terminal S VIDEO jack VIDEO jack AUDIO L R jacks Display 1 DUAL indicator 43 2 ANALOG indicator 22 3 DIGITAL AUTO indicator 22 4 96 24 indicator 43 5 MU...

Page 8: ...ENNA IR OUT 8 9 i 7 1 DIGITAL IN terminals 14 Coaxial DIGITAL 1 DVD Optical DIGITAL 2 CD DIGITAL 3 TV DIGITAL 4 CDR 2 AUDIO input output jacks 10 13 50 Input DVD IN TV SOUND DBS IN VCR 1 IN PLAY VCR 2 IN PLAY CD IN TAPE MD IN PLAY CDR IN PLAY PHONO IN Output VCR 1 OUT REC VCR 2 OUT REC TAPE MD OUT REC CDR OUT REC 3 S VIDEO and VIDEO composite input output jacks 12 13 50 Input DVD IN TV SOUND DBS I...

Page 9: ...the supplied FM antenna as temporary measure to the FM 75 Ω COAXIAL terminal A If reception is poor connect the outdoor FM antenna not supplied B 1 Disconnect the supplied FM antenna 2 Connect a 75 Ω coaxial cable with the standard type connector B A Extend the supplied FM antenna horizontally FM 75 COAXIAL AM EXT AM LOOP ANTENNA 2 3 1 AM antenna connections Assemble the supplied AM loop antenna a...

Page 10: ...t for a subwoofer connect the and terminals on the rear panel to the and terminals marked on the speakers 2 3 4 1 FRONT 1 SPEAKERS RIG HT LEFT FRONT 1 SPEAKERS RIG HT LEFT FRONT 1 SPEAKERS RIG HT LEFT 2 SPEAKERS CENTER SPEAKER SURROUND SPEAKERS 8 16 CAUTION SPEAKER IMPEDANCE SURROUNDBACKSPEAKERS FRONT1 SPEAKERS RIGHT LEFT RIGHT LEFT RIGHT LEFT CAUTION SPEAKER IMPEDANCE 1 SPEAKER See Instruction Ma...

Page 11: ...aces it may be difficult to fulfil this requirement this receiver can adjust the delay time so that the sounds through all the speakers reach the listener with the same timing See page 35 When only one speaker is connected for the surround back speaker Zone 1 speaker layout Ideal speaker layout varies depending on the conditions of your listening room The diagram below is a recommended typical exa...

Page 12: ...system CAUTION If you connect a sound enhancing device such as a graphic equalizer between the source components and this receiver the sound output through this receiver may be distorted Turntable If a ground cable is provided for your turntable connect the cable to the screw marked H on the rear panel Note This connection is for the turntable with an MM moving magnet type cartridge Any turntables...

Page 13: ... video component are connected to the receiver through the video jacks of different type you cannot record the picture In addition if the TV and a playing video component are connected to the receiver through the video jacks of different type you cannot view the playback picture on the TV Video camera The VIDEO input jacks on the front panel inside the front door are convenient when connecting and...

Page 14: ... jacks TV SOUND DBS IN DO NOT connect the TV s video output to these video input jacks Connect the TV to appropriate MONITOR OUT jacks to view the playback picture from any other connected video components DBS IN VCR1 TV SOUND DBS IN A B C D R L DBS VCR s You can connect two VCRs one to the VCR 1 jacks and the other to the VCR 2 jacks If your VCR has an AV COMPU LINK jack connect it to the VCR 1 j...

Page 15: ...roduction jacks This connection is the best connection method for enjoying DVD Audio sounds When a DVD Audio disc is played back the original high quality sounds can be reproduced only using this connection Å To component video output ı To subwoofer output Ç To center channel audio output Î To S video output To composite video output Ï To left right front channel audio output Ì To left right surro...

Page 16: ...t supplied When the component has a digital coaxial output terminal connect it to the DIGITAL 1 DVD terminal using a digital coaxial cable not supplied Digital output terminal You can connect any digital components which have an optical digital input terminal Note The digital signal format transmitted through the DIGITAL OUT terminal is the same as that of the input signal This means that when the...

Page 17: ...e Tape or Horizontally 60 Vertically 60 Signal emitting angle of the transmitter Target component s RF REMOTE ANTENNA IR OUT L e s s t h a n 3 m 1 0 f e e t At an angle of approx 60 30 30 15 45 Putting Batteries in the Remote Control Before using the remote control insert the two supplied batteries first 1 On the back of the remote control remove the battery cover 2 Insert the batteries Make sure ...

Page 18: ...0 for the Zone 1 source When the Surround DSP modes using the center surround and surround back speakers or when the DVD MULTI playback mode is activated for the Zone 1 source this connection DOES NOT allow you to use the Zone 2 speakers To use the Zone 2 front speakers connected to the FRONT2 ZONE2 SPEAKERS terminals See Setting the Zone 2 Speakers 2 Usage on page 38 and Activating the Zone 2 Fro...

Page 19: ...the remote control 1 Set ZONE 1 ZONE 2 selector to ZONE 1 Now the buttons on the remote control work for Zone 1 operations 2 Press AUDIO POWER ON The STANDBY lamp goes off on the front panel and the ZONE 1 indicator lights up on the unit s display For more details see Turning the Power On and Off Standby on page 19 3 Press one of the source selection buttons to select a source and starts playback ...

Page 20: ...djusting the Zone 2 Volume on page 28 On the remote control When operating the receiver using the remote control the unit s display always shows the Zone 1 source information though you are operating it for the Zone 2 source 1 Set ZONE 1 ZONE 2 selector to ZONE 2 Now the buttons on the remote control work for Zone 2 operations 2 Press AUDIO POWER ON The STANDBY lamp on the front panel goes off and...

Page 21: ...er the SPEAKERS 1 nor 2 indicator is lit see Activating the Zone 1 Front Speakers on page 21 To turn off the power into standby mode press AUDIO POWER STANDBY The STANDBY lamp lights up Notes A small amount of power is consumed in standby mode To turn the power off completely unplug the AC power cord If you have turned off the receiver with the volume level set at more than level 30 the volume lev...

Page 22: ... the speakers on page 34 The frames of L C R LS RS and SB light up when the corresponding speakers are set to LARGE or SMALL and when the speaker is required for the Surround DSP mode currently selected When SUB WOOFER is set to YES SUBWFR lights up see page 34 All three frames on the row of SB are not used at the same time When SBACK OUT is set to 2SPK the left and the right ones are used When it...

Page 23: ...e AM FM TAPE MD CDR CD PHONO DVD DVD MULTI CD CDR PHONO TAPE MD AM VCR 1 VCR 2 FM VIDEO TV DBS To use the speakers connected to the FRONT1 SPEAKERS terminals press SPEAKERS ON OFF 1 so that the SPEAKERS 1 indicator lights up on the display Make sure that the SPEAKERS 2 indicator is not lit To use the speakers connected to the FRONT2 ZONE2 SPEAKERS terminals press SPEAKERS ON OFF 2 ZONE 2 so that t...

Page 24: ...ting from NO to YES see page 34 subwoofer output is automatically activated Remote NOT 2 Press INPUT DIGITAL to select DGTL AUTO When using the remote control press ANALOG DIGITAL Each time you press the button the analog ANALOG and digital DGTL AUTO input modes alternate The DIGITAL AUTO indicator lights up on the display When selecting DGTL AUTO the following indicators show the digital signal f...

Page 25: ... level adjustments see page 40 and Surround and DSP modes see pages 42 to 49 You can only adjust the volume level and the subwoofer output level while Analog Direct is in use Once you have made an adjustment it is memorized for each analog source Press ANALOG DIRECT so that A DIRECT appears on the display The lamp on the button also lights up Each time you press the button Analog Direct turns on a...

Page 26: ... TV SOUND DBS IN jacks on the rear panel change the source name which will appear on the display When changing the source name from TV to DBS 1 Press TV SOUND DBS Make sure TV appears on the display 2 Press and hold TV SOUND DBS until ASSGN DBS appears on the display Note When connecting a DBS tuner to the TV SOUND DBS IN jacks change the source name to DBS which will appear on the display when se...

Page 27: ...input source through the receiver to a digital recording device connected to the DIGITAL OUT terminal Notes Analog to digital and digital to analog recordings are not possible The output volume level Midnight Mode see page 23 Bass Boost see page 24 Equalization patterns see page 40 Surround and DSP modes see pages 42 to 49 cannot affect the recording IMPORTANT While recording do not turn off the r...

Page 28: ...ay 2 Press ZONE 2 ON OFF to activate ZONE 2 The ZONE 2 indicator lights up When connecting the Zone 2 front speakers to the FRONT2 ZONE2 SPEAKERS terminals see also Setting the Zone 2 Speakers 2 usage on page 38 and Activating the Zone 2 Front Speakers on page 29 3 Press ZONE 2 CONTROL so that ZONE2 and the previously selected Zone 2 source name appear on the display Now the buttons and controls o...

Page 29: ...he front panel To stop Zone 2 operations and sounds from the Zone 2 speakers press ZONE 2 ON OFF so that the ZONE 2 indicator goes off from the display No sound will be heard in Zone 2 and the display changes to show the Zone 1 source To use this receiver for Zone 2 operations again 1 Press ZONE 2 ON OFF again so that the ZONE 2 indicator lights up on the display 2 Press ZONE 2 CONTROL so that ZON...

Page 30: ...ect the analog input as the Zone 2 source If analog connections have not been made no sound comes out of the Zone 2 speakers The Zone 2 volume level appears Selected source name Adjusting the Zone 2 Volume On the front panel To increase the volume turn MASTER VOLUME clockwise To decrease the volume turn it counterclockwise On the remote control To increase the volume press VOLUME To decrease the v...

Page 31: ...ne 1 Then the 3D PHONIC prcessing see page 43 is applied to the Surround DSP modes in Zone 1 the 3D PHONIC indicator lights up Muting the Zone 2 Sound Press MUTING to mute the sound through the Zone 2 front speakers The VOLUME level indicator goes off from the unit s display To restore the sound press MUTING again so that the VOLUME level indicator appears on the unit s display Turning MASTER VOLU...

Page 32: ... 1 will be interrupted IMPORTANT Check the following before or while using the buttons and controls For Zone 1 operations The ZONE 1 indicator lights up on the unit s display For Zone 2 operations The ZONE 2 indicator lights up on the unit s display When using the unit For Zone 1 operations ZONE2 is not shown in the unit s main display For Zone 2 operations ZONE2 is shown in the unit s main displa...

Page 33: ...ut stereo effect will be lost In this mode you will hear noise while tuning in to the stations The AUTO MUTING indicator and the STEREO indicator goes off from the display Note When you use the FM MODE on the remote control be sure that it is activated for the tuner not for the DVD and others Using Preset Tuning Once a station is assigned to a channel number the station can be quickly tuned in You...

Page 34: ... changes as follows For the details of speaker channel number see Speakers channels number and the size on page 33 6 0CH is the initial setting LINEAR PCM L R ANALOG LINEAR PCM L R ANALOG VOLUME SPEAKERS 1 VOLUME SPEAKERS 1 ZONE 1 ZONE 1 Remote NOT 3 Press in MULTI JOG PUSH SET ROOM SIZE appears on the display then the initial room size setting appears 4 Turn MULTI JOG to select an appropriate roo...

Page 35: ...age SUB WOOFER Register your subwoofer 34 FRONT SPEAKER Register your front speaker size 34 CNTR SPEAKER Register your center speaker size 34 SURR SPEAKER Register your surround speaker size 34 SBACK SPEAKER Register your surround back speaker size 34 SBACK OUT Register the number of the connected surround back speakers 34 DIST UNIT Select the measuring unit for the speaker distance 35 FRNTL DISTA...

Page 36: ... the center surround and surround back speakers If you have selected SMALL for the surround speakers you cannot select LARGE for the surround back speakers If you have selected NONE for the surround speakers the surround back speakers are fixed to NONE 7 Surround back speakers quantity SBACK OUT Select the number of the surround back speakers connected SBACK OUT 1SPK Select to use 1 surround back ...

Page 37: ... selected NONE see page 34 This setting is not valid for the DVD MULTI playback mode Ex In the above case set the speaker distance as follows Front speakers L R 3 0 m 10 ft Center speaker C 3 0 m 10 ft Surround speakers LS RS 2 7 m 9 ft Surround back speakers SB 2 4 m 8 ft Setting the bass sounds You can adjust subwoofer and bass sounds precisely according to your preference 7 Subwoofer output S W...

Page 38: ...nction takes effect only when the LFE signals come in Select one of the following LFE ATT 0dB Normally select this LFE ATT 10dB Select when the bass sound is distorted Selecting the main or sub channel You can select the playback sound channel you want while playing digital software recorded or broadcast in the Dual Mono mode see page 43 which includes two monaural channels separately 7 Dual Mono ...

Page 39: ...R 2 3 TV or DBS 1 4 CDR back to the beginning When DIGITAL 1 DGTL IN COAX is set to TV or DBS 1 2 CD 3 DVD 4 CDR 2 CD 3 DVD 4 MD 2 CD 3 DVD 4 VCR 2 2 CD 3 MD 4 CDR 2 CD 3 MD 4 VCR 2 2 CD 3 VCR 2 4 CDR 2 MD 3 DVD 4 CDR 2 MD 3 DVD 4 VCR 2 2 MD 3 VCR 2 4 CDR 2 VCR 2 3 DVD 4 CDR back to the beginning When DIGITAL 1 DGTL IN COAX is set to CDR 2 CD 3 TV or DBS 1 4 DVD 2 CD 3 TV or DBS 1 4 MD 2 CD 3 TV o...

Page 40: ...NE TOUCH OPERATION indicator goes off from the display Note If you have turned off the receiver with the volume level set at more than level 30 the volume level will be automatically set at level 30 next time you turn on the receiver Setting the component video input When you use the component video inputs for connecting the DVD player and or DBS tuner or VCR register the type of input jacks If yo...

Page 41: ...VENESS 1 Select the liveness level for your virtual listening room 41 CTR TONE 2 Make the center tone soft or sharp 41 PNRM CNTRL 3 Add wraparound sound effect with side wall image 41 CNTR WIDTH 2 3 Adjust the center channel localization between the center speaker and the left right front speakers 41 DIMENSION 3 Adjust sound localization position 41 CNTR GAIN 2 4 Adjust sound localization of the c...

Page 42: ...speaker output level SURR R LVL Select to adjust the right surround speaker output level SBACK LVL Select to adjust the surround back speaker output level Notes If you have selected NO or NONE for a speaker see page 34 the output level for the corresponding speaker is not adjustable Speaker output levels except the subwoofer output level are not adjustable when Analog Direct is in use But when you...

Page 43: ...urround and DSP sound parameters to your preference For Surround and DSP modes see pages 42 to 49 7 Adjustable parameters You can adjust the following parameters For Surround and DSP modes when the center speaker is connected This setting is common to all Surround modes and is memorized separately for DSP modes CTR TONE Adjust the center tone As the number increases the dialogue becomes clearer so...

Page 44: ... method used for Dolby Pro Logic IIx makes no limitation for the cutoff frequency of the surround treble This receiver provides two types of Dolby Pro Logic IIx modes Pro Logic IIx Movie PLIIx MOVIE and Pro Logic IIx Music PLIIx MUSIC When Dolby Pro Logic IIx is activated PLIIx MOVIE or PLIIx MUSIC appear and the indicator lights up on the display PLIIx MOVIE Suitable for playing any Dolby Surroun...

Page 45: ...n DTS signal is detected through the digital input the indicator lights up on the display DTS Extended Surround DTS ES DTS ES is another multi channel digital encoding format It greatly improves the 360 degree surround impression and space expression by adding the third surround channel surround back channel DTS ES includes two signal formats with different surround signal recording methods DTS ES...

Page 46: ...ANALOG VOLUME PRO LOGIC SPEAKERS 1 CINEMA NEO 6CINMA NEO 6MUSIC PLIIx MOVIE PLIIx MUSIC PRO LOGIC ZONE 1 LINEAR PCM DIGITAL L SUBWFR DUAL DIGITAL AUTO VOLUME SPEAKERS 1 ZONE 1 2 Press SURROUND to activate the Surround mode For multi channel digital software incoming signals are automatically detected and the appropriate Surround mode is activated see pages 46 and 47 for details Surround mode autom...

Page 47: ...ly 6 1 channel reproduction to both 5 1 channel and 6 1 channel encoded software PLIIx MOVIE 1 2 Select to apply PLIIx MOVIE 6 1 channel reproduction to both 5 1 channel and 6 1 channel encoded software PLIIx MUSIC 1 Select to apply PLIIx MUSIC 6 1 channel reproduction to both 5 1 channel and 6 1 channel encoded software EX ES OFF 3 Select to cancel the EX ES PLIIx 6 1 channel reproduction 1 When ...

Page 48: ...NEO 6MUSIC NONE Not effective PLII MOVIE PLII MUSIC PRO LOGIC NEO 6CINMA NEO 6MUSIC DVD MULTI Deactivated 5 Not effective Not effective None Incoming Signal Type Zone 2 Speakers Surround Back Channel EX ES PLIIx Available Surround Mode Setting Setting Dolby Digital EX Activated Not effective Not effective DOLBY D 3D PHONIC 2 Deactivated 2SPK 1SPK AUTO ON PLIIx MOVIE DOLBY D EX 1 3 PLIIx MUSIC DD P...

Page 49: ...UAL MONO 6 DTS 96 24 processing is not applied If you want to apply the processing set the EX ES PLIIx setting to OFF 2 When the Zone 2 speakers are activated the 3D PHONIC processing is applied to reproduce Dolby Digital or DTS software the 3D PHONIC indicator also lights up 3 When using PLIIx Movie to reproduce Dolby Digital or DTS software this receiver applies Dolby Digital EX DOLBY D EX or DT...

Page 50: ...UB Reproduces the spatial feeling of a live music club with a low ceiling DANCE CLUB Reproduces the spatial feeling of a rocking dance club PAVILION Reproduces the spatial feeling of an exhibition hall with a high ceiling THEATER 1 Reproduces the spatial feeling of a large theater where the seating capacity is about 600 THEATER 2 Reproduces the spatial feeling of a small theater where the seating ...

Page 51: ...annot select MONO FILM Note When the Zone 2 speakers are activated or the surround speakers are set to NONE the 3D PHONIC processing is applied to the DSP modes the 3D PHONIC indicator also lights up To adjust the effect level except All Channel Stereo see page 41 To cancel the DSP modes Press SURROUND DSP OFF or SURR DSP OFF on the remote control Sound reproduced from normal stereo Sound reproduc...

Page 52: ... To composite video output Ï To left right front channel audio output Ì To left right surround channel audio output Note When connecting a DVD player to the component video input jacks make the component video input setting VIDEO IN DVD correctly See page 38 for details DVD player SURR DVD VIDEO RIGHT LEFT S VIDEO VIDEO AUDIO SUBWOOFER CENTER DVD IN FRONT DVD IN R L R L A B C D E F G COMPONENT VID...

Page 53: ...iver automatically turns on and changes the Zone 1 source to the component If the receiver is already turned on with the ZONE 2 indicator lights up and the source name for Zone 2 appears on the unit s display the receiver changes the Zone 2 source to the component When you press PLAY on the remote control supplied for this receiver the receiver automatically turns on and changes the Zone 1 source ...

Page 54: ...f the Zone 2 sound by pressing ZONE 2 ON OFF the selected Zone 2 source component turns off unless the same component is selected as the Zone 1 source If the ZONE 1 indicator is lit the Zone 2 source will stop playing but will not turn off Synchronized Recording Only for Zone 1 Operations This operation is only possible when the receiver is ready for Zone 1 operations Synchronized recording means ...

Page 55: ...lugs See pages 12 and 13 5 Connect the video input output jacks on the VCR 1 DVD player TV and this receiver using the cables with RCA pin plugs S video plugs or component video plugs See CONNECTIONS 3 on the next page and pages 12 and 13 for details 6 Plug the AC power cords of the components and this receiver into the AC outlets 7 When turning on the TV for the first time after the AV COMPU LINK...

Page 56: ...is receiver You can control the connected video components using this remote control Aim the remote control at the remote sensor s on the target video component s or on the receiver directly For details see page 58 Note To operate the video components from Zone 2 use the RF rod antenna and IR signal transmitter see pages 14 and 15 CONNECTIONS 3 Video Cable Connection This receiver is equipped with...

Page 57: ...X jack using a component video cable In this case reconnect the TV referring to CASE 1 or CASE 2 on page 54 Automatic Power On Off Standby The TV for Zone 1 only VCR 1 VCR connected to the VCR 1 jacks and DVD player turn on and off along with the receiver Automatic Power On When you turn on the receiver by pressing STANDBY ON on the unit or AUDIO POWER ON on the remote control with ZONE 1 ZONE 2 s...

Page 58: ...ed for operating your target source When you press the FRONT L FRONT R CENTER SUBWFR SURR L SURR R or SURR BK button the corresponding speaker name appears on the remote s display IMPORTANT To operate JVC s audio components using this remote control You need to connect JVC s audio components through the COMPU LINK SYNCHRO jacks see page 51 in addition to the connections using cables with RCA pin p...

Page 59: ...form the following operations on the turntable PLAY Start playing STOP Stop operations CD recorder After pressing CDR or selecting CDR by pressing CONTROL repeatedly you can perform the following operations on the CD recorder PLAY Start playing 4 Return to the beginning of the current or previous track Skip to the beginning of the next track STOP Stop playing and recording PAUSE Pause playing or r...

Page 60: ...ng and recording or rewind or fast forward the tape PAUSE Pause playing or recording To resume press PLAY REC Press this button together with PLAY to start recording only for Zone 1 operations Press this button together with PAUSE to enter recording pause only for Zone 1 operations CHANNEL Change the TV channels on the VCR 1 9 10 RETURN 0 100 10 Select the TV channels on the VCR The 10 RETURN butt...

Page 61: ...e TVs If you cannot change the channels of some TVs by pressing number buttons press the CHANNEL buttons IMPORTANT To operate the other component s using the RF signals emitted from this remote control the IR signal transmitter and the RF rod antenna must be connected to this receiver Place the IR signal transmitter so that it is aimed at the remote sensor s on the target component s The RF signal...

Page 62: ...rs or DBS tuners by pressing number buttons press the CHANNEL buttons To change the transmittable signals for operating another manufacturer s VCR 1 Press and hold DVD POWER 2 Press VCR 1 3 Enter a manufacturer s code using buttons 1 9 and 0 See page 62 to find the code 4 Release DVD POWER 5 Try to operate your VCR 1 by pressing one of the below buttons When your VCR 1 have operated correctly you ...

Page 63: ...10 then 0 For track number 30 press 10 10 then 10 or press 10 10 10 then 0 Notes Refer to the manual supplied for the DVD player Some buttons listed above may not be used for some DVD players ENTER TOP MENU MENU DVD DVD RETURN ENTER TOP MENU MENU STOP PAUSE FF REW PLAY 1 2 3 4 5 6 7 P 8 9 10 10 0 POWER To change the transmittable signals for operating another manufacturer s CD player 1 Press and h...

Page 64: ...4 25 Tocom 26 Zenith 27 28 General Instrument 29 Initial setting For VCR For DVD player For TV Manufacturer Codes JVC 00 14 74 Fisher 05 Sanyo 05 Hitachi 08 09 10 49 Magnavox 08 17 49 Mitsubishi 08 18 RCA PROSC 08 24 29 30 31 48 Samsung 08 34 49 Philips 17 Panasonic 24 26 76 Toshiba 37 43 Sharp 38 77 Sony 39 Zenith 45 46 Mets 50 51 52 53 Quelle 52 53 54 55 56 57 58 59 60 61 62 63 64 65 66 67 Manuf...

Page 65: ...in the other zone Zone 1 and Zone 2 operations are done at the same time The receiver is turned on with the Zone 1 and Zone 2 sounds deactivated Incoming signal is too weak The station is too far away An incorrect antenna is used Antennas are not connected properly Ignition noise from automobiles SOLUTION Press ZONE 1 ON OFF for Zone 1 operations Press ZONE 2 ON OFF and ZONE 2 CONTROL for Zone 2 o...

Page 66: ...e Surround mode DSP mode and equalization pattern DOLBY D EX ES DSCRT or ES MATRIX cannot be select as the Surround mode The display does not light up Noise is heard during record playing Howling during record playing NO SUBWFR appears on the display OVERLOAD starts flashing on the display No playback picture of the VCR 1 or DBS tuner can be viewed DVD MULTI is cannot be select as the source DSP N...

Page 67: ...E MD IN CDR IN CD IN 87 dB 80 dB PHONO IN MM 70 dB 78 dB at OUT REC Frequency Response 8 Ω DVD IN VCR 1 IN VCR 2 IN TV SOUND DBS IN VIDEO 20 Hz to 100 kHz 1 dB 3 dB TAPE MD IN CDR IN CD IN 20 Hz to 100 kHz 1 dB 3 dB PHONO IN MM 20 Hz to 20 kHz 1 dB RIAA Phono Equalization 1 0 dB 20 Hz to 20 kHz Bass Boost 6 dB 1 0 dB at 100 Hz Equalization 63 Hz 250 Hz 1 kHz 4 kHz 16 kHz 8 dB in 2 dB steps Video V...

Page 68: ...cleaning 4 Damage that occurs in shipment due to act of God and cosmetic damage 5 Signal reception problems and failures due to line power surge 6 Video Pick up Tubes CCD Image Sensor Cartridge Stylus Needle are covered for 90 days from the date of purchase 7 Batteries except that Rechargeable Batteries are covered for 90 days from the date of purchase There are no express warranties except as lis...

Page 69: ...rized servicer or visit our website at www JVC com Remember to retain your Bill of Sale for Warranty Service Do not service the television yourself Caution To prevent electrical shock do not open the cabinet There are no user serviceable parts inside Please refer to qualified service personnel for repairs Accessories To purchase accessories for your JVC product please call toll free 1 800 882 2345...

Page 70: ...EN 0404MWMMDWJEIN 2004 VICTOR COMPANY OF JAPAN LIMITED VICTOR COMPANY OF JAPAN LIMITED RX 8040B AUDIO VIDEO CONTROL RECEIVER ...

Page 71: ...LVT1198 002A C RX 8040B AUDIO VIDEO CONTROL RECEIVER RECEPTEUR DE COMMANDE AUDIO VIDEO INSTRUCTIONS MANUEL D INSTRUCTIONS English Français ...

Page 72: ...iterature accompanying the appliance CAUTION WARNING TO REDUCE THE RISK OF FIRE OR ELECTRIC SHOCK DO NOT EXPOSE THIS APPLIANCE TO RAIN OR MOISTURE For the main unit Pour l appareil principal CAUTION TO PREVENT ELECTRIC SHOCK MATCH WIDE BLADE OF PLUG TO WIDE SLOT FULLY INSERT ATTENTION POUR EVITER LES CHOCS ELECTRIQUES INTRODUIRE LA LAME LA PLUS LARGE DE LA FICHE DANS LA BORNE CORRESPONDANTE DE LA ...

Page 73: ... from the wall outlet always pull the plug not the AC power cord Do not handle the AC power cord with wet hands If you are not going to operate the receiver for an extended period of time unplug the AC power cord from the wall outlet Multi room operations Do not use the remote control outdoors or install the speakers outdoors When operating the receiver from a place where you cannot see the receiv...

Page 74: ...ing Preset Tuning 31 Selecting the FM Reception Mode 31 Basic Settings 32 Quick Speaker Setup 32 Basic Setting Items 33 Basic Procedure 34 Setting the speakers 34 Setting the speaker distance 35 Setting the bass sounds 35 Selecting the main or sub channel 36 Setting the digital input terminals 37 Setting the component video input 38 Setting the Zone 2 Speakers 2 38 Memorizing the volume level for ...

Page 75: ...ER button 24 56 h VOLUME buttons 17 18 21 24 28 29 56 j MUTING button 24 29 56 Remote s display window 1 ZONE 1 indicator Lights up when you press a button on the remote control with the ZONE 1 ZONE 2 selector set to ZONE 1 This remote control can be used only for Zone 1 operations 2 ZONE 2 indicator Lights up when you press a button on the remote control with the ZONE 1 ZONE 2 selector set to ZON...

Page 76: ... INPUT DIGITAL FM AM TUNING FM AM PRESET FM MODE MEMORY TUNER CONTROL 5 7 3 8 9 p q w e a s d f g h t y u i o TV SOUND DBS VIDEO VCR 2 VCR 1 DVD DVD MULTI AM FM TAPE MD CDR CD PHONO S VIDEO DIGITAL VIDEO L AUDIO R VIDEO 4 6 r D EQ INPUT ATT SLEEP VOLUME ONETOUCH OPERATION 3D PHONIC NEO 6 VIRTUAL SB MIDNIGHT MODE AUTO MUTING TUNED STEREO LINEAR PCM DIGITAL L SUBWFR LS RS C R S LFE DUAL DIGITAL AUTO...

Page 77: ...n 45 s INPUT ANALOG button 22 INPUT ATT button 23 d MIDNIGHT MODE button 23 f INPUT DIGITAL button 22 g TUNER CONTROL buttons FM AM TUNING 5 buttons 30 FM AM PRESET 5 buttons 31 FM MODE button 31 MEMORY button 31 h VIDEO input jacks 11 DIGITAL optical terminal S VIDEO jack VIDEO jack AUDIO L R jacks Display 1 DUAL indicator 43 2 ANALOG indicator 22 3 DIGITAL AUTO indicator 22 4 96 24 indicator 43 ...

Page 78: ... ANTENNA IR OUT 8 9 i 7 1 DIGITAL IN terminals 14 Coaxial DIGITAL 1 DVD Optical DIGITAL 2 CD DIGITAL 3 TV DIGITAL 4 CDR 2 AUDIO input output jacks 10 13 50 Input DVD IN TV SOUND DBS IN VCR 1 IN PLAY VCR 2 IN PLAY CD IN TAPE MD IN PLAY CDR IN PLAY PHONO IN Output VCR 1 OUT REC VCR 2 OUT REC TAPE MD OUT REC CDR OUT REC 3 S VIDEO and VIDEO composite input output jacks 12 13 50 Input DVD IN TV SOUND D...

Page 79: ...ect the supplied FM antenna as temporary measure to the FM 75 Ω COAXIAL terminal A If reception is poor connect the outdoor FM antenna not supplied B 1 Disconnect the supplied FM antenna 2 Connect a 75 Ω coaxial cable with the standard type connector B A Extend the supplied FM antenna horizontally FM 75 COAXIAL AM EXT AM LOOP ANTENNA 2 3 1 AM antenna connections Assemble the supplied AM loop anten...

Page 80: ...xcept for a subwoofer connect the and terminals on the rear panel to the and terminals marked on the speakers 2 3 4 1 FRONT 1 SPEAKERS RIG HT LEFT FRONT 1 SPEAKERS RIG HT LEFT FRONT 1 SPEAKERS RIG HT LEFT 2 SPEAKERS CENTER SPEAKER SURROUND SPEAKERS 8 16 CAUTION SPEAKER IMPEDANCE SURROUNDBACKSPEAKERS FRONT1 SPEAKERS RIGHT LEFT RIGHT LEFT RIGHT LEFT CAUTION SPEAKER IMPEDANCE 1 SPEAKER See Instructio...

Page 81: ...s it may be difficult to fulfil this requirement this receiver can adjust the delay time so that the sounds through all the speakers reach the listener with the same timing See page 35 When only one speaker is connected for the surround back speaker Zone 1 speaker layout Ideal speaker layout varies depending on the conditions of your listening room The diagram below is a recommended typical exampl...

Page 82: ...rol system CAUTION If you connect a sound enhancing device such as a graphic equalizer between the source components and this receiver the sound output through this receiver may be distorted Turntable If a ground cable is provided for your turntable connect the cable to the screw marked H on the rear panel Note This connection is for the turntable with an MM moving magnet type cartridge Any turnta...

Page 83: ...ying video component are connected to the receiver through the video jacks of different type you cannot record the picture In addition if the TV and a playing video component are connected to the receiver through the video jacks of different type you cannot view the playback picture on the TV Video camera The VIDEO input jacks on the front panel inside the front door are convenient when connecting...

Page 84: ...UDIO jacks TV SOUND DBS IN DO NOT connect the TV s video output to these video input jacks Connect the TV to appropriate MONITOR OUT jacks to view the playback picture from any other connected video components DBS IN VCR1 TV SOUND DBS IN A B C D R L DBS VCR s You can connect two VCRs one to the VCR 1 jacks and the other to the VCR 2 jacks If your VCR has an AV COMPU LINK jack connect it to the VCR...

Page 85: ... reproduction jacks This connection is the best connection method for enjoying DVD Audio sounds When a DVD Audio disc is played back the original high quality sounds can be reproduced only using this connection Å To component video output ı To subwoofer output Ç To center channel audio output Î To S video output To composite video output Ï To left right front channel audio output Ì To left right s...

Page 86: ...cable not supplied When the component has a digital coaxial output terminal connect it to the DIGITAL 1 DVD terminal using a digital coaxial cable not supplied Digital output terminal You can connect any digital components which have an optical digital input terminal Note The digital signal format transmitted through the DIGITAL OUT terminal is the same as that of the input signal This means that ...

Page 87: ... sided Adhesive Tape or Horizontally 60 Vertically 60 Signal emitting angle of the transmitter Target component s RF REMOTE ANTENNA IR OUT L e s s t h a n 3 m At an angle of approx 60 30 30 15 45 Putting Batteries in the Remote Control Before using the remote control insert the two supplied batteries first 1 On the back of the remote control remove the battery cover 2 Insert the batteries Make sur...

Page 88: ... page 50 for the Zone 1 source When the Surround DSP modes using the center surround and surround back speakers or when the DVD MULTI playback mode is activated for the Zone 1 source this connection DOES NOT allow you to use the Zone 2 speakers To use the Zone 2 front speakers connected to the FRONT2 ZONE2 SPEAKERS terminals See Setting the Zone 2 Speakers 2 on page 38 and Activating the Zone 2 Fr...

Page 89: ... On the remote control 1 Set ZONE 1 ZONE 2 selector to ZONE 1 Now the buttons on the remote control work for Zone 1 operations 2 Press AUDIO POWER ON The STANDBY lamp goes off on the front panel and the ZONE 1 indicator lights up on the unit s display For more details see Turning the Power On and Off Standby on page 19 3 Press one of the source selection buttons to select a source and starts playb...

Page 90: ...ee Adjusting the Zone 2 Volume on page 28 On the remote control When operating the receiver using the remote control the unit s display always shows the Zone 1 source information though you are operating it for the Zone 2 source 1 Set ZONE 1 ZONE 2 selector to ZONE 2 Now the buttons on the remote control work for Zone 2 operations 2 Press AUDIO POWER ON The STANDBY lamp on the front panel goes off...

Page 91: ...either the SPEAKERS 1 nor 2 indicator is lit see Activating the Zone 1 Front Speakers on page 21 To turn off the power into standby mode press AUDIO POWER STANDBY The STANDBY lamp lights up Notes A small amount of power is consumed in standby mode To turn the power off completely unplug the AC power cord If you have turned off the receiver with the volume level set at more than level 30 the volume...

Page 92: ...ting the speakers on page 34 The frames of L C R LS RS and SB light up when the corresponding speakers are set to LARGE or SMALL and when the speaker is required for the Surround DSP mode currently selected When SUB WOOFER is set to YES SUBWFR lights up see page 34 All three frames on the row of SB are not used at the same time When SBACK OUT is set to 2SPK the left and the right ones are used Whe...

Page 93: ...te AM FM TAPE MD CDR CD PHONO DVD DVD MULTI CD CDR PHONO TAPE MD AM VCR 1 VCR 2 FM VIDEO TV DBS To use the speakers connected to the FRONT1 SPEAKERS terminals press SPEAKERS ON OFF 1 so that the SPEAKERS 1 indicator lights up on the display Make sure that the SPEAKERS 2 indicator is not lit To use the speakers connected to the FRONT2 ZONE2 SPEAKERS terminals press SPEAKERS ON OFF 2 ZONE 2 so that ...

Page 94: ... setting from NO to YES see page 34 subwoofer output is automatically activated Remote NOT 2 Press INPUT DIGITAL to select DGTL AUTO When using the remote control press ANALOG DIGITAL Each time you press the button the analog ANALOG and digital DGTL AUTO input modes alternate The DIGITAL AUTO indicator lights up on the display When selecting DGTL AUTO the following indicators show the digital sign...

Page 95: ...tput level adjustments see page 40 and Surround and DSP modes see pages 42 to 49 You can only adjust the volume level and the subwoofer output level while Analog Direct is in use Once you have made an adjustment it is memorized for each analog source Press ANALOG DIRECT so that A DIRECT appears on the display The lamp on the button also lights up Each time you press the button Analog Direct turns ...

Page 96: ... the TV SOUND DBS IN jacks on the rear panel change the source name which will appear on the display When changing the source name from TV to DBS 1 Press TV SOUND DBS Make sure TV appears on the display 2 Press and hold TV SOUND DBS until ASSGN DBS appears on the display Note When connecting a DBS tuner to the TV SOUND DBS IN jacks change the source name to DBS which will appear on the display whe...

Page 97: ...tal input source through the receiver to a digital recording device connected to the DIGITAL OUT terminal Notes Analog to digital and digital to analog recordings are not possible The output volume level Midnight Mode see page 23 Bass Boost see page 24 Equalization patterns see page 40 Surround and DSP modes see pages 42 to 49 cannot affect the recording IMPORTANT While recording do not turn off t...

Page 98: ...isplay 2 Press ZONE 2 ON OFF to activate ZONE 2 The ZONE 2 indicator lights up When connecting the Zone 2 front speakers to the FRONT2 ZONE2 SPEAKERS terminals see also Setting the Zone 2 Speakers 2 usage on page 38 and Activating the Zone 2 Front Speakers on page 29 3 Press ZONE 2 CONTROL so that ZONE2 and the previously selected Zone 2 source name appear on the display Now the buttons and contro...

Page 99: ...On the front panel To stop Zone 2 operations and sounds from the Zone 2 speakers press ZONE 2 ON OFF so that the ZONE 2 indicator goes off from the display No sound will be heard in Zone 2 and the display changes to show the Zone 1 source To use this receiver for Zone 2 operations again 1 Press ZONE 2 ON OFF again so that the ZONE 2 indicator lights up on the display 2 Press ZONE 2 CONTROL so that...

Page 100: ... select the analog input as the Zone 2 source If analog connections have not been made no sound comes out of the Zone 2 speakers The Zone 2 volume level appears Selected source name Adjusting the Zone 2 Volume On the front panel To increase the volume turn MASTER VOLUME clockwise To decrease the volume turn it counterclockwise On the remote control To increase the volume press VOLUME To decrease t...

Page 101: ...n Zone 1 Then the 3D PHONIC prcessing see page 43 is applied to the Surround DSP modes in Zone 1 the 3D PHONIC indicator lights up Muting the Zone 2 Sound Press MUTING to mute the sound through the Zone 2 front speakers The VOLUME level indicator goes off from the unit s display To restore the sound press MUTING again so that the VOLUME level indicator appears on the unit s display Turning MASTER ...

Page 102: ...Zone 1 will be interrupted IMPORTANT Check the following before or while using the buttons and controls For Zone 1 operations The ZONE 1 indicator lights up on the unit s display For Zone 2 operations The ZONE 2 indicator lights up on the unit s display When using the unit For Zone 1 operations ZONE2 is not shown in the unit s main display For Zone 2 operations ZONE2 is shown in the unit s main di...

Page 103: ...on but stereo effect will be lost In this mode you will hear noise while tuning in to the stations The AUTO MUTING indicator and the STEREO indicator goes off from the display Note When you use the FM MODE on the remote control be sure that it is activated for the tuner not for the DVD and others Using Preset Tuning Once a station is assigned to a channel number the station can be quickly tuned in...

Page 104: ...mber changes as follows For the details of speaker channel number see Speakers channels number and the size on page 33 6 0CH is the initial setting LINEAR PCM L R ANALOG LINEAR PCM L R ANALOG VOLUME SPEAKERS 1 VOLUME SPEAKERS 1 ZONE 1 ZONE 1 Remote NOT 3 Press in MULTI JOG PUSH SET ROOM SIZE appears on the display then the initial room size setting appears 4 Turn MULTI JOG to select an appropriate...

Page 105: ...ee page SUB WOOFER Register your subwoofer 34 FRONT SPEAKER Register your front speaker size 34 CNTR SPEAKER Register your center speaker size 34 SURR SPEAKER Register your surround speaker size 34 SBACK SPEAKER Register your surround back speaker size 34 SBACK OUT Register the number of the connected surround back speakers 34 DIST UNIT Select the measuring unit for the speaker distance 35 FRNTL D...

Page 106: ...er surround and surround back speakers If you have selected SMALL for the surround speakers you cannot select LARGE for the surround back speakers If you have selected NONE for the surround speakers the surround back speakers are fixed to NONE 7 Surround back speakers quantity SBACK OUT Select the number of the surround back speakers connected SBACK OUT 1SPK Select to use 1 surround back speaker S...

Page 107: ...have selected NONE see page 34 This setting is not valid for the DVD MULTI playback mode Ex In the above case set the speaker distance as follows Front speakers L R 3 0 m 10 ft Center speaker C 3 0 m 10 ft Surround speakers LS RS 2 7 m 9 ft Surround back speakers SB 2 4 m 8 ft Setting the bass sounds You can adjust subwoofer and bass sounds precisely according to your preference 7 Subwoofer output...

Page 108: ...n the LFE signals come in Select one of the following LFE ATT 0dB Normally select this LFE ATT 10dB Select when the bass sound is distorted Selecting the main or sub channel You can select the playback sound channel you want while playing digital software recorded or broadcast in the Dual Mono mode see page 43 which includes two monaural channels separately 7 Dual Mono DUAL MONO Select the playbac...

Page 109: ...2 VCR 2 3 TV or DBS 1 4 CDR back to the beginning When DIGITAL 1 DGTL IN COAX is set to TV or DBS 1 2 CD 3 DVD 4 CDR 2 CD 3 DVD 4 MD 2 CD 3 DVD 4 VCR 2 2 CD 3 MD 4 CDR 2 CD 3 MD 4 VCR 2 2 CD 3 VCR 2 4 CDR 2 MD 3 DVD 4 CDR 2 MD 3 DVD 4 VCR 2 2 MD 3 VCR 2 4 CDR 2 VCR 2 3 DVD 4 CDR back to the beginning When DIGITAL 1 DGTL IN COAX is set to CDR 2 CD 3 TV or DBS 1 4 DVD 2 CD 3 TV or DBS 1 4 MD 2 CD 3 ...

Page 110: ...he ONE TOUCH OPERATION indicator goes off from the display Note If you have turned off the receiver with the volume level set at more than level 30 the volume level will be automatically set at level 30 next time you turn on the receiver Setting the component video input When you use the component video inputs for connecting the DVD player and or DBS tuner or VCR register the type of input jacks I...

Page 111: ...1 LIVENESS 1 Select the liveness level for your virtual listening room 41 CTR TONE 2 Make the center tone soft or sharp 41 PNRM CNTRL 3 Add wraparound sound effect with side wall image 41 CNTR WIDTH 2 3 Adjust the center channel localization between the center speaker and the left right front speakers 41 DIMENSION 3 Adjust sound localization position 41 CNTR GAIN 2 4 Adjust sound localization of t...

Page 112: ...und speaker output level SURR R LVL Select to adjust the right surround speaker output level SBACK LVL Select to adjust the surround back speaker output level Notes If you have selected NO or NONE for a speaker see page 34 the output level for the corresponding speaker is not adjustable Speaker output levels except the subwoofer output level are not adjustable when Analog Direct is in use But when...

Page 113: ...he Surround and DSP sound parameters to your preference For Surround and DSP modes see pages 42 to 49 7 Adjustable parameters You can adjust the following parameters For Surround and DSP modes when the center speaker is connected This setting is common to all Surround modes and is memorized separately for DSP modes CTR TONE Adjust the center tone As the number increases the dialogue becomes cleare...

Page 114: ...sion method used for Dolby Pro Logic IIx makes no limitation for the cutoff frequency of the surround treble This receiver provides two types of Dolby Pro Logic IIx modes Pro Logic IIx Movie PLIIx MOVIE and Pro Logic IIx Music PLIIx MUSIC When Dolby Pro Logic IIx is activated PLIIx MOVIE or PLIIx MUSIC appear and the indicator lights up on the display PLIIx MOVIE Suitable for playing any Dolby Sur...

Page 115: ... When DTS signal is detected through the digital input the indicator lights up on the display DTS Extended Surround DTS ES DTS ES is another multi channel digital encoding format It greatly improves the 360 degree surround impression and space expression by adding the third surround channel surround back channel DTS ES includes two signal formats with different surround signal recording methods DT...

Page 116: ...R R ANALOG VOLUME PRO LOGIC SPEAKERS 1 CINEMA NEO 6CINMA NEO 6MUSIC PLIIx MOVIE PLIIx MUSIC PRO LOGIC ZONE 1 LINEAR PCM DIGITAL L SUBWFR DUAL DIGITAL AUTO VOLUME SPEAKERS 1 ZONE 1 2 Press SURROUND to activate the Surround mode For multi channel digital software incoming signals are automatically detected and the appropriate Surround mode is activated see pages 46 and 47 for details Surround mode a...

Page 117: ... apply 6 1 channel reproduction to both 5 1 channel and 6 1 channel encoded software PLIIx MOVIE 1 2 Select to apply PLIIx MOVIE 6 1 channel reproduction to both 5 1 channel and 6 1 channel encoded software PLIIx MUSIC 1 Select to apply PLIIx MUSIC 6 1 channel reproduction to both 5 1 channel and 6 1 channel encoded software EX ES OFF 3 Select to cancel the EX ES PLIIx 6 1 channel reproduction 1 W...

Page 118: ...NMA NEO 6MUSIC NONE Not effective PLII MOVIE PLII MUSIC PRO LOGIC NEO 6CINMA NEO 6MUSIC DVD MULTI Deactivated 5 Not effective Not effective None Incoming Signal Type Zone 2 Speakers Surround Back Channel EX ES PLIIx Available Surround Mode Setting Setting Dolby Digital EX Activated Not effective Not effective DOLBY D 3D PHONIC 2 Deactivated 2SPK 1SPK AUTO ON PLIIx MOVIE DOLBY D EX 1 3 PLIIx MUSIC ...

Page 119: ...ve DUAL MONO 6 DTS 96 24 processing is not applied If you want to apply the processing set the EX ES PLIIx setting to OFF 2 When the Zone 2 speakers are activated the 3D PHONIC processing is applied to reproduce Dolby Digital or DTS software the 3D PHONIC indicator also lights up 3 When using PLIIx Movie to reproduce Dolby Digital or DTS software this receiver applies Dolby Digital EX DOLBY D EX o...

Page 120: ...E CLUB Reproduces the spatial feeling of a live music club with a low ceiling DANCE CLUB Reproduces the spatial feeling of a rocking dance club PAVILION Reproduces the spatial feeling of an exhibition hall with a high ceiling THEATER 1 Reproduces the spatial feeling of a large theater where the seating capacity is about 600 THEATER 2 Reproduces the spatial feeling of a small theater where the seat...

Page 121: ...ou cannot select MONO FILM Note When the Zone 2 speakers are activated or the surround speakers are set to NONE the 3D PHONIC processing is applied to the DSP modes the 3D PHONIC indicator also lights up To adjust the effect level except All Channel Stereo see page 41 To cancel the DSP modes Press SURROUND DSP OFF or SURR DSP OFF on the remote control Sound reproduced from normal stereo Sound repr...

Page 122: ...tput To composite video output Ï To left right front channel audio output Ì To left right surround channel audio output Note When connecting a DVD player to the component video input jacks make the component video input setting VIDEO IN DVD correctly See page 38 for details DVD player SURR DVD VIDEO RIGHT LEFT S VIDEO VIDEO AUDIO SUBWOOFER CENTER DVD IN FRONT DVD IN R L R L A B C D E F G COMPONENT...

Page 123: ...receiver automatically turns on and changes the Zone 1 source to the component If the receiver is already turned on with the ZONE 2 indicator lights up and the source name for Zone 2 appears on the unit s display the receiver changes the Zone 2 source to the component When you press PLAY on the remote control supplied for this receiver the receiver automatically turns on and changes the Zone 1 sou...

Page 124: ...n off the Zone 2 sound by pressing ZONE 2 ON OFF the selected Zone 2 source component turns off unless the same component is selected as the Zone 1 source If the ZONE 1 indicator is lit the Zone 2 source will stop playing but will not turn off Synchronized Recording Only for Zone 1 Operations This operation is only possible when the receiver is ready for Zone 1 operations Synchronized recording me...

Page 125: ...gs See pages 12 and 13 5 Connect the video input output jacks on the VCR 1 DVD player TV and this receiver using the cables with RCA pin plugs S video plugs or component video plugs See CONNECTIONS 3 on the next page and pages 12 and 13 for details 6 Plug the AC power cords of the components and this receiver into the AC outlets 7 When turning on the TV for the first time after the AV COMPU LINK c...

Page 126: ...is receiver You can control the connected video components using this remote control Aim the remote control at the remote sensor s on the target video component s or on the receiver directly For details see page 58 Note To operate the video components from Zone 2 use the RF rod antenna and IR signal transmitter see pages 14 and 15 CONNECTIONS 3 Video Cable Connection This receiver is equipped with...

Page 127: ...NK EX jack using a component video cable In this case reconnect the TV referring to CASE 1 or CASE 2 on page 54 Automatic Power On Off Standby The TV for Zone 1 only VCR 1 VCR connected to the VCR 1 jacks and DVD player turn on and off along with the receiver Automatic Power On When you turn on the receiver by pressing STANDBY ON on the unit or AUDIO POWER ON on the remote control with ZONE 1 ZONE...

Page 128: ...e used for operating your target source When you press the FRONT L FRONT R CENTER SUBWFR SURR L SURR R or SURR BK button the corresponding speaker name appears on the remote s display IMPORTANT To operate JVC s audio components using this remote control You need to connect JVC s audio components through the COMPU LINK SYNCHRO jacks see page 51 in addition to the connections using cables with RCA p...

Page 129: ... perform the following operations on the turntable PLAY Start playing STOP Stop operations CD recorder After pressing CDR or selecting CDR by pressing CONTROL repeatedly you can perform the following operations on the CD recorder PLAY Start playing 4 Return to the beginning of the current or previous track Skip to the beginning of the next track STOP Stop playing and recording PAUSE Pause playing ...

Page 130: ...ng and recording or rewind or fast forward the tape PAUSE Pause playing or recording To resume press PLAY REC Press this button together with PLAY to start recording only for Zone 1 operations Press this button together with PAUSE to enter recording pause only for Zone 1 operations CHANNEL Change the TV channels on the VCR 1 9 10 RETURN 0 100 10 Select the TV channels on the VCR The 10 RETURN butt...

Page 131: ... for some TVs If you cannot change the channels of some TVs by pressing number buttons press the CHANNEL buttons IMPORTANT To operate the other component s using the RF signals emitted from this remote control the IR signal transmitter and the RF rod antenna must be connected to this receiver Place the IR signal transmitter so that it is aimed at the remote sensor s on the target component s The R...

Page 132: ...erters or DBS tuners by pressing number buttons press the CHANNEL buttons To change the transmittable signals for operating another manufacturer s VCR 1 Press and hold DVD POWER 2 Press VCR 1 3 Enter a manufacturer s code using buttons 1 9 and 0 See page 62 to find the code 4 Release DVD POWER 5 Try to operate your VCR 1 by pressing one of the below buttons When your VCR 1 have operated correctly ...

Page 133: ... 10 10 then 0 For track number 30 press 10 10 then 10 or press 10 10 10 then 0 Notes Refer to the manual supplied for the DVD player Some buttons listed above may not be used for some DVD players ENTER TOP MENU MENU DVD DVD RETURN ENTER TOP MENU MENU STOP PAUSE FF REW PLAY 1 2 3 4 5 6 7 P 8 9 10 10 0 POWER To change the transmittable signals for operating another manufacturer s CD player 1 Press a...

Page 134: ...23 24 25 Tocom 26 Zenith 27 28 General Instrument 29 Initial setting For VCR For DVD player For TV Manufacturer Codes JVC 00 14 74 Fisher 05 Sanyo 05 Hitachi 08 09 10 49 Magnavox 08 17 49 Mitsubishi 08 18 RCA PROSC 08 24 29 30 31 48 Samsung 08 34 49 Philips 17 Panasonic 24 26 76 Toshiba 37 43 Sharp 38 77 Sony 39 Zenith 45 46 Mets 50 51 52 53 Quelle 52 53 54 55 56 57 58 59 60 61 62 63 64 65 66 67 M...

Page 135: ...rce in the other zone Zone 1 and Zone 2 operations are done at the same time The receiver is turned on with the Zone 1 and Zone 2 sounds deactivated Incoming signal is too weak The station is too far away An incorrect antenna is used Antennas are not connected properly Ignition noise from automobiles SOLUTION Press ZONE 1 ON OFF for Zone 1 operations Press ZONE 2 ON OFF and ZONE 2 CONTROL for Zone...

Page 136: ...s the Surround mode DSP mode and equalization pattern DOLBY D EX ES DSCRT or ES MATRIX cannot be select as the Surround mode The display does not light up Noise is heard during record playing Howling during record playing NO SUBWFR appears on the display OVERLOAD starts flashing on the display No playback picture of the VCR 1 or DBS tuner can be viewed DVD MULTI is cannot be select as the source D...

Page 137: ...S IN VIDEO 87 dB 80 dB TAPE MD IN CDR IN CD IN 87 dB 80 dB PHONO IN MM 70 dB 78 dB at OUT REC Frequency Response 8 Ω DVD IN VCR 1 IN VCR 2 IN TV SOUND DBS IN VIDEO 20 Hz to 100 kHz 1 dB 3 dB TAPE MD IN CDR IN CD IN 20 Hz to 100 kHz 1 dB 3 dB PHONO IN MM 20 Hz to 20 kHz 1 dB RIAA Phono Equalization 1 0 dB 20 Hz to 20 kHz Bass Boost 6 dB 1 0 dB at 100 Hz Equalization 63 Hz 250 Hz 1 kHz 4 kHz 16 kHz ...

Page 138: ...EN FR 0504MWMMDWJEIN 2004 VICTOR COMPANY OF JAPAN LIMITED VICTOR COMPANY OF JAPAN LIMITED RX 8040B AUDIO VIDEO CONTROL RECEIVER ...

Reviews: