


24
Menu Functions
Sharpness
Makes the picture look sharper or softer.
The higher the value, the sharper
the picture becomes. The lower
the value, the softer the picture
becomes.
This function is only available when a Video, S-Video or Component signal is
selected.
BrilliantColor™
This function utilizes a new color-processing algorithm and system level
enhancements to enable higher brightness while providing truer, more vibrant
colors in picture. It enables a greater than 50% brightness increase in mid-tone
images, which are common in video and natural scenes, so the projector
reproduces images in realistic and true colors. If you prefer images with that
quality, select
On
. Selecting
Off
disables
BrilliantColor™
, and
Color
Temperature
becomes unavailable for access at the same time.
Color
Temperature*
The options available for color temperature* settings vary according to the
connected input signal.
•
High
: Makes pictures appear bluish white.
•
Middle
: Maintains normal colorings for white.
•
Low
: Makes pictures appear reddish white.
3D Color
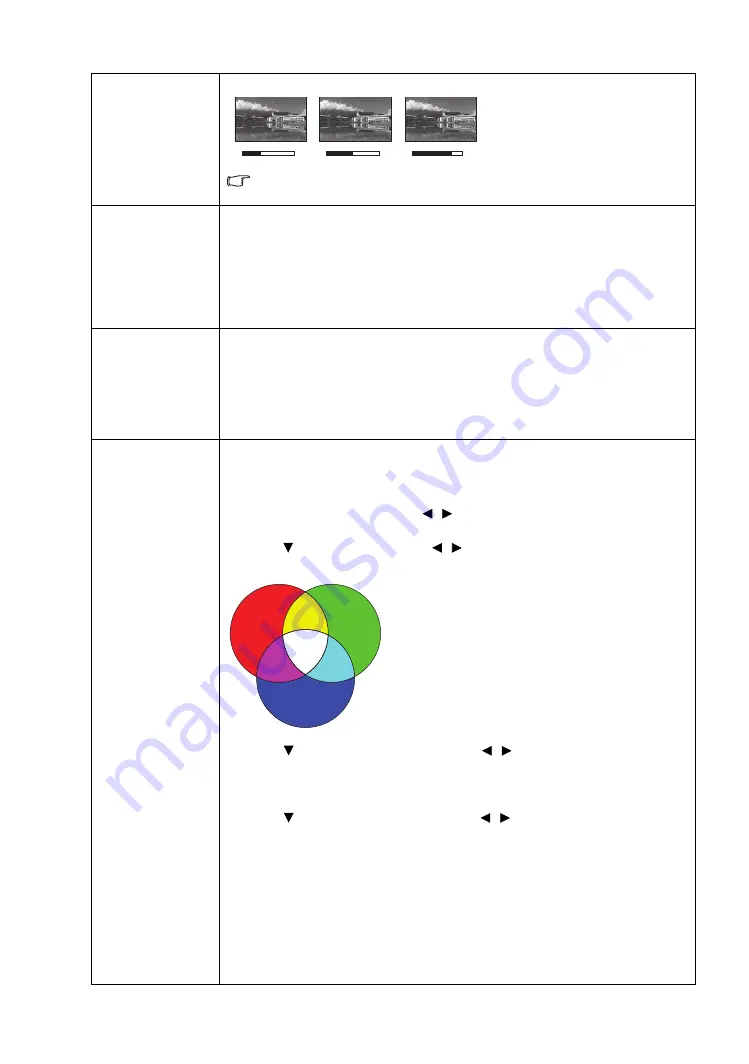
Management
Provides six sets (RGBCMY) of colors to be adjusted. You can select any of
them to adjust its color range and saturation.
1. Press
ENTER
to display the
3D Color Management
window.
2. Select
Select Color
and use
/
to select a color from
R
(Red),
G
(Green),
B
(Blue),
C
(Cyan),
M
(Magenta), and
Y
(Yellow).
3. Press to select
Hue
and use
/
to set its range. Increase in the range
will include colors consisted of more proportions of its two adjacent colors.
The illustration shows how the colors relate to
each other.
For example, if you select
R
and set its range at
0, only pure red is selected. Increasing its range
will include both the red color close to yellow and
red color close to magenta.
4. Press
to
select
Saturation
* and use
/
to adjust its values. Every
adjustment made reflects to the image immediately. For example, if you
select
R
and set its value at 0, only the saturation of pure red will be
affected.
5. Press
to
select
Brightness
and use
/
to adjust its values. Every
adjustment made reflects to the image immediately. For example, if you
select
R
and set its value at 0, only the brightness of pure red will be
affected.
6. Repeat steps 2 to 5 until you have made all of the desired adjustments.
7. When done, press
MENU
to exit.
*About saturation
It is the amount of that color in a video picture. Lower settings produce less
saturated colors; a setting of “0” removes that color from the image entirely. If
the saturation is too high, that color will be overpowering and unrealistic.
4
7
12
Red
Yellow
Green
Cyan
Magenta
Blue