


31
ENGLISH
ENGLISH
32
· Reduce noise / Watch a more natural picture
· Set the aspect ratio, etc.
Super DigiPure
Auto
Picture
Picture Mode
Standard
Back Light
Features
White Balance
Tint
Colour
Sharp
Bright
Contrast
Cool
Picture
>
Pull Down
Colour Management
Picture Management
Smart Picture
MPEG Noise Reduction
Auto
On
On
Off
Off
Colour System
Zoom
Features
Super DigiPure
Off
Super DigiPure
Auto
>>
Sub
Main
Auto
PAL
Colour System
Zoom
Auto
Panoramic
Panoramic
14:9 Zoom
16:9 Zoom
16:9 Zoom Subtitle
Full
Regular
>>
Super DigiPure
Auto
Movie Theatre
On
Movie Theatre
On
Movie Theatre
On
Movie Theatre
On
IMPORT
ANT!
PREP
ARE
USE
SETTINGS
TROUBLE?
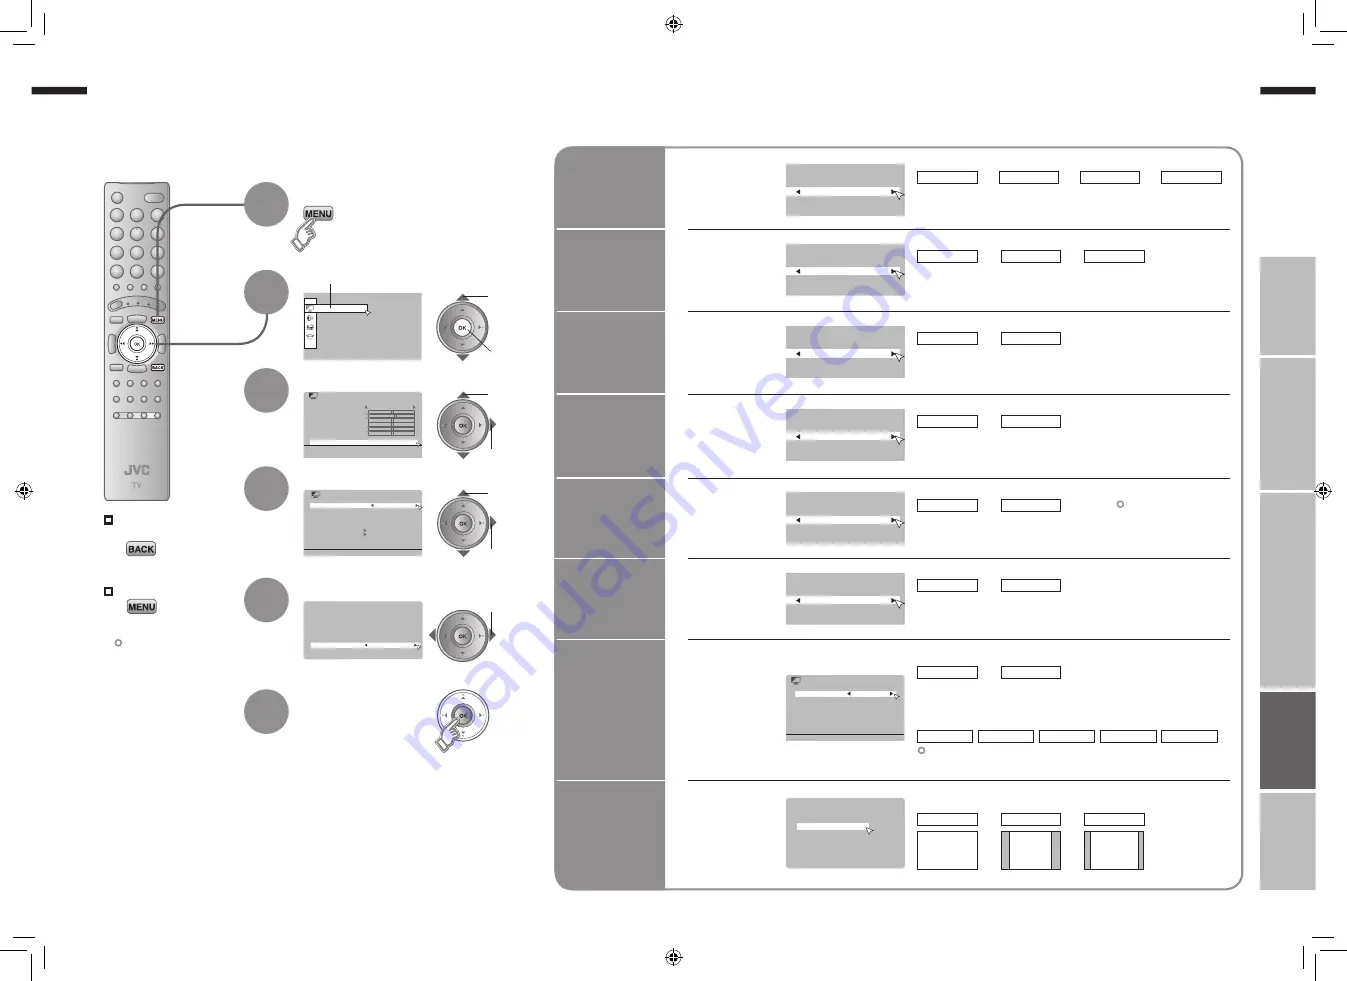
Select “Picture”
By default, the TV automatically adjusts itself for the best picture.
Display the menu bar
Select “Features”
Select an item
Change settings
Super
DigiPure
Pull Down
Colour
Management
Smart
Picture
Colour
System
Zoom
E.g. “Super DigiPure”
E.g. “Super DigiPure”
Finish
Advanced picture adjustment
To the previous
screen
Exit
1
The menu disappears
after one minute of
inactivity.
2
3
4
5
6
2
next
1
select
2
next
1
select
2
next
1
select
select
For
natural-looking
outlines
For smooth
cinema film
Off
: Function is
turned off
On
Auto
: Automatically
adjusts
: Function is
always on
For
natural-looking
pictures
Off
: Function is
turned off
On
: Maintain a natural
colour balance
Fix
bright / dark
pictures
Off
: Function is
turned off
On
: Make it easier to view
bright / dark pictures
When
there is no
colour
Main
: Main picture
Sub
: Sub-picture in
MULTI-PICTURE mode (P. 23)
1
Select the screen to change settings on
PAL
2
Select the colour system
SECAM
NTSC 3.58 NTSC 4.43
Auto
Set a default
aspect ratio
Panoramic
Select a default aspect ratio for Auto in “Zoom” (P. 18)
Regular
14:9 Zoom
16 : 9
4 : 3
14 : 9
Picture
Management
Off
: Function is
turned off
Min
Max
Auto
: When the picture
loses sharpness
: Automatically
adjusts
MPEG Noise
Reduction
Off
: Function is
turned off
On
To reduce
MPEG video
noise
Off
: Function is
turned off
On
: When noise appers
Fix
brightness of
white areas
Not available when
“Picture Mode” is set
to “Bright” (P. 30).
: Make it easier to view
white areas
: When
noise appears
For colour system in your country or region.
“Colour system in your country or region” (P. 36)
31-32
25.10.2006 13:28:37


