4
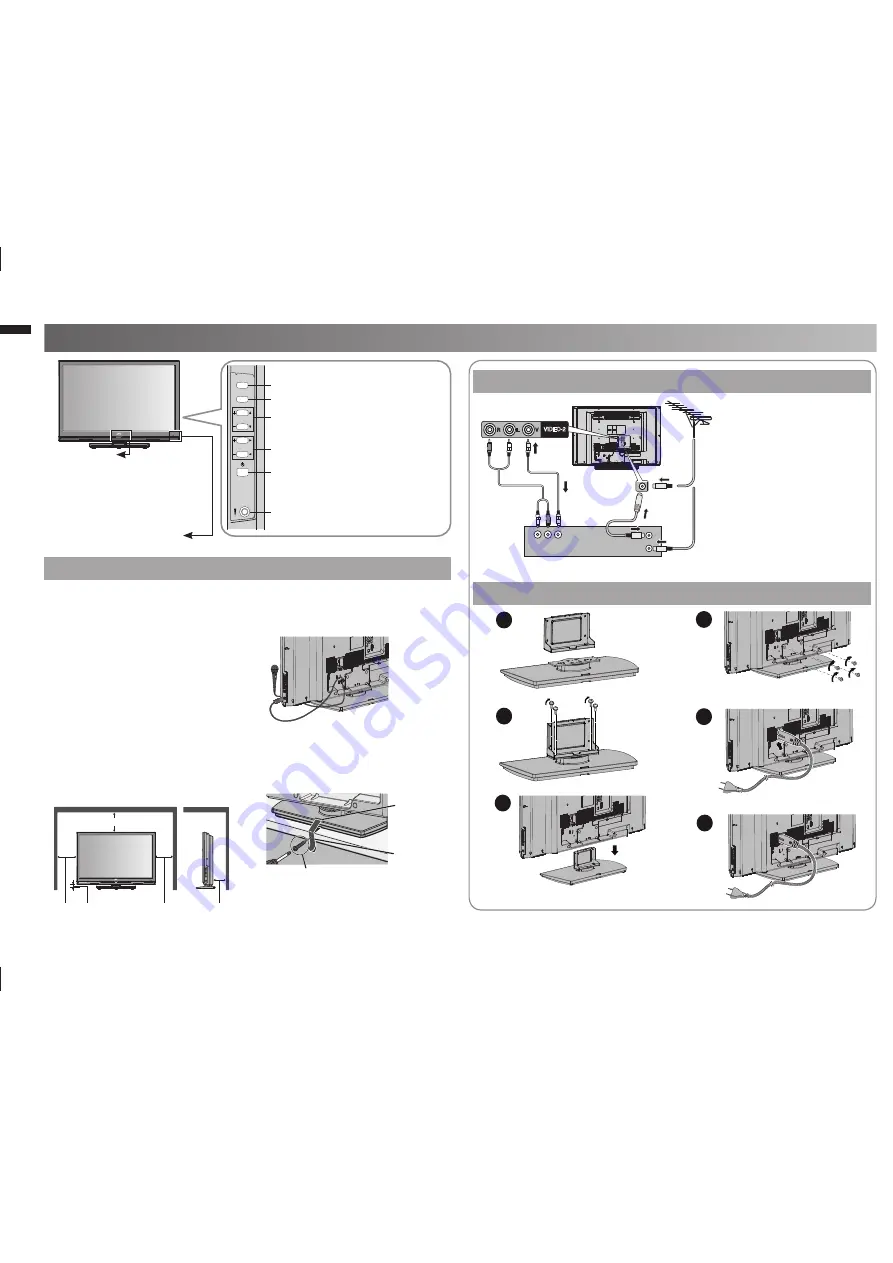
CHANNEL
VOLUME
MENU/OK
TV/VIDEO
VIDEO-2
R
L
V
2
3
4
5
6
1
Set up and connections
Care when setting
Hole for
belt
Belt (not
provided)
200 mm
150 mm
150 mm 50 mm
50 mm
Screw (not provided)
Switch between TV / VIDEO
devices
Display on-screen menu / set
Change channel / Page /
Hyper Scan Function (P. 3)
Volume / Adjust
Power On / Off
Microphone
Power requirements
■
Connect the power cord only to a
•
110-240V, 50/60Hz AC outlet.
When attaching the TV to the
■
wall, use the optional JVC wall
mounting unit.
Consult a quali
fi
ed technician.
•
JVC assumes no responsibility for
•
damage due to improper mounting.
400 mm x 200 mm mount which
•
conforms to VESA standards.
Installation requirements
■
To avoid overheating, ensure the
•
unit has ample room.
After all the connections
•
have been made, insert
the plug into an AC
outlet.
Connect an aerial and VCR / DVD Player
AERIAL
OR
VCR (DVD Player)
Stand Assembly
To prevent the TV from falling
•
thread the belt through the hole
on the back of the stand and
secure it to the TV rack.
If the microphone is installed,
•
should be lock it’s cable follow
picture.
Power lamp
ON : Lit (Blue)
OFF : Unlit
Power lamp lights while
the TV is on.
“Power Lamp” (P. 14)
•
Remote control sensor
GGT0372-001A-H-EN.indd 4
GGT0372-001A-H-EN.indd 4
13/07/2010 16:53:25
13/07/2010 16:53:25
All manuals and user guides at all-guides.com


