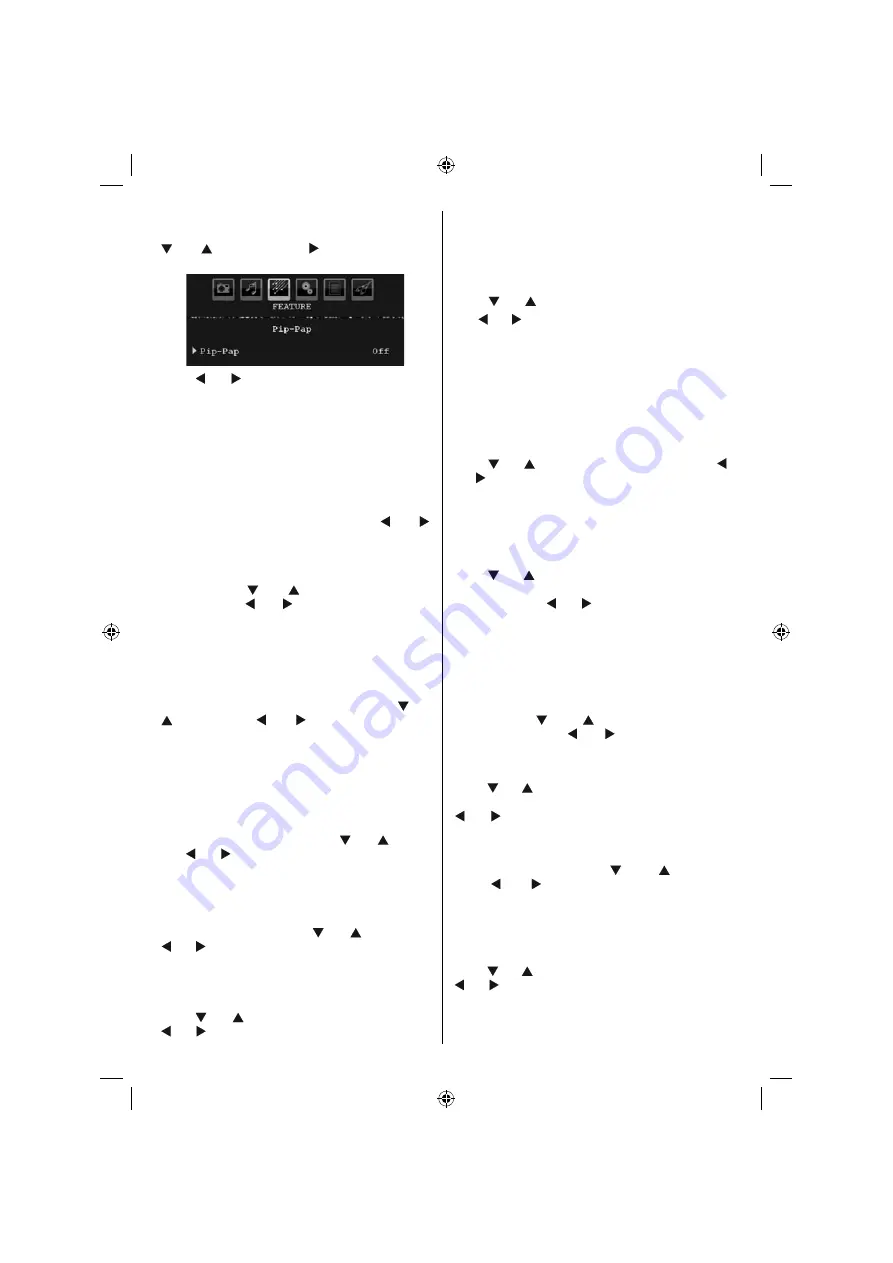
background image

English   

- 24 -

Pip-Pap

In the 

Feature

 menu, highlight 

PIP

 item by pressing 

” or “

” buttons. Press “ ” button to enter 

PIP


submenu:

Using “ ” or “ ” button, you can switch to PIP, PAP 
mode or turn off the feature.

If the TV is switched to PIP or PAP mode, Pip-Pap 
submenu will change accordingly and the following 
settings will appear on the same menu screen.  

Note that if you switch to PAP mode by using Pip-Pap setting, 
only Source and Swap options will be active among the 
menu settings.

Pip-Pap

This line controls Pip/Pap modes. Use “ ” or “ ” 
buttons to switch the TV to 

Pip

Pap

 or 

Off

Pip Size

Using this setting, you can set the size of the Pip 
window. Press “

” or “

” button to highlight Pip 

Size item. Use “ ” or “ ” button to set Pip Size to 
Small or Large.

Note: This setting will be inactive if the TV is set to Pap 
mode.

PIP Position

This setting is used for moving the sub picture.

Select PIP Position  item by using “

” or 

” button. Use “ ” or “ ” button to adjust  PIP 

position. 

Positions available are: Bottom Right,Bottom Left, Top 
Left and Top Right.

Source

PIP Source setting enables you to select the source 
of the sub picture.

Select PIP Source item by using “

” or “

” button. 

Use “ ” or “ ” button to set 

PIP source

.

Program

This setting will be unavailable to be used.

Swap

Select 

Swap

 item by using “

” or “

” button. Use 

“ ” or “ ” button to set. This function enables to swap 
between the main and the PIP picture.

Note: See Appendix E for all PIP/PAP modes.

Sleep Timer

Press “

” or “

” button to select 

Sleep Timer

. Use 

“ ” or “ ” button to set the 

Sleep Timer

.

The timer can be programmed between 

Off

 and 

120


minutes in steps of 

10

 minutes. 

If 

Sleep Timer

 is activated, at the end of the selected 

time, the TV goes automatically to standby mode.

Child Lock

Press “

” or “

” button to select 

Child Lock

.

Use “ ” or “ ” button  to set the Child Lock 

On

 or 

Off

When On is selected, the TV can only be controlled 
by the remote control handset. In this case the control 
panel buttons (except for the 

STANDBY

 button) will 

not work.

Hence, if one of those buttons is pressed, 

Child Lock 

On

 will be displayed on the screen when the  menu 

screen is not visible.

Language

Press “

” or “

” button to select 

Language

. Use “

” or “ ” button to select the 

Language

Default Zoom

While zoom mode is set as AUTO, the TV will set 
the zoom mode in accordance with the  signal of 
the broadcast. If there is no WSS or aspect ratio 
information, the TV will then use this setting to adopt. 
Press “

” or “

” button to select 

Default Zoom

. You 

can set 

Default Zoom

 to 

Panoramic

16:9

4:3

 or 

14:9

 by pressing “ ” or “ ” button.

Note : Default Zoom feature will not be available while in 
Digital Tv mode.

Blue Background

If the signal is weak or absent, the TV will automatically 
change to a blue screen. To enable this, set 

Blue 

Background

 to 

On

.

By pressing “

” or “

” button, select 

Blue 

Background

. Press “ ” or “ ” button  to set 

Blue 

Background

 as 

On

 or 

Off

.

Menu Background

Press “

” or “

” button to select 

Menu Background

You can set menu background level by pressing 
“ ” or “ ” button.

Backlight

This setting controls the backlight level. Select 

B a c k l i g h t

  b y   p r e s s i n g   “

”   o r   “

”   b u t t o n . 

Press“

” or “ ” button to set 

Backlight

 to 

Auto, 

Medium

Maximum

 or 

Minimum

.

Menu Timeout

To set a specifi c display timeout for menu screens, 
set a value for this option.

Press “

” or “

” button to select 

Menu Timeout

. Use 

“ ” or “ ” button to change menu timeout to 

15 sec

30 sec

 or 

60 sec

.

A01_[GB]_SSM_MB36_MASKE_32882W_(RM-C2503-1C_UK)_IDTV_NICKEL7_10064678_50154964.indd   24

A01_[GB]_SSM_MB36_MASKE_32882W_(RM-C2503-1C_UK)_IDTV_NICKEL7_10064678_50154964.indd   24

25.09.2009   17:49:31

25.09.2009   17:49:31

Summary of Contents for LT-32HC1BU

Page 1: ...INSTRUCTIONS ENGLISH LT 32HR1BN 0909TMH VT VT WIDE LCD PANEL TV BREDT LCD PANEL TV VEJLEDNING DANSK SUOMI LAAJAKAISTAISEN TAULUTELEVISION OHJEET 䄰た䍏噅剟孇䉟䑋彆䥝弱 㘴㘷㡟㔰ㄵ㐹㘴 祬 ﱬ 㤠䍵浡 㠺ㄷ㨰 ...

Page 2: ...of these products please contact your local municipal office your household waste disposal service or the shop where you purchased the product Penalties may be applicable for incorrect disposal of this waste in accordance with national legislation Business users If you wish to dispose of this product please visit our web page http www jvc eu to obtain information about the take back of the product...

Page 3: ...Operation 14 Electronic Programme Guide EPG 14 Programme Options 14 Analogue Teletext 14 Widescreen 14 IDTV Menu System 15 Channel List 15 Navigating the Entire Channel List 15 Moving the channels in the channel list 15 Deleting the Channels in the Channel List 15 Renaming channels 15 Adding Locks to Channels 16 Setting Favourites 16 Program Guide 16 Timers 16 Common Interface 16 TV Setup 17 Setup...

Page 4: ...onnection Automatic programming system Forward or backward manual tuning Automatic sound muting when no transmission NTSC playback PIP PAP PAT functions AVL Automatic Volume Limiting When no valid signal is detected after 5 minutes the TV switches itself automatically to standby mode PLL Frequency Search PC input Plug Play for Windows 98 ME 2000 XP Vista Audio line out Game Mode Active antenna pow...

Page 5: ...as possible Moisture and Water Do not use this device in a humid and damp place avoid the bathroom the sink in the kitchen and near the washing machine Do not expose this device to rain or water as this may be dangerous and do not place objects filled with liquids such as flower vases on top Avoid from dripping or splashing If any solid object or liquid falls into the cabinet unplug the TV and hav...

Page 6: ... thin film transistors giving you fine picture details Occasionally a few non active pixels may appear on the screen as a fixed blue green or red point Please note that this does not affect the performance of your product Warning Do not leave your TV in standby or operating mode when you leave your house Warning This is a class A product In a domestic environment this product may cause radio inter...

Page 7: ...broadcasts 15 Standby GUIDE 16 Programme guide 17 Cursor up 18 Cursor right BACK 19 Return 20 Cursor down 21 Effect on off Jump to now in EPG mode BLUE 22 Install Menu YELLOW 23 Feature Menu Current Language in DTV mode 24 Volume up down 25 Muting 0 1 8 9 Numeric buttons 26 27 Teletext on PAT Picture and text Teletext off 28 Reveal 29 Time 30 Subtitle on off 31 Mono stereo Dual I II A01_ GB _SSM_M...

Page 8: ...ble to connect the set to a subwoofer unit Audio Line Outs 2 output audio signals to an external device such as an optional sound system To connect the external speakers to your TV use AUDIO LINE OUTS of the TV with an audio cable SCART 2 3 inputs or outputs for external devices Note S VHS VCR should be connected to EXT 2 and can be watched from EXT 2S source SCART 1 4 inputs or outputs for extern...

Page 9: ... outputs digital audio signals of the currently watched source Use an SPDIF coaxial cable to transfer audio signals to a device that has SPDIF input SPDIF 8 Digital Out outputs digital audio signals of the currently watched source Use a digital optic cable to transfer audio signals to a device that has SPDIF input RF Input 9 connects to an antenna or a cable Note that if you use a decoder or a med...

Page 10: ...input to connect a device that has an HDMI connector to your TV Use an appropriate HDMI cable to make such a connection Note that you should switch to HDMI 4 source to view the content from the connected device Power off both the TV and the device before making any connections Side HDMI Input supports connections between HDMI devices such as DVD players You can use INPUT AV side HDMI input of the ...

Page 11: ...s are not supported If the plugged USB disk is not recognised please reinsert the disk It is recommended that you connect your USB device directly to the USB input of the TV Some compatibility problems may occur if you use a separate cable connection Connecting the LCD TV to a PC For displaying your computer s screen image on your LCD TV you can connect your computer to the TV set Power off both c...

Page 12: ...cting a camcorder connect to the VIDEO IN socket and the AUDIO SOCKETS INPUT FAV For selecting the related source see the section Input selection in the following parts To listen the TV sound from headphones connect to the HEADPHONE jack of theTV Camcorder Headphone Connecting Other Equipment via Scart Most devices support SCART connection You can connect a DVD recorder a VCR or a decoder to your ...

Page 13: ...ume or button to increase volume so a volume level scale slider will be displayed on the screen Programme Selection Press button to select the next programme or button to select the previous programme Viewing Main Menu Press buttons at the same time to view main menu In the Main menu select sub menu using or buttons and enter the sub menu using or buttons To learn the usage of the menus refer to t...

Page 14: ... This process will take a few minutes To cancel searching you can press MENU button at any time during the process The following OSD will be displayed during the automatic search After Automatic Search is completed the following message will be displayed asking for sorting option If you select YES programme list will be sorted according to LCN logical channel number Select NO for using frequency s...

Page 15: ... the next day Details displays the programmes in detail OK View Timer shows the highlighted channel sets the reminder for future programmes Numeric buttons Jump go to preferred channel directly via numeric buttons 0 SEARCH activates Guide Search window Press 0 button to view Guide Search menu Using this feature you can search the programme guide database in accordance with the genre selected or wi...

Page 16: ...n while the Select item on Channel List menu is highlighted via or buttons Moving the channels in the channel list Press or buttons to select the channel that will be moved Press or buttons to select the Move item on Channel List menu and press OK to confirm Note If you enter the same programme number of the channel that you want to move services will be replaced Do you want to continue OSD will b...

Page 17: ... Mode to Off Hint Pressing button can help you for displaying information in IDTV Program Guide This section is same with the instructions given in the General Operations page Please see Electronic Programme Guide EPG section in the General Operations part Timers To display timers window press either TIME button on the remote control or activate the item from the main menu To add a timer press the...

Page 18: ...ming first time installation When this setting is on search process will locate the encrypted channels as well If it is set as OFF manually encrypted channels will not be located while in automatic search or manual search Use or button to select Scan Encrypted and then press or button to set this setting as On or Off Parental Control Some channels broadcast material which you do not want younger m...

Page 19: ...button and using the or buttons to choose Setup and press OK button Highlight Configuration menu with or keys and press OK Use or buttons to choose RECEIVER UPGRADE and press OK button Using the or button change Automatic scanning from Enabled to Disabled Highlight Scan for upgrade menu with or keys and pres OK to commence upgrade After the search progress is completed the message Completed search...

Page 20: ...bles the use of active antenna Note Antenna power should be Off when standard antenna is used instead of the active antenna Language Settings In this menu the user can adjust the preferred language Select Language item in the Setup menu and press OK button Then language settings menu will be displayed You can set the desired language options by using and buttons Note If the Country option is set t...

Page 21: ...ates of that channel Clear Service List This setting is visible only when the Country option is set to Denmark Sweden Norway or Finland Use this setting to clear channels stored Press or button to select Clear Service List and then press OK The following OSD will be displayed on the screen Press OK to cancel Select Yes by pressing or button and press OK to delete all of the channels First Time Ins...

Page 22: ...ll automatically switch to digital TV mode Note If the USB stick is not recognized after Power off on or First Time Installation first plug the USB device out and power off on the TV set Plug the USB device again Press OK to browse MENU to quit Playing Audio Files Play This OK Plays the selected file Play GREEN Play all media files in the folder starting with the selected one Pause Resume YELLOW b...

Page 23: ...t signal is weak and the picture is noisy use Noise Reduction setting to reduce the noise amount Press or button to select Noise Reduction Press or to choose from one of these options Low Medium High or Off Film Mode Films are recorded at a different number of frames per second to normal television programmes Press or button to select Film Mode Press or button to set this feature On or Off Turn th...

Page 24: ...level Press button to decrease headphone volume level Headphone volume level can be adjusted between 0 and 63 Sound Mode Press or button to select Sound Mode Using or button you can select Mono Stereo Dual I or Dual II mode only if the selected channel supports that mode AVL Automatic Volume Limiting AVL function adjusts the sound to obtain fixed output level between programmes For instance volume...

Page 25: ...omatically to standby mode Child Lock Press or button to select Child Lock Use or button to set the Child Lock On or Off When On is selected the TV can only be controlled by the remote control handset In this case the control panel buttons except for the STANDBY button will not work Hence if one of those buttons is pressed Child Lock On will be displayed on the screen when the menu screen is not v...

Page 26: ...e between 0 and 199 Band Band can be selected either C or S Press or button to set Band Channel Channel can be changed by or button or numeric buttons Colour System Press or button to select Colour System Use or button to change the colour system to PAL PAL 60 SECAM or AUTO Sound System Press or button to select Sound System Press or button to change the sound system to BG DK I L or L Fine Tune Pr...

Page 27: ...for starting automatic tuning all stored programmes will be erased and the TV will search for available channels During the search the following OSD will be displayed Whenever you press the BLUE button APS function stops and Program Table appears on the screen If you wait until the end of APS Program Table will be displayed with the programmes found and located Source Menu Press or button and sele...

Page 28: ...Name Sound Indicator and Zoom Mode information is displayed on the screen when a new programme is entered or button is pressed Muting Function Press button to disable sound Muting indicator will be displayed in the upper side of the screen To cancel muting there are two alternatives the first one is pressing the button and the second one is increasing the volume level PIP Picture in Picture and PA...

Page 29: ...t ratio with subtitles to the full screen Zoom This option zooms to the picture Note You can shift to screen up or down by pressing buttons while picture zoom is selected as panaromic 14 9 Cinema or Subtitle Teletext Teletext system transmits information such as news sports and weather on your TV Note that is the signal degrades for example in poor adverse weather conditions some text errors may o...

Page 30: ...e to a non earthed audio equipment or neon lights etc Mountains or high buildings can cause double pictures or ghost images Sometimes you can improve the picture quality by changing the direction of the aerial Is the picture or teletext unrecognisable Check if you have entered the correct frequency Please retune the channels The picture quality may degrade when two peripherals are connected to the...

Page 31: ... 12 800 600 72 48 1 VESA 13 800 600 75 46 9 VESA 14 800 600 85 53 7 VESA 15 832 624 75 49 7 MAC 16 1024 768 43 35 5 VESA interlace 17 1024 768 60 48 4 VESA 18 1024 768 70 56 5 VESA 19 1024 768 72 57 7 20 1024 768 75 60 0 21 1024 768 85 68 3 22 1152 864 60 53 8 23 1152 864 70 64 2 VESA 24 1152 864 75 67 5 VESA 25 1152 864 85 77 1 VESA 26 1152 870 75 68 9 MAC 27 1280 768 60 47 7 VESA 28 1360 768 60 ...

Page 32: ...z O 576I 50Hz O 576P 50Hz O 720P 50Hz O 720P 60Hz O 1080I 50Hz O 1080I 60Hz O 1080P 50Hz O 1080P 60Hz O 1080P 24 HZ O X Not Available O Available Note In some cases a signal on the LCD TV may not be displayed properly The problem may be an inconsistency with standards from the source equipment DVD Set top box etc If you do experience such a problem please contact your dealer and also the manufactu...

Page 33: ...9 9 9 9 9 9 9 9 9 8 RGB This indicates that selection is possible only if Scart 1 has a RGB signal Restrictions Scart 1 source must have RGB signal to perform PIP PAP with sources TV Scart 2 Scart 2 S FAV If these sources are set to main window and Scart 1 does not have a RGB signal Pip Pap source can not be switched to the Scart 1 source If scart 1 source is set to main window and scart 1 does no...

Page 34: ...JPEGs are not supported Appendix E Supported DVI Resolutions When connecting devices to your TV s connectors by using DVI converter cables not supplied you can refer to the following resolution information 24Hz 25Hz 30Hz 50Hz 60Hz 480i 480p 576i 576p 720p 1080i 1080p A01_ GB _SSM_MB36_MASKE_32882W_ RM C2503 1C_UK _IDTV_NICKEL7_10064678_50154964 indd 33 A01_ GB _SSM_MB36_MASKE_32882W_ RM C2503 1C_U...

Page 35: ...776 mm x 524 mm x 94 mm TV only Weight 11 1 Kg TV only Digital Reception Transmission Standards DVB T MPEG2 DVB T MPEG4 HD i DEMODULATION Symbol rate COFDM with 2K 8K FFT mode Modulation 16 QAM 64 QAM FEC for all DVB modes automatically found ii VIDEO H 264 MPEG 4 part 10 main and high profile level 4 1 MPEG 2 MP HL video decoder HD display multi format capable 1080i 720p 576p CVBS analogue output...

Page 36: ... 2009 Victor Company of Japan Limited 50154964 䄰た䍏噅剟孇䉟䑋彆䥝弱 㘴㘷㡟㔰ㄵ㐹㘴 祬 ﱬ 㤠䍵浡 㠺ㄷ㨰 ...

Reviews: