background image

23

English   |

Installation

Installation

Before Installation

Before installation of this unit, please note the 

following precautions.

#

WARNINGS

•  If you connect the ignition wire (red) and the battery 

wire (yellow) to the car chassis (ground), you may 
cause a short circuit, that in turn may start a fire. 
Always connect those wires to the power source 
running through the fuse box.

•  Do not cut out the fuse from the ignition wire (red) 

and the battery wire (yellow). The power supply 
must be connected to the wires via the fuse.

#

CAUTION

•  Install this unit in the console of your vehicle. 

Do not touch the metal part of this unit during and 
shortly after the use of the unit. Metal part such as 
the heat sink and enclosure become hot.


NOTE

•  Mounting and wiring this product requires skills and 

experience. For best safety, leave the mounting and 
wiring work to professionals.

•  Make sure to ground the unit to a negative 12V DC 

power supply.

•  Do not install the unit in a spot exposed to direct 

sunlight or excessive heat or humidity. Also avoid 
places with too much dust or the possibility of water 
splashing.

•  Do not use your own screws. Use only the screws 

provided. If you use the wrong screws, you could 
damage the unit.

•  If your car’s ignition does not have an ACC position, 

connect the ignition wires to a power source that 
can be turned on and off with the ignition key. If you 
connect the ignition wire to a power source with a 
constant voltage supply, such as with battery wires, 
the battery may be drained.

•  If the console has a lid, make sure to install the unit 

so that the front panel will not hit the lid when 
closing and opening.

•  If the fuse blows, first make sure the wires aren’t 

touching to cause a short circuit, then replace the 
old fuse with one with the same rating.

•  Insulate unconnected wires with vinyl tape or other 

similar material. To prevent a short circuit, do not 
remove the caps on the ends of the unconnected 
wires or the terminals.

•  Secure the wires with cable clamps and wrap vinyl 

tape around the wires that comes into contact with 
metal parts to protect the wires and to prevent short 
circuit.

•  Connect the speaker wires correctly to the terminals 

to which they correspond. The unit may be 
damaged or fail to work if you share the 

¤

 wires or 

ground them to any metal part in the car.

•  When only two speakers are being connected to 

the system, connect the connectors either to both 
the front output terminals or to both the rear output 
terminals (do not mix front and rear). For example, 
if you connect the 

¢

 connector of the left speaker 

to a front output terminal, do not connect the 

¤


connector to a rear output terminal.

•  After the unit is installed, check whether the brake 

lamps, blinkers, wipers, etc. on the car are working 
properly.

•  Mount the unit so that the mounting angle is 30° 

or less.

•  Do not press hard on the panel surface when installing 

the unit to the vehicle. Otherwise scars, damage, or 
failure may result.

•  Reception may drop if there are metal objects near 

the Bluetooth antenna.

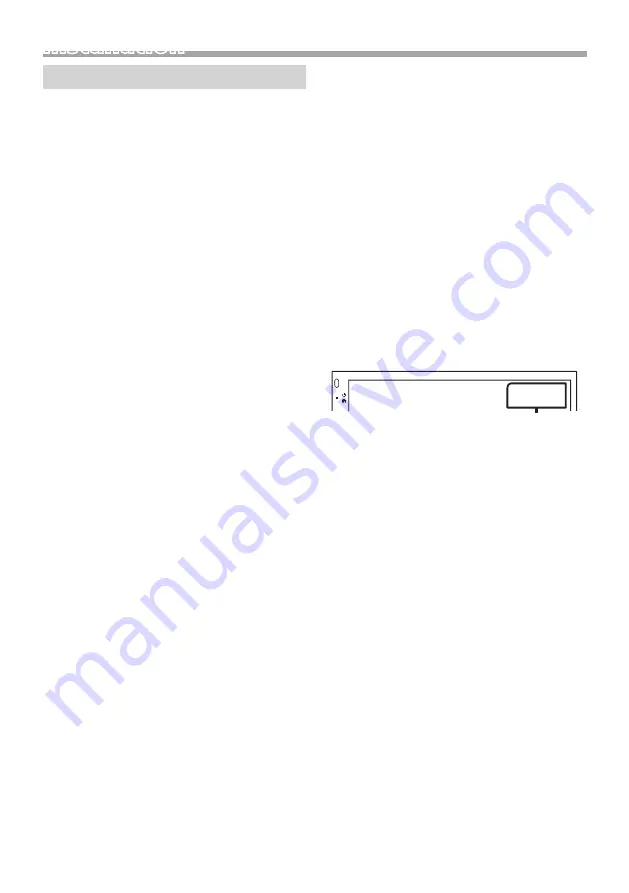
Bluetooth antenna unit

Summary of Contents for KW-M27DBT

Page 1: ...nstruction Manual etc is available from https www jvc net cs car B5A 3199 02 EN E 2021 JVCKENWOOD Corporation Model name indication position See Removing the trim plate P 25 Trim plate KW M27DBT MONITOR WITH RECEIVER INSTRUCTION MANUAL ...

Page 2: ...nstallation consult your JVC dealer Ñ Ñ Precautions on using this unit When you purchase optional accessories check with your JVC dealer to make sure that they work with your model and in your area The Radio Data System or Radio Broadcast Data System feature won t work where the service is not supported by any broadcasting station Ñ Ñ Protecting the monitor To protect the monitor from damage do no...

Page 3: ...es SETUP If you select ON for Parking Guidelines you can adjust the parking guidelines See To adjust the parking guidelines P 16 System Reset Touch System Reset and then touch YES to set all the settings to the initial default settings Bluetooth Displays the Bluetooth Settings screen P 17 Screen Dimmer Select the dimmer mode High Default Mid Low Demo Select the demonstration mode Default is ON Inf...

Page 4: ... the sound Pressing for 1 second turns the screen off When the screen is off touch the display to turn on the screen 6 Reset If the unit or the connected unit fails to operate properly the unit returns to factory settings when this button is pressed Common operations Ñ Ñ Turning on the power 1 Press the button Ñ Ñ Turning off the power 1 Press and hold the button Ñ Ñ Adjusting the volume 1 Press t...

Page 5: ... Displays the Mirroring screen P 14 When android device with Mirroring OB for JVC application installed is connected 4 Switches to an external component connected to the AV IN input terminal P 15 5 Displays the Hands Free screen P 18 6 Plays a Bluetooth audio player P 19 7 Switches to the digital radio broadcast P 6 8 Displays the SETUP screen P 3 List screen There are some common function keys in...

Page 6: ...ble service and component Displays the Digital Radio Setup screen P 7 3 Recalls the memorized service When touched for 2 seconds stores the current receiving service in memory 4 Returns to previous screen Displays the Audio screen P 20 Ñ Ñ Store a services You can store the current receiving service in memory 1 Tune in to a service you want to preset 2 Touch and hold 1 5 in which you want to store...

Page 7: ...s poor automatically switches to Radio Data System ON OFF Default Announcement Select Switches to the set Announcement service Related Service When you select ON the unit switches to a related service if exists when a DAB service network is not available Default is OFF Antenna Power Sets power supply to the Digital Radio antenna Set to ON when the Digital Radio antenna in use is equipped with a bo...

Page 8: ...tation in memory 4 Returns to previous screen Displays the Audio screen P 20 Ñ Ñ Auto memory You can preset 6 stations for the current band FM1 FM2 FM3 AM1 AM2 1 Touch FM or AM to select the band 2 Touch 3 Touch Auto Store The local stations with the strongest signals are found and stored automatically Ñ Ñ Manual memory You can store the current receiving station in memory 1 Tune in to a station y...

Page 9: ...ON OFF Default RDS 1 Displays the RDS Settings screen AF When station reception is poor automatically switches to the station that is broadcasting the same program over the same Radio Data System network ON Default OFF TA Switches to the traffic information automatically when the traffic bulletin starts TI indicator lights up ON OFF Default RDS Clock Sync Synchronizing the Radio Data System statio...

Page 10: ...nd Multi Card Reader Take backups of the audio files used with this unit The files may be erased depending on the operating conditions of the USB device We shall have no compensation for any damage arising from any erased data No USB device comes with this unit You need to purchase a commercially available USB device Cap the USB terminal whenever not using Playback operations Ñ Ñ Control the music...

Page 11: ... U H Plays or pauses E F Searches the previous next content Touch and hold to fast forward or fast backward 1 Searches file P 11 NORMAL 16 9 4 3 Select a screen mode 4 Returns to previous screen Displays the Audio screen P 20 Ñ Ñ Selecting a track in a list Searches file 1 Touch 1 2 Select whether you search by audio files video files 3 Touch to moves to the upper hierarchy 4 Touch the desired fol...

Page 12: ...8 Plus iPhone 8 iPhone 7 Plus iPhone 7 iPhone SE iPhone 6s Plus iPhone 6s iPhone 6 Plus NOTE If you start playback after connecting the iPod the music that has been played by the iPod is played first Cap the USB terminal whenever not using Playback operations Ñ Ñ Control the music you are listening to on the source control screen 1 5 4 3 2 1 Artwork Shown if the track contains artwork 2 Displays t...

Page 13: ...1 Touch 1 2 Touch desired item When you touch a category its contents are displayed 3 Touch desired item from the content list Playback starts Touch 6 to moves to the upper hierarchy NOTE The source control screen appears when you touch 6 at the top hierarchy ...

Page 14: ...t version of the Mirroring application Mirroring OB for JVC on your Android 2 Remove the cap of the USB terminal 3 Connect the Android smartphone P 27 4 Launch Mirroring App on your Android Smartphone 1 Touch to check mark 2 Touch OK to start Mirroring App 3 Touch to check mark 4 Touch START NOW to start capturing your Android screen 5 Start to enjoy Mirroring Ñ Ñ To disconnect the Android smartph...

Page 15: ...ion buttons are not displayed on the screen touch the display 1 NOTE When the picture from the rear view camera is displayed on the AV IN screen the picture output from the Visual Output terminal disappears Rear view camera To use a rear view camera the REVERSE lead connection is required For connecting a rear view camera P 26 Ñ Ñ Displaying the picture from the rear view camera The rear view scre...

Page 16: ...g brake to prevent the car from moving 1 Press the button 2 Touch 3 Touch System 4 Touch T or U of Parking Guidelines and set to ON 5 Touch Guidelines SETUP 6 Adjust the parking guidelines by selecting the mark 7 Adjusting the position of the selected mark A B C D Make sure that lines A and B are horizontally parallel and that lines C and D are of the same length NOTE Touch Initialize and then tou...

Page 17: ...egister a new Bluetooth device disconnect the Bluetooth device currently connected and then register the new device A new device cannot be registered if there are 8 registered Bluetooth units Delete unnecessary registration P 17 1 Turn on the Bluetooth function on your smartphone cell phone 2 Search the unit KW M27DBT from your smartphone cell phone If a PIN code is required enter the PIN code 000...

Page 18: ... call 1 Press the button 2 Touch Phone 3 See the table below for each operation method Call by entering a phone number 1 Enter a phone number with number keys 2 Touch Û Make a call Touch to delete the last entry Call using call records 1 Touch 2 Touch Incoming Calls Outgoing Calls Missed Calls 3 Select the phone number from the list Make a call Call using the phonebook 1 Touch 2 Select the name fr...

Page 19: ... file Repeat off U H Plays or pauses E F Searches the previous next content Touch and hold to fast forward or fast backward 1 Searches file P 19 4 Returns to previous screen Displays the Audio screen P 20 Displays the Voice Recognition screen NOTE Operations and display indications may differ according to their availability on the connected device You can access the voice recognition function of t...

Page 20: ...t Fader R S Adjust the front and rear volume balance 15 front to 15 rear INITIALIZE To clear the adjustment Listening Position Select a listening position from Front Left Front All Front Right and Middle INITIALIZE To clear the adjustment Equalizer Control 1 Press the EQ button 2 Touch Equalizer 3 Set each item as follows 1 2 3 4 1 You can select frequency bar and adjust its level 9 to 9 The adjus...

Page 21: ...ar speaker or subwoofer Phase Inversion Set the phase of subwoofer output to shift the phase 180 degrees When Subwoofer is selected INITIALIZE To clear the adjustment Listening Position DTA 1 Press the EQ button 2 Touch Position DTA 3 Touch Delay 4 Touch T or U to adjust the delay time of the selected speaker 5 Touch Level 6 Touch T or U to adjust the sound level of the selected speaker Sound Effe...

Page 22: ...le liquid or gas if the battery is left in an extremely high temperature surrounding environment and or subjected extremely low air pressure The battery pack or batteries shall not be exposed to excessive heat such as sunshine fire or the like Risk of fire explosion or the leakage of flammable liquid or gas if the battery is disposed into fire or a hot oven recharged shorted mechanically crushed o...

Page 23: ...ith a constant voltage supply such as with battery wires the battery may be drained If the console has a lid make sure to install the unit so that the front panel will not hit the lid when closing and opening If the fuse blows first make sure the wires aren t touching to cause a short circuit then replace the old fuse with one with the same rating Insulate unconnected wires with vinyl tape or othe...

Page 24: ...tions for each unit 3 Connect the ISO connector to the unit 4 Install the unit in your car 5 Reconnect the terminal of the battery 6 Press the reset button Installing the unit Ñ Ñ Non Japanese cars Bend the tabs of the mounting sleeve with a screwdriver or similar utensil and attach it in place NOTE Make sure that the unit is installed securely in place If the unit is unstable it may malfunction e...

Page 25: ... if necessary Ñ Ñ Removing the trim plate 1 Use the extraction key accessory 3 to lever out the four tabs two on the left part two on the right part 3 2 Pull the trim plate forward Ñ Ñ Removing the unit 1 Remove the trim plate by referring to step 1 in Removing the trim plate 2 Insert the extraction key accessory 2 deeply into the slot as shown The protrusion at the tip of the extraction key must ...

Page 26: ...ring wheel remote control feature you need an exclusive remote adapter not supplied matched to your car Connect to vehicle s reverse lamp harness when using the optional rear view camera Light Blue Yellow Steering remote control wire Fuse 15A Subwoofer Preout Cap Cap FM AM antenna input FM AM antenna Connector A Connector B USB device 2 USB terminal 1 0 8 m ISO Connector FRONT OUT REAR OUT VIDEO O...

Page 27: ...rol A 7 Red Ignition ACC A 8 Black Earth Ground Connection B 1 B 2 Purple Purple Black Rear Right B 3 B 4 Gray Gray Black Front Right B 5 B 6 White White Black Front Left B 7 B 8 Green Green Black Rear Left 1 Max 150mA 12V Speaker Impedance 4 8 Ω CAUTION Before you connect the commercially available ISO connectors to the unit check the following condition Make sure that the pin assignment of the c...

Page 28: ...rs to be trouble is not always serious Check the following points before calling a service center For operations with the external components refer also to the instructions supplied with the adapters used for the connections as well as the instructions supplied with the external components Ñ Ñ General No sound comes out of the speakers Adjust the volume to the optimum level Check the cords and con...

Page 29: ... signal reception The sound is interrupted or skipped while using a Bluetooth audio player Reduce the distance between the unit and the Bluetooth audio player Turn off then turn on the unit When the sound is not yet restored connect the player again The connected audio player cannot be controlled Check whether the connected audio player supports AVRCP Audio Video Remote Control Profile The Bluetoo...

Page 30: ...ower Class1 Maximum Communication range Line of sight approx 10m 32 8 ft Audio Codec SBC Profile Multi Profile support HFP V1 7 Hands Free Profile A2DP Advanced Audio Distribution Profile AVRCP V1 5 Audio Video Remote Control Profile PBAP Phonebook Access Profile Ñ Ñ DSP section Graphics equalizer Band 13 Band Frequency 62 5 100 160 250 400 630 1k 1 6k 2 5k 4k 6 3k 10k 16k Hz Level 9 9 X Over High...

Page 31: ...Voltage 11 16V 12V DC car battery Maximum Current 100 mA Ñ Ñ Video section Color System of External Video Input NTSC PAL External Video Input Level RCA jacks 1 Vp p 75 Ω External Audio Max Input Level RCA jacks 1 5 V 25 kΩ Video Output Level RCA jacks 1 Vp p 75 Ω Ñ Ñ Audio section Maximum Power Front Rear 45 W 4 Full Bandwidth Power Front Rear at less than 1 THD 16 W 4 Output frequency band 20 20 ...

Page 32: ...is list of conditions and the following disclaimer Redistributions in binary form must reproduce the above copyright notice this list of conditions and the following disclaimer in the documentation and or other materials provided with the distribution Neither the name of the Xiph org Foundation nor the names of its contributors may be used to endorse or promote products derived from this software ...

Page 33: ...ליך ניתן לא רגילה ביתית כאשפה עליו X במתקן סוללות וכן ישן ואלקטרוני חשמלי ציוד למחזר יש שלהם הלוואי ובתוצרי כאלה בפריטים לטפל המסוגל מתקן אודות פרטים לקבלת המקומית הרשות עם קשר צרו נאותים לאשפה והשלכה מיחזור אליכם הקרוב המיחזור בריאותנו על שליליות השפעות ולמנוע משאבים לשמר יעזרו הסביבה ועל Declaration of Conformity with regard to the Radio Equipment Regulations 2017 S I 2017 1206 Declaration of Co...

Page 34: ...7DBT cumple la Directiva 2014 53 EU El texto completo de la declaración de conformidad con la UE está disponible en la siguiente dirección de internet Português Deste modo a JVCKENWOOD declara que o equipamento de rádio KW M27DBT está em conformidade com a Diretiva 2014 53 UE O texto integral da declaração de conformidade da UE está disponível no seguinte endereço de internet Polska Niniejszym JVC...

Page 35: ...tuviškai Šiuo JVCKENWOOD pažymi kad radijo įranga KW M27DBT atitinka 2014 53 EB direktyvos reikalavimus Visą EB direktyvos atitikties deklaracijos tekstą galite rasti šiuo internetiniu adresu Malti B dan JVCKENWOOD jiddikjara li t tagħmir tar radju KW M27DBT huwa konformi mad Direttiva 2014 53 UE It test kollu tad dikjarazzjoni ta konformità huwa disponibbli fl indirizz intranet li ġej Українська ...

Page 36: ......

Reviews: