(No.MA249)1-13
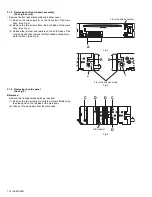
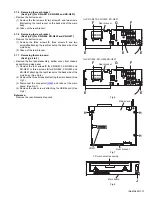
3.1.5 Removing the rear bracket
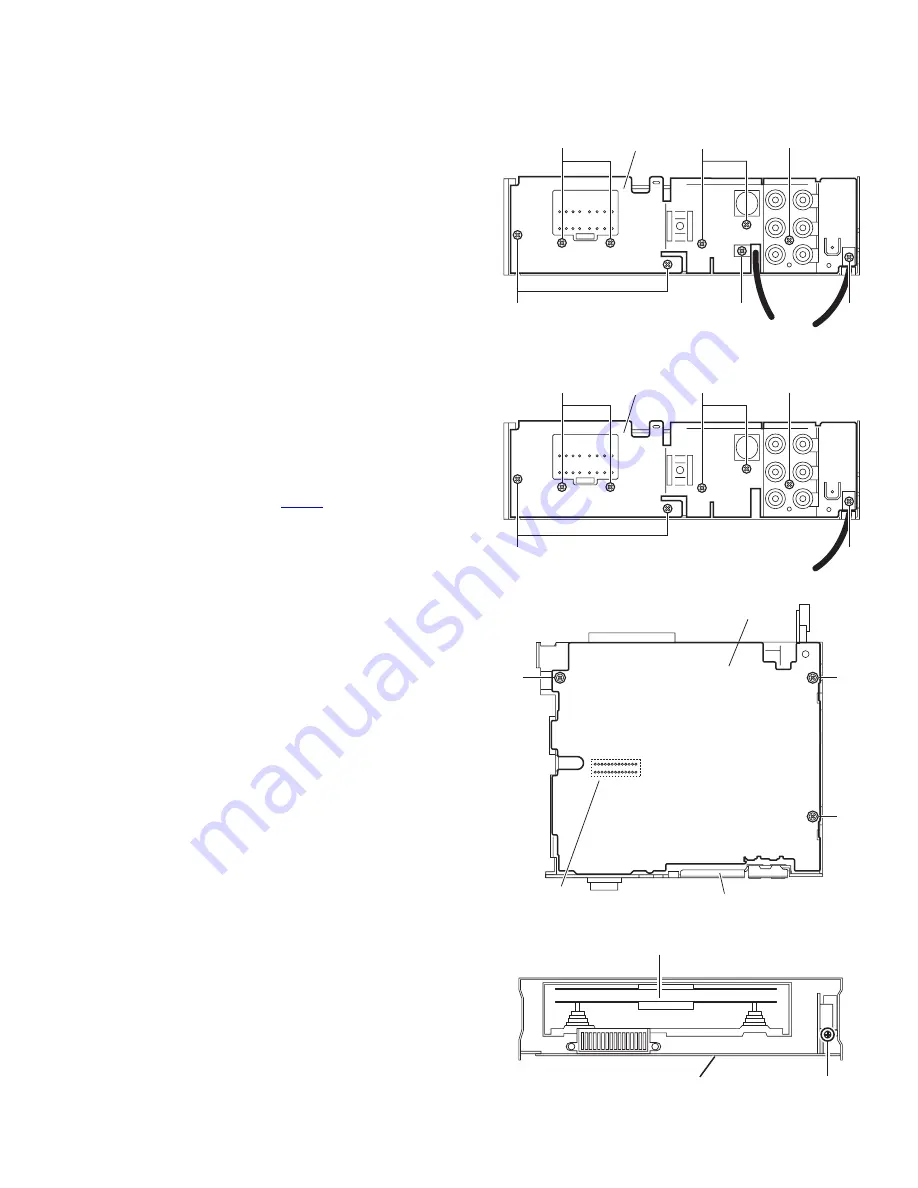
(See Fig.6) [For KD-AR870, KD-G820 and KD-G821]
• Remove the bottom cover.
(1) Remove the four screws
E
, two screws
F
and two screws
G
attaching the rear bracket on the back side of the main
body.
(2) Take out the rear bracket.
3.1.6 Removing the rear bracket
(See Fig.6) [For KD-G824, KD-G825 and KD-G827]
• Remove the bottom cover.
(1) Remove the three screws
E
, three screws
F
and two
screws
G
attaching the rear bracket on the back side of the
main body.
(2) Take out the rear bracket.
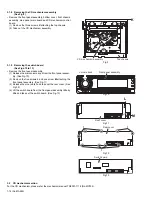
3.1.7 Removing the main board
(See Figs.6 to 8)
• Remove the front panel assembly, bottom cover, front chassis
assembly and side panel.
(1) Remove the four screws
E
for KD-AR870, KD-G820 and
KD-G821 or three screws
E
for KD-G824, KD-G825 and
KD-G827 attaching the rear bracket on the back side of the
main body. (See Fig.6.)
(2) Remove the three screws
H
attaching the main board. (See
Fig.7)
(3) Disconnect the connector
CN501
and take out the main
board. (See Fig.7)
(4) Remove the one screw
J
attaching the USB board. (See
Fig.8)
Reference:
Remove the rear bracket as required.
Fig.6
Fig.7
Fig.8
F
E
E
E
Rear bracket
F
G
for KD-AR870, KD-G820, KD-G821
F
E
E
Rear bracket
F
G
for KD-G824, KD-G825,KD-G827
Main board
H
H
H
CN501
Rear bracket
J
Main board
CD mechanism assembly
Summary of Contents for KD-AR870J
Page 23: ... No MA249 1 23 ...
Page 27: ... M E M O ...
Page 49: ... M E M O ...
Page 77: ...XXXXX 3 27 MEMO ...

