background image

ENGLISH

   - 12 -

Programme Selection (Previous or next

programme)

• Press “

” button to select the previous

programme.

•  Press  “

“  button  to  select  the  next

programme.

Programme Selection (direct access)

Press digit buttons on the  remote control to

select programmes between 0 and 9. TV will

switch to the selected programme. To select

programmes between 10 - 99, press the digit

buttons consecutively which programme you

want  to  select  (eg.  for  programme  27,  first

press 2 and then 7). When it is late to press

second  digit  button  only  the  first  digit

programme will be displayed. The limit of the

delay time is 3 seconds.
Example: PR6   press 6

 PR12   press 1 and 2

Press  directly  the  programme  number  to

reselect  single  digit  programmes.

Hint: 

The channel list numbers are assigned by the broad-

casters. Because not all channels are broadcast free-to-air

and stored by the receiver, the channel list numbers do not

run continuously. The fifteenth channel in the list, for ex-

ample, may not be channel number 15 but channel number
17.

Menu System

Your TV has been designed with a menu sys-

tem to provide an easy manipulation of a multi-

function system. The TV is controlled by choos-

ing  the  commands,  which  are  displayed  on

the screen.
Press the “

MENU

” button. The menu will be

displayed in the middle of the screen.

Press “ ” or “ ” button to select a menu title

and then “ ” or “ ” button to select a menu
item. Press “ ” / “ ” or “

OK

” buttons to enter

the menu item.
In AV modes, menus appear the same as in

TV mode except the Installation menu.

• Press the “

MENU

” button again to remove

menu.

• Press the “

BACK

” button to return to the pre-

vious menu.

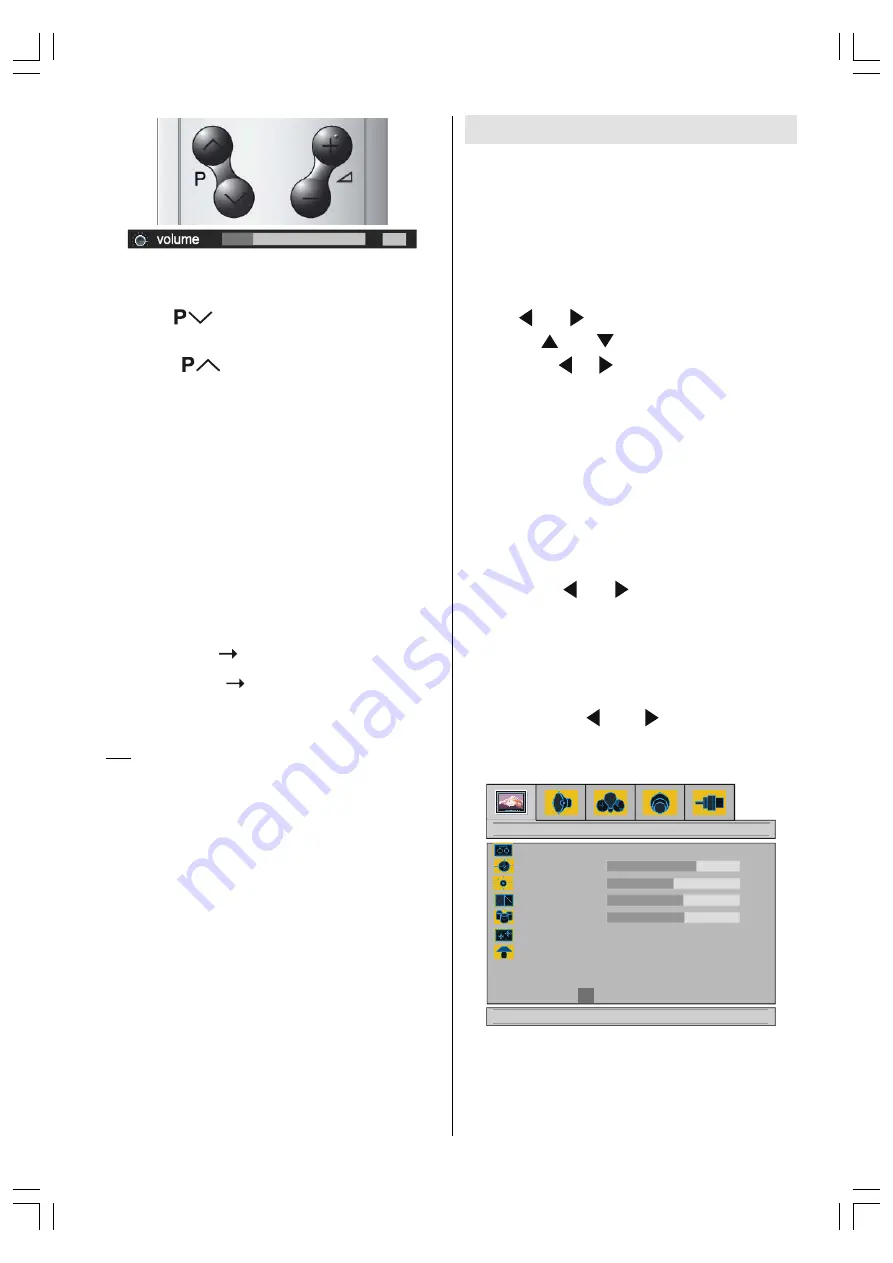
Picture Menu

By pressing “ ” or “ ” button, select the first

icon. Picture menu appears on the screen.

Setting Mode

• As you enter the picture menu, Mode will be

the first item.

•  By  pressing  “ ”  or  “ ”  button  you  may

choose one of these options:


Manual, Bright, Standard 

and

 Soft

.

GRZQIRUSLFWXUHVHWWLQJV

%ULJKW

&RQWUDVW

6KDUSQHVV
&RORXU

3LFWXUH


0RGH

0DQXDO

&RORXU7HPSHUDWXUH

1RUPDO

%ULJKW

0LQ

5HVHW

• 

Bright

Standard

 and 

Soft

 modes are all pre-

set. When these modes are selected Con-

trast,


Bright-1,  Sharpness  and  Colour  can

not be changed. They can only be changed

when 

Manual

 is selected as a picture mode.

01-ENG-1525-17MB18-1861UK_15B60SE.p65

30.06.2005, 15:09

12

Summary of Contents for InteriArt LT-15B60SE

Page 1: ...CH FRANÇAIS ITALIANO 1004TKH VT VT 2005 VICTOR COMPANY OF JAPAN LIMITED INSTRUCTIONS LCD TV GERÄT BEDIENUNGSANLEITUNG PANNEAU LCD TELEVISEUR MANUEL D INSTRUCTIONS TV A SCHERMO LCD ISTRUZIONI LT 15B60SE LCD PANEL TV ...

Page 2: ...ns where the temperature is likely to fall below 5ºC 41ºF Mains Supply The mains supply required for this equipment is 100 240 V AC 50 Hz Never connect to a DC supply or any other power source DO en sure that the TV is not standing on the mains lead DO NOT cut off the mains plug from this equipment this incorporates a special Radio Interference Filter the removal of which will impair its performan...

Page 3: ...on or has a standby mode Switch the equipment off and make sure your family know how to do this Special arrangements may need to be made for infirm or handicapped people DON T continue to operate the equipment if you are in any doubt about it working normally or it is damaged in any way switch off with draw the mains plug and consult your dealer DON T put the empty batteries into garbage instead o...

Page 4: ...or damage to the unit first firmly insert the small end of the power cord into the AC Adaptor unit it is no longer wobbly and then plug the larger end of power cord into an AC outlet CAUTION The TV screen may be damaged if the TV is carried as shown in the diagram WARNING TO PREVENTFIRE OR SHOCK HAZARD DO NOT EXPOSETHISAPPLIANCETO RAIN OR MOISTURE 01 ENG 1525 17MB18 1861UK_15B60SE p65 30 06 2005 1...

Page 5: ...ed data whether caused during normal operation or misuse of the product WARNING NEVER LEAVE A STATIONARY IMAGE ON THE SCREEN If stationary images generated by TELETEXT CHANNELIDENTIFICATION LOGOS COM PUTER DISPLAYS VIDEO GAMES ON SCREEN MENUS etc are left on the TV screen for any length of time they could be come permanently ingrained If you use your television to display completely still images o...

Page 6: ...button MENU button Cursor Up button OK button Cursor Right button BACK button Volume Up Down buttons Teletext VCR DVD Control buttons Programme Up Down buttons Cursor Down button Teletext Button Cursor Left button Stereo Bilingual button GREEN Hyper Sound On Off button RED ZOOM Mode button Information Button Mute button 01 ENG 1525 17MB18 1861UK_15B60SE p65 30 06 2005 15 09 5 ...

Page 7: ...ENGLISH 6 ControlPanelButtons 67 1 92 80 2 1 92 80 83 352 5 0 2 1 352 5 0 83 0 18 79 9 2 63 5 63 5 32 5 03 1 5 5 5 9 5 01 ENG 1525 17MB18 1861UK_15B60SE p65 30 06 2005 15 09 6 ...

Page 8: ... TV screen Tilt the TV up and down While holding the stand with one hand which should be on lower level of the stand for avoiding trapping use your other hand to hold the middle of the top of the TV and slowly tilt the TV up and down How to remove the stand 5 029 7 6 5 6 67 1 01 ENG 1525 17MB18 1861UK_15B60SE p65 30 06 2005 15 09 7 ...

Page 9: ... TV this will prevent it from falling over Use curtains or blinds to prevent direct sunlight falling on the screen A floor and table top stand are available for this television or and angled bracket which enables the TV to be wall mounted The LCD display panels are manufactured using an extremely high level of precision technol ogy however sometimes some parts of the screen may be missing picture ...

Page 10: ...ng Sleep timer Child lock Auto 4 3 16 9 Automatic sound mute when no transmis sion When no valid signal is detected after 5 min utes the TV switches itself automatically to stand by mode NTSC Playback PLL Frequency Search PC input Support Up to 1024 x 768 BeforeSwitchingonyourTV Power connection Only use the adaptor supplied with this prod uct 7R 32 5 1387 9 WHUPLQDO DGDSWRU IMPORTANT The TV set i...

Page 11: ...a used old battery or a new one or mixed battery types Remove dead batteries immediately to prevent acid from leaking into the battery compartment SwitchingtheTVON OFF To switch the TV on Your TV will switch on in two steps 1 Connect the power supply cord to the sys tem Then the TV switches itself to stand by mode and the power lamp becomes red 2 To switch on the TV from stand by mode either Press...

Page 12: ...amme selection can be made by using the buttons on the bottom of the TV Operating with the buttons on the TV Volume Setting Press button to decrease volume or button to increase volume so a vol ume level scale slider will be displayed at the middle of the bottom on the screen Programme Selection Press P button to select the next pro gramme or P button to select the previ ous programme Switching in...

Page 13: ...stem Your TV has been designed with a menu sys tem to provide an easy manipulation of a multi function system The TV is controlled by choos ing the commands which are displayed on the screen Press the MENU button The menu will be displayed in the middle of the screen Press or button to select a menu title and then or button to select a menu item Press or OK buttons to enter the menu item In AV mod...

Page 14: ...olour Tem perature Press or button to select Warm Cool or Normal Setting Bright 2 This item changes the back light of the pic ture Using or button select Bright 2 Press or buttontoselect Min Med or Max Setting Hue This item is displayed in Picture menu when the TV receives an NTSC signal Using or button select Hue Press button to increase hue level Press button to decrease hue level ULJKW OHIW WR ...

Page 15: ...Menu all settings are stored automatically Feature Menu By pressing or button select the third icon Feature menu appears on the screen GRZQ IRU IHDWXUH VHWWLQJV DQJXDJH KLOG RFN HDWXUH 6OHHS 7LPHU 2II 2II 2Q QJOLVK OXH DFN 2II 2Q Sleep Timer The Sleep Timer is used to turn the TV off after a defined period of time after selecting this item The timer can be programmed between Off and 120 minutes in...

Page 16: ... exit Selecting Band Band can be chosen either C or S by pressing or button Selecting Channel Channel can be changed by or button or by Digit Buttons Selecting Colour System Using or button on Colour System you can change the colour system to PAL SECAMorAUTO Note In EXT mode you can choose NTSC 3 58 and NTSC 4 43 as well Selecting Sound System Using or button on Sound System you can change the sta...

Page 17: ...e s loca tion Press the direction buttons to select a programme and press the GREEN button Then select another programme and press the GREEN button again The first selected programme moves into the location of the sec ond selected programme Using the YELLOW button you can delete any programme you want A P S Auto Programming System By pressing button select the third icon A P S menu appears on the ...

Page 18: ...does not have teletext transmission no time information will be displayed The time information will disappear after pressing the button again Sound Indicator button is used to select Mono or Ste reo or Dual I or Dual II 0RQR In Mono broadcast or in forced mono for ste reo broadcast 6WHUHR In Stereo broadcast XDO If dual broadcast is detected Dual I is selected in default and also can be selected a...

Page 19: ...n be changed by pressing Red button You can change the screen size ac cording to the picture aspect ratio Select the optimum one from the following ZOOM modes Auto 4 3 and 16 9 AUTO When a WSS Wide Screen Signalling sig nal which shows the aspect ratio of the pic ture is included in the broadcast signal or the signal from an external device the TV auto matically changes the ZOOM mode to 4 3 or 16 ...

Page 20: ...e screen Select H Position item by using or button Use or button to adjust the value Press MENU buttonor BACK buttontostore the value Vertical Position This item shifts the image vertically towards the top or bottom of the screen Select V Position item by using or button Use or button to adjust the value Press MENU buttonor BACK buttontostore the value Dot Clock Dot Clock adjustments correct inter...

Page 21: ... the page number will be displayed on the upper left corner of the screen when the selected page is found Now you can display this tele text page by pressing button To Select Double Height Text Press button for the top half of the infor mation page to be displayed in double height text Press button again for the bottom half of the information page to be displayed in double height text Press button...

Page 22: ...t screen backward one page at a time For Fastext and Toptext The subject heading for the information may have a particular colour Pressanappropriate RED GREEN YELLOW or BLUE button in order to reach the relevant page quickly For TOPTEXT If Toptext transmission is present colour coded buttons will appear in status row If Toptext transmission is not present status row will not appear In Toptext mode...

Page 23: ...erial cable Connect the Video Recorder to the EXT 1 ter minal with the SCART cable or connect it to the EXT 2 terminal with the audio and video cables NTSC Playback Connect a NTSC video recorder to a terminal Then press AV button to select the corre sponding AV mode NTSC 3 58 4 43 system is detected automati cally in AV mode Camera and Camcorder To connect to the EXT 2 terminal Connect your camera...

Page 24: ...ENGLISH 23 3 8 2 1 17 11 7 1 3725 3 1387 9 9 9 9 7 6 9 2 1 8 2 5 9 2 1 3 21 PeripheralEquipmentConnections 6 5 01 ENG 1525 17MB18 1861UK_15B60SE p65 30 06 2005 15 09 23 ...

Page 25: ... 2 8 7 DECODER FORSATELLITERECEIVER VIDEO HEADPHONE AUDIO 9 8 DQWHQQD 9 DQWHQQD 5RXQG RKP FRD LDO FDEOH 5RXQG RKP FRD LDO FDEOH ODW RKP WZLQ OHDG FDEOH 5HDU RI 79 5HDU RI 79 2XWGRRU QWHQQD RQQHFWLRQV AntennaConnections 01 ENG 1525 17MB18 1861UK_15B60SE p65 30 06 2005 15 09 24 ...

Page 26: ...nc frequency range of 30 57 KHz The following table is an illustration of some of the typical video display modes RUL RQWDO 9HUWLFDO RU N 9HU 0RGH UHTXHQF 5HVROXWLRQ The native resolution of the TFT LCD Panel is 1024 x 768 Therefore using Mode 6 is advised to get the best PC input display quality 01 ENG 1525 17MB18 1861UK_15B60SE p65 30 06 2005 15 09 25 ...

Page 27: ... on Display Screen Is the aerial connected properly Are the plugs connected tightly to the aerial socket Is the aerial cable damaged Are suitable plugs used to connect the aerial If you are in doubt consult your dealer No Image means that your TV is not receiving any transmission Have you pressed the cor rect buttons on the remote control Try once more PC Picture If no PC picture appears check tha...

Page 28: ...s German Nicam Stereo Audio Output 2 x 3 WRMS 10 THD EXT 1Terminal Euroconnector 21 pin SCART 1 back of the cabinet Video Input S Video Y C input Audio L R Inputs and RGB inputs are available TV broadcast outputs Video and Audio L R are available EXT 2Terminal RCA connectors x 3 side of the cabinet S VIDEO connector x 1 side of the cabinet Video input S VIDEO Y C input and Audio L R inputs are ava...

Reviews: