background image

16

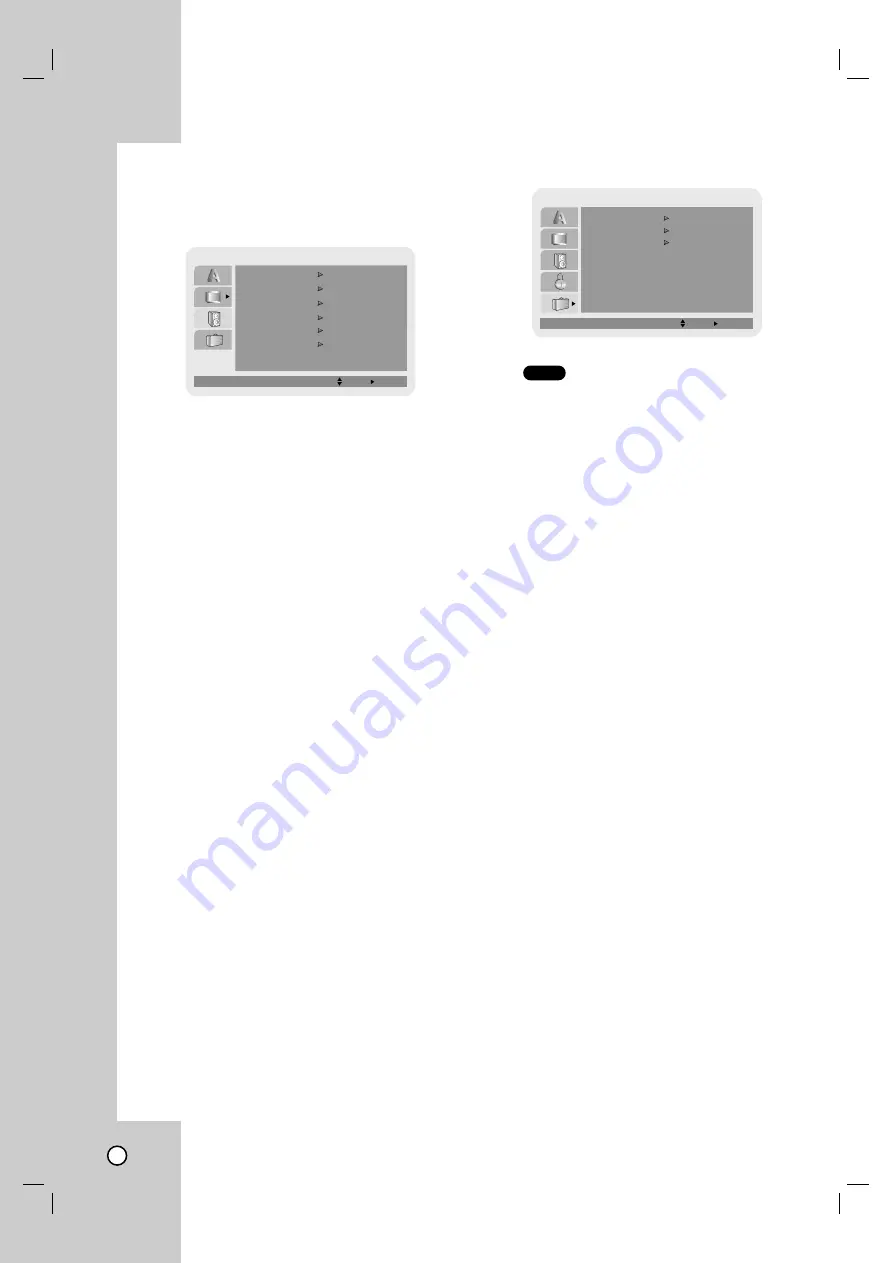
AUDIO

Each DVD disc has a variety of audio output options.
Set the player’s AUDIO options according to the type
of audio system you use. 

Dolby Digital / DTS / MPEG

Bitstream –

Select “Bitstream” if you connect this

DVD player’s DIGITAL OUT jack to an amplifier or
other equipment with a Dolby Digital, DTS or
MPEG decoder.

PCM (for Dolby Digital / MPEG) –

Select when

connected to a two-channel digital stereo amplifi-
er. DVDs encoded in Dolby Digital or MPEG will
be automatically downmixed to two-channel PCM
audio.

Off (for DTS):

If you select “Off”, the DTS signal

is not output through the DIGITAL OUT jack.

Sample Freq. (Frequency)

If your receiver or amplifier is NOT capable of han-
dling 96 kHz signals, select 48 kHz. When this choice
is made, this unit automatically converts any 96 kHz
signals to 48 kHz so your system can decode them. 

If your receiver or amplifier is capable of handling 96
kHz signals, select 96 kHz.

Check the documentation for your amplifier to verify
its capabilities.

Dynamic Range Control (DRC)

With the DVD format, you can hear a program’s
soundtrack in the most accurate and realistic presen-
tation. However, you may wish to compress the
dynamic range of the audio output (the difference
between the loudest sounds and the quietest ones).
This allows you to listen to a movie at a lower volume
without losing clarity of sound. Set DRC to On for this
effect.

Vocal

Set to On only when a multi-channel karaoke DVD is
playing. The karaoke channels on the disc mix into
normal stereo sound.

OTHERS

PBC

Set Playback Control (PBC) to On or Off.

On

: Video CDs with PBC are played according to the  

PBC.

Off

: Video CDs with PBC are played the same way

as Audio CDs.

B.L.E. (Black Level Expansion) 

To select the black level of playback pictures. Set
your preference and monitor’s ability.

On: 

Expanded grey scale. (0 IRE cut off)

Off:

Standard grey scale. (7.5 IRE cut off)

DivX(R) VOD 

We provide you the DivX® VOD (Video On Demand)
registration code that allows you to rent and purchase

videos using the DivX® VOD service. For more infor-
mation, visit www.divx.com/vod.

1. Select “DivX(R) VOD” option then press 

B

.

2. Press ENTER (OK) while “Select” is selected and

the registration code will appear. 
Use the registration code to purchase or rent the

videos from DivX® VOD service at
www.divx.com/vod. Follow the instructions and
download the video onto a disc for playback on
this unit.

3. Press ENTER (OK) to exit.

Note:

All the downloaded videos from DivX® VOD can only
be played back on this unit.

VCD

AUDIO

Dolby Digital

Bitstream

PCM

48 kHz

Bitstream

DTS   

MPEG 

Sample Freq.

On

DRC

Move

Select         

Off

Vocal

On

PBC

OTHERS

Move

Select

On

B.L.E.

Select

DivX(R) VOD

Summary of Contents for HR-XVC14BU

Page 1: ... DVD PLAYER VIDEO CASSETTE RECORDER INSTRUCTIONS LPT1148 001A For customer use Enter below the Model No and Serial No which are located on the rear of cabinet Retain this information for future reference Model No Serial No ...

Page 2: ... generates uses and can radiate radio fre quency energy and if not installed and used in accordance with the instructions may cause harmful interference to radio communications However there is no guarantee that interference will not occur in a particular installation If this equipment does cause harmful interference to radio or television reception which can be determined by turning the equipment...

Page 3: ... plug has two blades and a third grounding prong The wide blade or the third prong are provided for your safety If the provided plug does not fit into your outlet consult an electrician for replacement of the obsolete outlet 10 Protect the power cord from being walked on or pinched particularly at plugs convenience recepta cles and the point where they exit from the product 11 Only use attachments...

Page 4: ...6 B L E Black Level Expansion 16 DivX R VOD 16 Remote Control Function 16 Operation 18 VCR Tape Playback 18 Basic Instructions 18 Auto Tracking 18 Manual Tracking 18 Search 18 Still Picture and Frame by Frame Playback 18 Slow Motion 18 CM SKIP Commercial Skip 19 VCR Tape Recording 19 20 Basic Recording One Touch Recording 19 Instant Timer Recording 19 Manual Timer Programming 20 Timer Link Recordi...

Page 5: ...mbol All discs listed below DVD and finalized DVD R RW Video CDs Audio CDs DivX files About the Symbol Display may appear on your TV display during opera tion and indicates that the function is not permitted by this unit or the disc Notes on Discs Handling Discs Do not touch the playback side of the disc Hold the disc by the edges so that fingerprints do not get on the surface Never stick paper or...

Page 6: ...disc cannot play If you try to play a DVD with a different regional code from your player the message Check Regional Code appears on the TV screen Notes on Copyrights It is forbidden by law to copy broadcast show broadcast via cable play in public or rent copyright ed material without permission This product features the copy protection function developed by Macrovision Copy protection signals are...

Page 7: ...tton for about two seconds to search backward VCR Rewinds the tape during the stop mode or for fast reverse picture search e PLAY N N Starts playback of a disc or tape f FF M M DVD Skip to next chapter or track Press and hold for two seconds for a fast forward search VCR Advances the tape during the STOP mode or for fast forward picture search g STOP x x Stops playback of the disc or tape h PAUSE ...

Page 8: ...picture search N N PLAY Starts playback 0 9 Selects numbered options in a menu PROGRAM Shows or hides Program menu CLEAR 0000 Removes a mark on the Marker Search menu c A MONITOR Selects an audio language DVD SUBTITLE Selects a subtitle language ANGLE Selects a DVD camera angle if available ZOOM Enlarges DVD video image MARKER Marks any point during playback SEARCH Displays Marker Search menu TITL...

Page 9: ...SSIVE SCAN VIDEO OUT Y Pb Pr DVD EXCLUSIVE OUT Connect to a TV with Y Pb Pr inputs d AUDIO OUT Left Right DVD EXCLUSIVE OUT Connect to a TV or other equipment with audio inputs e AC Power Cord Plug into the power source f COAXIAL DIGITAL AUDIO OUT jack DVD EXCLUSIVE OUT Connect to digital coaxial audio equipment a b c d e f Rear Panel Caution Do not touch the inner pins of the jacks on the rear pa...

Page 10: ...t to the audio left right in jacks on the TV using the supplied audio cables A1 Note If you use this connection set the TV s source selec tor to VIDEO Optional TV Connections These connections support only DVD playback The tuner and VCR still output through the DVD VCR OUT A1 V jacks Component Video Progressive Scan connection If your television is a high definition or digital ready television you...

Page 11: ...g the optional audio video cables Refer to page 21 for Timer Link Recording Accessory Audio Video A V Connections to unit Connect the VCR IN LINE 1 or LINE 2 jacks on the unit to the audio video out jacks on your accessory component using the optional audio video cables Refer to page 19 for Basic Recording Preparation VIDEO OUT AUDIO OUT Cable Satellite box Rear of the unit ...

Page 12: ...el sound A digital multi channel connection provides the best sound quality For this you need a multi channel Audio Video receiver that supports one or more of the audio formats supported by your unit MPEG 2 Dolby Digital and DTS Check the receiver manual and the logos on the front of the receiver Caution Due to the DTS Licensing agreement the digital output will be in DTS digital out when DTS aud...

Page 13: ...ses the 12 hour system Be sure to set AM and PM correctly SETUP FUNCTION OSD The on screen display can be turned on or off AUDIO MODE The unit has two separate audio playback systems the high quality VHS Hi Fi system and standard NORMAL mono system The same audio is generally recorded on both systems The VHS Hi Fi system plays on separate left and right channels and the NORMAL system plays monaura...

Page 14: ...n also set a language for the subtitles and the Setup menu among other things For details on each Setup menu item see pages 15 to 16 To display and exit the Menu Press SETUP MENU to display the menu A second press of SETUP MENU will take you back to initial screen To go to the next level Press B on the Remote Control To go back to the previous level Press b on the Remote Control General Operation ...

Page 15: ... with bands on the upper and lower portions of the screen Panscan Automatically displays the wide pic ture on the entire screen and cuts off the portions that do not fit Progressive Scan Progressive Scan Video provides the highest quality pictures with less flickering If you are using the Component Video jacks for con nection to a TV or a monitor that is compatible with a progressive scan signal s...

Page 16: ...e loudest sounds and the quietest ones This allows you to listen to a movie at a lower volume without losing clarity of sound Set DRC to On for this effect Vocal Set to On only when a multi channel karaoke DVD is playing The karaoke channels on the disc mix into normal stereo sound OTHERS PBC Set Playback Control PBC to On or Off On Video CDs with PBC are played according to the PBC Off Video CDs ...

Page 17: ...t to respond to A or B code signals Keep pressing ENTER OK down during step 1 1 Press the number Key 1 for A 2 for B or 3 for C to change the remote control code 2 Ensure the unit in VCR mode and then turn off the power 3 Press B on the unit for over 5 seconds while the unit is turned off The code currently set appears on the front display panel 4 Press x STOP on the remote control to change the u...

Page 18: ...arch This function lets you visually search for a tape sec tion in either direction forward and backward During the high speed picture search modes the audio is muted and horizontal lines noise bars appear Also a short time is needed to stabilize the tape speed when re entering the PLAY mode so slight interfer ence may be observed during this time To search 1 Press m REW or M FF during playback Pr...

Page 19: ...to continue recording press X PAUSE or press z REC After 5 minutes in PAUSE mode the unit stops automatically to protect the tape and the video heads Instant Timer Recording With this feature you can record for a preset length without using the program timer Note Instant Timer recording is not available when the external timer record is in progress 1 Turn on unit and the TV 2 Insert a video casset...

Page 20: ... recording If you make a mistake or want to change a set ting use v to select the option and correct it using b B If the program preset time is past the PAST TIME PROGRAMMED message appears on the TV screen Return to the incorrect program and program it with the correct time If you enter a past date the timer recording will be performed on that date of the next year If the power fails or the unit ...

Page 21: ... during external timer recording this unit will be stop the external timer recording and turns off the power automatically If the power of the external device is on again this unit will be start the external timer record ing again Press x STOP to stop recording intentionally while external timer recording is in progress The external timer record is available only for the device that is connected w...

Page 22: ...h contents recorded on it is inserted into the VCR the real time counter shows length of the tape running in hours minutes and seconds Press DISPLAY to select the real time counter display Every press of DISPLAY changes the TV screen as illustrated below Counter Memory This feature is useful if there is a section of tape you want to view immediately after recording or if you want to return to the ...

Page 23: ...mpt to hook up more than one televi sion set to the unit for either recording or playback VCR Auto Play System This unit features automatic playback When you load a tape with the safety tab removed the following occurs The Output Source is changed to VCR mode automatically The power turns on automatically and playback begins At the end of the tape the unit stops then rewinds The tape is ejected af...

Page 24: ...on one at time to select a point A and point B and repeats a sequence from point A Starting point to point B End point ZOOM During playback or pause mode press ZOOM to enlarge the video image 3 steps You can move through the zoomed picture using b B v V buttons Press CLEAR 0000 to exit RANDOM During playback or in stop mode press RANDOM for random playback TITLE If the current DVD title has a menu...

Page 25: ...ized points To enter a marker press MARKER at the desired point on the disc The Marker icon appears on the TV screen briefly Repeat to enter up to nine markers To Recall or Clear a Marked Scene 1 During disc playback press SEARCH The marker search menu appears on the screen 2 Within 10 seconds press b B to select a marker number that you want to recall or clear 3 Press ENTER OK and playback starts...

Page 26: ... PLAY or ENTER OK to start Playback begins in the order in which you pro grammed the tracks Playback stops after all of the tracks on the Program list have played once 6 To resume normal playback from programmed playback select a track on the list and then press N PLAY Repeat Programmed Tracks Press REPEAT to select a desired repeat mode Track repeats the current track All repeats all the tracks o...

Page 27: ...show press N PLAY or press X PAUSE again Moving to another File Press or or cursor b or B once while viewing a picture to advance to the next or previous file Zoom During watching pictures press ZOOM to enlarge the video image 3 steps You can move through the zoomed picture using b B v V buttons Rotating the picture Press v V during showing a picture to rotate the picture clockwise or counter cloc...

Page 28: ...g play back press and hold SUBTITLE about 3 seconds then press b B to select another language code until the subtitle is displayed properly Note The DivX subtitle file name has to be identified with the DivX file name to display by this unit DivX disc compatibility with this player is limited as follows Available resolution size of the DivX file is under 720x576 W x H pixel The file name of the Di...

Page 29: ...ter before contacting a service technician Handling the Unit When shipping the unit Please save the original shipping carton and packing materials If you need to ship the unit for maximum protection re pack the unit as it was originally packed at the factory Keeping the exterior surfaces clean Do not use volatile liquids such as insecticide spray near the unit Do not leave rubber or plastic produc...

Page 30: ...sh 7585 Laothian 7679 Latin 7665 Latvian Lettish 7686 Language Code Lingala 7678 Lithuanian 7684 Macedonian 7775 Malagasy 7771 Malay 7783 Malayalam 7776 Maltese 7784 Maori 7773 Marathi 7782 Moldavian 7779 Mongolian 7778 Nauru 7865 Nepali 7869 Norwegian 7879 Oriya 7982 Panjabi 8065 Pashto Pushto 8083 Persian 7065 Polish 8076 Portuguese 8084 Quechua 8185 Rhaeto Romance 8277 Rumanian 8279 Russian 828...

Page 31: ...ct the AC power plug to the AC outlet securely Insert a disc or tape Check that the disc or tape indicator in the display window is lit Select the appropriate video input mode on the TV so the picture from the unit player appears on the TV screen Check TV capability Check mode of connections eg Components etc The cable is correctly connected Select the correct input mode of the audio receiver so y...

Page 32: ... Remote Control use the same buttons for VCR and DVD functions ex PLAY The current remote control code does not match the unit Camcorder is off Unit SOURCE SELECT is not set to LINE1 or LINE2 Correction Eject the cassette tape Select STEREO by repeatedly pressing A MONITOR on the Remote Control Remove the obstacle Replace the batteries with new ones Point the Remote Control at the remote sensor of...

Page 33: ...CR Specifications Head system Four head helical scan azimuth system Timer 12 hour display type with AM PM Tape speed SP 33 35 mm sec LP 16 67 mm sec SLP 11 12 mm sec Tape width 12 7 mm Maximum recording time SP 2 HOURS T 120 SLP 6 HOURS T 120 8 HOURS T 160 Rewind time About 3 minutes T 120 Frequency range 20 Hz to 20 kHz Signal to noise ratio More than 43 dB Dynamic range More than 88 dB Channel s...

Page 34: ...34 Warranty Only in U S A ...

Page 35: ...35 MEMO ...

Page 36: ...US HR XVC14BU HR XVC15SU Printed in Indonesia 0207MNH OT OT P N MFL37329833 ...

Reviews: