2-2
2. In case of mechanical failure
If you cannot remove the cassette tape which is loaded be-
cause of any mechanical failure, manually remove it by tak-
ing the following steps.
(1) Unplug the power cable and remove the top cover, front
panel assembly and others so that the mechanism as-
sembly is visible. (See SECTION 1 DASASSEMBLY.)
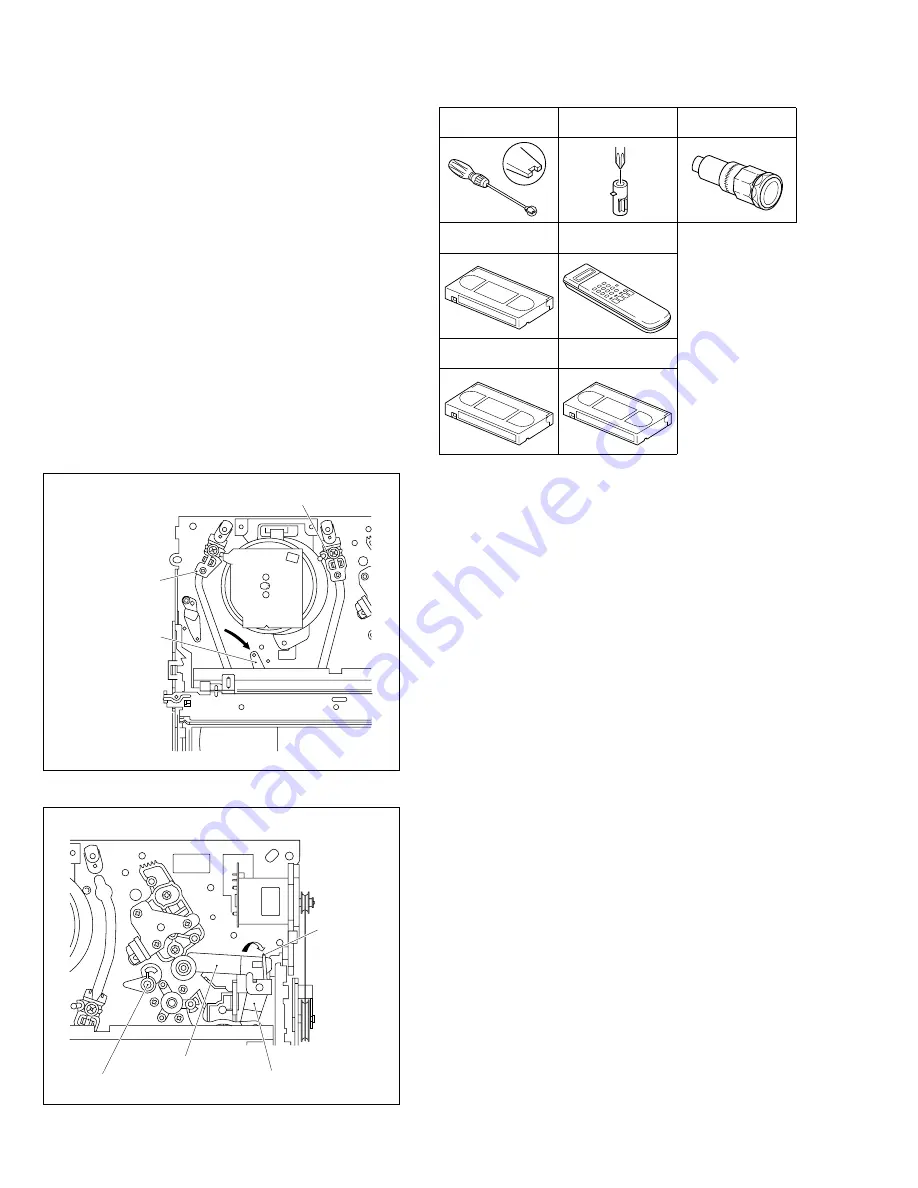
(2) While keeping the tension arm assembly of the mecha-
nism assembly free from tension, pull the tape on the pole
base assembly (supply or take-up side) out of the guide
roller. (See Fig.2-1-3c.)
(3) Take the spring of the pinch roller arm assembly off the
hook of the press lever assembly, and detach it from the
tape. (See Fig.2-1-3d.)
(4) In the same way as in the electrical failure instructions in
2.1.3-1(5), remove the top guide.
(5) Raise the cassette tape cover. By keeping it in that posi-
tion, draw out the cassette tape case from the cassette
holder and take out the tape.
(6) By hanging the pinch roller arm assembly spring back
on the hook, take up the slack of the tape into the cas-
sette.
Fig. 2-1-3d
Fig. 2-1-3c
Pole base assembly (take-up side)
Pole base assembly
(supply side)
Tension arm assembly
Guide pole guard
Pinch roller arm assembly
Press lever assembly
Take the spring
off the hook, and
detach it from the
tape.
2.1.4 Jigs and tools required for adjustment
Roller driver
PTU94002
A/C head positioning tool
PTU94010
Back tension cassette gauge
PUJ48076-2
Jig RCU
PTU94023B
Torque gauge
PUJ48075-2
Alignment tape
(SP, stairstep, PAL)
MHPE
Alignment tape
(LP, stairstep, PAL)
MHPE-L


