background image

safety first

2

Safety Precautions

The rating plate and the safety caution are on the rear of the unit.

WARNING: DANGEROUS VOLTAGE INSIDE

WARNING: TO PREVENT FIRE OR SHOCK HAZARD, DO NOT EXPOSE THIS UNIT TO RAIN

OR MOISTURE.

IMPORTANT

Please read the various precautions on pages 2–4 of this instruction manual before installing or

operating the recorder.

It should be noted that it may be unlawful to re-record pre-recorded tapes, records, or discs

without the consent of the owner of copyright in the sound or video recording, broadcast or cable
programme and in any literary, dramatic, musical, or artistic work embodied therein.

IMPORTANT

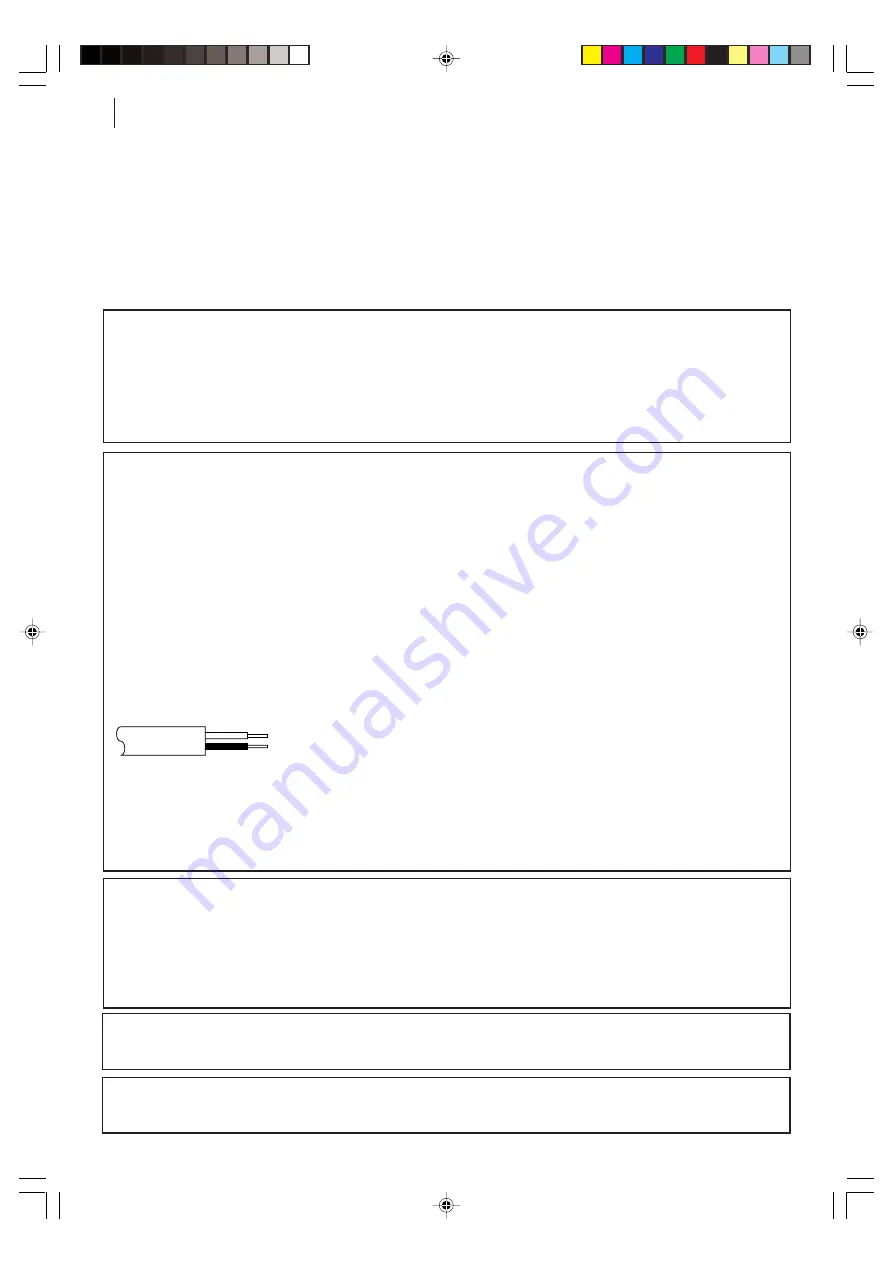
Connection to the mains supply in the United Kingdom. DO NOT cut off the mains plug from
this equipment.

 If the plug fitted is not suitable for the power points in your home or the cable is

too short to reach a power point, then obtain a proper safety approved extension lead/adapter or
consult your dealer.

In the unlikely event of the plug fuse failing be sure to replace the fuse only with an identical
approved type, as originally fitted, and to replace the fuse cover. If the fuse fails again consult
your nearest JVC dealer.

If nonetheless the mains plug is cut off remove the fuse and dispose of the plug immediately, to
avoid a possible shock hazard by inadvertent connection to the mains supply.
If this product is not supplied fitted with a mains plug then follow the instructions given below:

DO NOT

 make any connection to the Larger Terminal coded E or Green.

The wires in the mains lead are coloured  in accordance with the following code:

Blue to N (Neutral) or Black
Brown to L (Live) or Red

If these colours do not correspond with the terminal   identifications of your plug, connect as
follows:
Blue wire to terminal coded N (Neutral) or coloured Black.
Brown wire to terminal coded L (Live) or coloured Red.

If in doubt — consult a competent electrician.

CAUTION

When you are not using the recorder for a long period of time, it is recommended that you
disconnect the power cord from the mains outlet.

Dangerous voltage inside. Refer internal servicing to qualified service personnel. To prevent
electric shock or fire hazard, remove the power cord from the mains outlet prior to connecting or
disconnecting any signal lead or aerial.

The 

STANDBY/ON


o

 button does not completely shut off mains power from the unit, but switches

operating current on and off. “

y

 ” shows electrical power standby and “ 

z

” shows 

ON

.

Video tapes recorded with this video recorder in the LP (Long Play) mode cannot be played back on
a single-speed video recorder.

  HR-S5965/5966EK-EN/p02-07

2/19/03, 04:07 PM

2

Summary of Contents for HR-S5965EK

Page 1: ...DIO 0000 VPS PDC 3 5 3 2 4 30 SEC PR PR PR ENTER LP00000 000 VCR TV i SAT PR I S VHS VCR 625 HR S5965EK HR S5966EK VIDEO CASSETTE RECORDER INSTRUCTIONS LPT0768 001A HR S5965 5966EK Cover 2 19 03 03 48 PM 1 ...

Page 2: ... remove the fuse and dispose of the plug immediately to avoid a possible shock hazard by inadvertent connection to the mains supply If this product is not supplied fitted with a mains plug then follow the instructions given below DO NOT make any connection to the Larger Terminal coded E or Green The wires in the mains lead are coloured in accordance with the following code Blue to N Neutral or Bla...

Page 3: ...st as water droplets form in the surface of a glass filled with cold liquid Moisture condensation on the head drum will cause damage to the tape In conditions where condensation may occur keep the recorder turned on for a few hours to let the moisture dry ATTENTION TO MOBILE PHONE USERS TO MOBILE PHONE USERS TO MOBILE PHONE USERS TO MOBILE PHONE USERS TO MOBILE PHONE USERS Using a mobile phone in ...

Page 4: ... is unattended unless it is specifically stated that it is designed for unattended operation or has a standby mode Switch off using the switch on the equipment and make sure that your family knows how to do this Special arrangements may need to be made for infirm or handicapped people DON T use equipment such as personal stereos or radios so that you are distracted from the require ments of road s...

Page 5: ... Diagrams of Equipment 6 Equipment Key 7 Welcome to JVC 8 Three Step Quick Start 10 Basic Features 13 Advanced Features 27 Subsidiary Information 53 List of Terms 57 HR S5965 5966EK EN p02 07 2 19 03 04 07 PM 5 ...

Page 6: ... 3 4 5 6 7 8 9 10 11 ENTREE ANT IN ENTREE DECODEUR IN DECODER ENTREE SORTIE IN OUT SORTIE RF OUT ANTENNE SORTIE OUT R L AUDIO L 1 L 2 010 1 6 3 4 2 5 4 1 8 7 6 5 2 3 S VHS VCR AUDIO 0000 VPS PDC 3 5 3 2 4 30 SEC PR PR PR ENTER LP00000 000 VCR TV i t y o u 2 7 6 1 8 3 9 4 0 r Q 5 i q w e p W E HR S5965 5966EK EN p02 07 2 19 03 04 07 PM 6 ...

Page 7: ... played back or when S VHS ET mode is engaged DECODER function is not available in the UK 4 L 1 IN OUT Connector enables AV connection to TV or second VCR 5 AUDIO OUT L R Connectors enable connection of audio cassette recorder TV or second VCR for dubbing REMOTE CONTROL 1 TV STANDBY ON o Button turns TV on off 2 TV VCR Button switches connected TV s mode between TV and AV 3 TV Button switches TV i...

Page 8: ... Refer to the List of Terms on page 57 if you need an explanation for any terms in this manual remote control The Remote Control can operate most of your VCR s functions as well as basic functions of JVC TV sets see page 7 When inserting the lithium battery CR 2032 be sure to insert in the correct directions as indicated below To open the battery compartment press the release tab and carefully pul...

Page 9: ...ART cable There are several types of SCART cables fully wired and others If you use a SCART cable you must also connect the RF cable You are now ready to start the Three Step Quick Start which begins on the next page ENTREE ANT IN ENTREE DECODEUR IN DECODER L 2 ENTREE SORTIE IN OUT SORTIE RF OUT ANTENNE L 1 SORTIE OUT R L AUDIO 010 RF Cable provided TV Aerial Cable not provided 21 pin SCART Cable ...

Page 10: ...he following information displayed on your TV screen SELECT THE VIDEO CHANNEL When Auto Setup has finished you will see the following display panel on your VCR rf cable only If you have only used the RF Cable to connect the VCR to the TV you will see this display The number is the channel on the TV that the Auto Setup has chosen to be the video channel In the example we have presumed that channel ...

Page 11: ...tion In certain reception conditions station names may not be stored correctly and Guide Program Numbers may not be set properly If this happens when you timer record a TV programme using the VIDEO Plus system the VCR will record a TV programme of a different station When programming the timer using the VIDEO Plus system be sure to check that the preset position corresponding to the broadcasting s...

Page 12: ...three step quick start 12 HR S5965 5966EK EN p08 12 2 19 03 04 08 PM 12 ...

Page 13: ...Basic Features Playback 14 Playback Features 16 Recording 18 VIDEO Plus Timer Programming 21 Express Timer Programming 24 HR S5965 5966EK EN p13 20 2 19 03 04 08 PM 13 ...

Page 14: ...re that the window side of the cassette is facing up and the spine label is facing away from the VCR Insert the cassette as shown in the diagram below don t use too much force If the VCR was turned off before you inserted the cassette the power will come on automatically The counter on the TV screen will reset to read 0 00 00 If the record safety tab on the video cassette has been removed playback...

Page 15: ...g cases in an environment prone to extreme temperature or humidity in a dusty environment flaw dirt or mold on video tapes continuous usage for a long time Use a dry cleaning cassette JVC TCL 2 in the following cases Rough poor picture appears while a tape is played back The picture is unclear or no picture appears USE CLEANING CASSETTE appears on the screen only with O S D set to ON 墌 pg 40 HR S5...

Page 16: ... resume playback Single Frame Movement You can move backward or forward from the still picture in one of two ways method one Press the button on the Remote Control Each time the button is pressed the frame will move forward one frame method two Press D or E on the VCR or the Remote Control Each time one of these buttons is pressed the frame will advance or move back one frame Press to resume playb...

Page 17: ...teady Press to resume playback Variable Speed Search During playback press the D or E button on the Remote Control The more times that you press either button the faster the rate of search To decrease the speed of search press the button for the opposite direction Press to resume playback Picture Search You can perform picture search in either direction During playback or still picture press the o...

Page 18: ...VCR display panel for about 5 seconds Press again to change the setting while tape speed is displayed You can choose Standard Play SP or Long Play LP The picture quality on LP recordings will not be as high as on SP recordings but the tape will last longer Start Recording There are two ways to start recording method one Press and hold T and then press on the Remote Control method two Press T on th...

Page 19: ...me may not appear immediately be incorrect or simply show as Change Display Information By pressing the bbutton repeatedly you can change the display on the VCR between the clock time and the preset position The preset position cannot be shown during playback Resetting the Counter Press the bbutton so that the counter display appears on the TV screen While the display is shown press the 0000 butto...

Page 20: ...il the tape runs out engage instant timer recording Press T again and the display panel will show a flashing Record indicator U and 0 30 This means that the VCR will record for 30 minutes on the programme already selected and then stop auto matically increase time Each time T is pressed the time limit is increased by 30 min utes to a maximum of 6 hours This function only works with the T button on...

Page 21: ...nd of shorthand for video recorders and using them automatically sets your VCR to record the correct programme channel and time Get to the VIDEO Plus Screen Press p Press 1 to place the pointer next to VIDEO PLUS then press OK or The PLUSCODE NO screen appears Enter the PlusCode Number Press the number keys on the Remote Control to enter the PlusCode number of the programme you wish to record If y...

Page 22: ...weekly basis press DAILY number key 8 or WEEKLY number key 9 to turn the function on Pressing the same key again turns the function off You will see your selection appear on the TV screen capacity You can set this VCR to timer record up to eight programmes If you try to enter a ninth PROGRAM FULL appears on the screen satellite receiver users To timer record a satellite broadcast using the VIDEO P...

Page 23: ...dicator and Record indicator U will flash Insert another tape with the safety tab in place to record AUDIO 0000 VPS PDC 3 5 3 2 4 30 SEC PR PR PR ENTER LP00000 000 VCR TV i 0000 If no video tape is loaded c indicator will flash Insert a tape to record If the tape reaches its end during timer recording the recording stops and c U and on the display panel blink Press c to disengage timer then press ...

Page 24: ...PROGRAMING then press OK or Enter Programme Details set start time Use the START buttons number keys 1 and or 4 to enter the start time set stop time Use the STOP buttons number keys 2 and or 5 to enter the stop time set date Use the DATE buttons number keys 3 and or 6 to adjust the date current date will automatically appear set programme Use the PR buttons to enter the programme required set tap...

Page 25: ...ver Leave the satellite receiver s power on For memory capacity and Serial Recording see VIDEO Plus Timer Programming on page 22 Return to Normal Screen Press p or PROGRAM COMPLETED appears on the TV screen for about 5 seconds then the normal TV screen appears Engage Timer Mode You must now put the VCR into Timer Mode by pressing c otherwise no recording will take place c will appear on the displa...

Page 26: ...ncel a programme change a programme Use START number keys 1 and 4 STOP number keys 2 and 5 DATE number keys 3 and 6 PR DAILY number key 8 WEEKLY number key 9 and PDC number key 7 buttons as necessary return to normal screen Press C as many times as necessary return to timer mode If there are still programmes to be recorded press c P1 NEXT START STOP SP VPS PDC OFF DATE TV PROG 8 00 10 00 24 12 3 I...

Page 27: ...pe 30 The B E S T Picture System 32 Sound Modes 33 Finding Specific Scenes 34 Auto Satellite Program Recording 35 Editing 37 Other Functions 41 Connection to a Stereo System 44 Video Channel Set 45 Tuner Set 46 Clock Set 52 HR S5965 5966EK EN p27 40 2 19 03 04 10 PM 27 ...

Page 28: ... new tape is inserted the VCR returns to automatic tracking Video Stabilizer You can automatically correct vertical vibrations in the picture when playing back unstable recordings made on another VCR The default setting is OFF get to the mode set screen Press Move the highlight bar to MODE SET using the PR and PR buttons and press or E select video stabilizer mode Move the highlight bar to VIDEO S...

Page 29: ... and PR buttons Press or E to select the desired mode AUTO NORM Provides optimised picture benefits of B E S T Picture System When B E S T is OFF PICTURE CONTROL switches automatically from AUTO to NORM EDIT Minimizes picture degradation during editing re cording or playback SOFT Reduces image coarseness when viewing overplayed tapes containing lots of noise return to normal screen Press 1 a k MEN...

Page 30: ...ck the recording quality before you start important recordings You cannot activate the S VHS ET function while recording is in progress while timer recording or Instant Timer Recording 墌 pg 20 is in progress while B E S T 墌 pg 32 is in progress S VHS ET does not work with S VHS tapes with recordings in LP mode To keep the highest quality recording and playback pictures over a long period of time S...

Page 31: ... automatically selected regardless of the S VHS mode setting To record in VHS on an S VHS cassette Insert the cassette marked S VHS the S VHS indicator will light on the display panel Then perform the steps below to set the S VHS to OFF the S VHS indicator will go out The VHS recording mode will be selected get to the mode set screen Press Move the highlight bar to MODE SET using the PR and PR but...

Page 32: ...o normal screen Press Recording and Playback Using B E S T recording Press and hold T and press on the Remote Control or press T on the VCR The VCR spends about 7 seconds assessing the condition of the tape and then begins recording playback Press The VCR adjusts the playback picture quality based on the condition of the tape in use B E S T is active during Auto Tracking bESt appears on the VCR s ...

Page 33: ...until NORM appears on the TV screen Soundtrack Selection This VCR is capable of recording three soundtracks and will play back the one that you select with the AUDIO button track use Hi Fi stereo pre recorded tapes Main audio of bilingual tapes Sub audio of bilingual tapes Audio dubbed tapes Audio dubbed tapes Notes normal selection hi fi l l L r should normally be selected In this mode Hi Fi ster...

Page 34: ...d number of times e g five The TV screen will display 5 or 5 and the VCR begins searching through the tape in the corresponding direction for the fifth index marker from its current position Instant Review The display panel tells you how many timer recorded programmes are on the tape If you have three the REVIEW REVIEW REVIEW REVIEW REVIEW indicator and 3 blink on the display panel To watch the fi...

Page 35: ...diagram below ENTREE ANT IN ENTREE DECODEUR IN DECODER ENTREE SORTIE IN OUT SORTIE RF OUT ANTENNE SORTIE OUT R L AUDIO CONTROLEUR SAT SAT CONTROL L 1 L 2 010 DECODER VCR TV EXT 2 EXT 1 010 Outdoor Unit Satellite Cable TV Aerial TV Aerial Cable ANT IN RF OUT Mains Outlet 21 pin AV Input Connectors SCART Aerial Connector Satellite Receiver Back of VCR Back of TV DECODER function is not available in ...

Page 36: ...ing is in progress disengage To disengage the VCR during Auto Satellite Prog Recording press the o button The VCR will stop recording and turns off tape speed When recording two or more programmes consecutively you cannot set a different tape speed for each programme The first speed selected will apply to all programmes in that recording session b e s t The B E S T system will not work during Auto...

Page 37: ...nd PR buttons and press or E select mode Move the highlight bar to L 1 OUTPUT using the PR and PR buttons Press or E to select the desired mode FOR L 1 OUTPUT VIDEO If a connected device s input is compatible only with regular video signals set to VIDEO S VIDEO If a connected device s input is compatible with Y C signals set to S VIDEO This setting will let you take advantage of higher quality S V...

Page 38: ...hlight bar to OUTPUT INPUT SET using the PR and PR buttons and press or E select mode Move the highlight bar to L 2 INPUT using the PR and PR buttons Press or E to select the desired mode FOR L 2 INPUT VIDEO If a connected device s output is compatible only with regular video signals set to VIDEO S VIDEO If a connected device s output is compatible with Y C signals set to S VIDEO This setting will...

Page 39: ...nd or PR to select L 1 if you ve used the L 2 IN DECODER connector or L 2 if you ve used the L 1 IN OUT connector If this VCR is the player set O S D to OFF 墌 pg 40 set edit mode See Picture Control on page 29 start source vcr Engage its PLAY mode start recording vcr Engage its RECORD mode NOTES All necessary cables can be obtained from your dealer For Y C signal input output be sure to use a 21 p...

Page 40: ... 1 L 2 010 TV Set Video Channel or AV Mode Another VCR Your VCR 21 pin SCART Cables not provided RF Cable provided ENTREE ANT IN ENTREE DECODEUR IN DECODER ENTREE SORTIE IN OUT SORTIE RF OUT ANTENNE SORTIE OUT R L AUDIO L 1 L 2 010 Your VCR Another VCR TV Set Video Channel or AV Mode RF Cable provided 21 pin SCART Cables not provided HR S5965 5966EK EN p27 40 2 19 03 04 10 PM 40 ...

Page 41: ...rs 2 Tape speed SP LP EP EP is for NTSC only 3 NTSC playback display 4 Tape direction 5 Counter display 6 Tape remaining time 7 Audio mode 8 Tape position indicator 9 VPS PDC indicator 0 NICAM display Day month year Current time Preset position number and station name Auxiliary input mode indicator L 1 or L 2 Cassette Loaded indicator S VHS ET Indicator S VHS ET ON S VHS ET OFF 2 3 4 5 6 7 8 9 0 1...

Page 42: ... mode the VCR s power is turned off after timer recording or Instant Timer Recording Auto SP a LP Timer When timer recording in SP mode if the VCR calculates that there isn t enough tape to record the complete programme it will automatically switch from SP to LP mode get to the mode set screen Press Move the highlight bar to MODE SET using the PR and PR buttons and press or E enable disable auto s...

Page 43: ... mode Move the highlight bar to AUTO POWER using the PR and PR buttons Press or E to select 3H or OFF return to normal screen Press Repeat Playback start repeat playback Press then press and hold again for over 5 seconds then release The Play indicator will flash on the display panel and the VCR will automatically playback and rewind the tape 100 times and then stop stop playback Pressing S or sto...

Page 44: ...et and play them back through the stereo volume When listening to sound through the connected stereo turn the TV s volume down to zero dynamic range This VCR has a Hi Fi audio dynamic range of 80 dB Check that your stereo is capable of handling this level of input If it cannot you risk speaker damage ENTREE ANT IN ENTREE DECODEUR IN DECODER ENTREE SORTIE IN OUT SORTIE RF OUT ANTENNE SORTIE OUT R L...

Page 45: ...shows the following information Set Video Channel for av connection Press PR until the display panel shows CH The Video Channel is now set to OFF Go to Step 3 for rf connection Press PR or PR to set the VCR to a vacant channel number between 52 and 69 which is not occupied by any station in your area refer to station list on page 49 In the example we have presumed that channel 52 is vacant and hav...

Page 46: ...nfirmation screen Once Auto Channel Set has completed its search the confirmation screen will appear showing the details PR Preset Number CH Channel Number and ID Station Name of the TV stations that the process has found The first station will have a highlight bar over it and will be blinking This screen and the programme currently being broadcast on the selected station will alternate at 8 secon...

Page 47: ... E button to move to the Channel ID space and use the PR and PR buttons to select the required ID from the stored list fine tuning Press the E button repeatedly to move to the Fine Tuning and use the PR and PR buttons to fine tune the channel A or a symbol will appear during this process save new channel details Press to save the details you have just entered The Confir mation Screen will appear a...

Page 48: ...pace and stop when the desired character is indicated then press E to enter Enter the remaining characters the same way maximum of 4 After entering all characters press The Confirmation screen appears If you make a mistake press D until the incorrect character begins blinking Then enter the correct character by pressing the PR and PR buttons close confirmation screen Press Delete a Channel get to ...

Page 49: ...ct new position Use the button to move the station to the new preset position then press close confirmation screen Press PR 01 02 03 04 05 06 07 CH 26 23 30 33 37 10 MOVE k MANUAL CH SET MENU EXIT ID BBC1 ITV CH4 BBC2 CH5 PR 08 09 10 11 12 13 14 CH ID PR 01 02 03 04 05 06 07 CH 26 33 23 30 37 10 MOVE a k MENU EXIT ID BBC1 BBC2 ITV CH4 CH5 PR 08 09 10 11 12 13 14 CH ID Example If you moved the stat...

Page 50: ...KY SKY Sky One SKY1 Sky Net SKYN Sport SPRT SR 1 SR1 Super RTL SRTL STV Test STVT STV 1 STV1 STV 2 STV2 Suedwest3 SWR SWF 1 SWF1 Schweiz4 SWZ4 TYNE TEES TEES Text TEXT STATION NAME ID TF1 TF1 TNT int TNT TRT int TRT TSI TSI TSR TSR TSW TSW TVE TVE TV Polonia TVPA TVP 1 TVP1 TVP 2 TVP2 TVS TVS TV2 TV2 TV5 TV5 Tele Zurich TZUR Ulster TV ULST Veronica VERN VIVA VIVA VIVA2 VIV2 VOX VOX VTM VTM VT4 VT4...

Page 51: ... 23 29 35 Waltham 58 64 61 54 35 North Belmont 22 28 25 32 56 Emley Moor 44 51 47 41 37 North West Caldbeck 30 34 28 32 56 Winter Hill 55 62 59 65 48 North East Bilsdale West Moor 33 26 29 23 35 Chatton 39 45 49 42 Pontop Pike 58 64 61 54 68 Scotland Angus 57 63 60 53 Black Hill 40 46 43 50 37 Sandale 22 Caldbeck 34 28 32 56 Creigkelly 31 27 24 21 48 Darvel 33 26 23 29 35 Durris 22 28 25 32 67 Eit...

Page 52: ... press or E set preset for clock data source If you have set JUST CLOCK to ON you will need to specify a preset station for JUST CLOCK to take its source data from Use the PR and PR buttons to select the preset and press or E start clock operation Press NOTE If the recorder s memory backup has expired or the AC was disconnected from the recorder the recorder will automatically perform Auto Clock S...

Page 53: ...y be index codes too close together RECORDING Q When I pause and then resume a recording the end of the recording before the pause is overlapped by the beginning of the continuation of recording Why does this happen A This is normal It reduces distortion at the pause and resume points Q Can the VCR indefinitely remain in the Record Pause mode A No The VCR shuts off automatically after 5 minutes to...

Page 54: ...in the RECORD PAUSE MODE The tape is already fully rewound or fast forwarded If you re using only the RF cable for connection the TV s channel selector is not set to the Video Channel the VCR s Video Channel has not been correctly set If you re using both the RF cable and 21 pin SCART cable for connection the TV is not set to the AV mode This is normal The automatic tracking mode is engaged The vi...

Page 55: ... safety tab removed The end of the tape was reached during timer recording c has been pressed when there are no programs in memory or the timer record information has been pro grammed incorrectly The VCR s preset positions have been set incorrectly Insert a cassette or using adhesive tape cover the hole where the tab was removed Set to the desired preset Confirm that the source is prop erly connec...

Page 56: ...tling or howling is heard from the TV during camcorder recording 2 When scanning channels some of them are skipped over 3 The preset cannot be changed 4 Channel settings that were made manually seem to have changed or disappeared 5 No channels are stored in the VCR s memory The camcorder s microphone is too close to the TV The TV s volume is too high Those channels have been designated to be skipp...

Page 57: ...ew 34 Instant Timer Recording 20 J J J J J Just Clock 52 L L L L L L 1 OUTPUT 37 L 2 INPUT 38 M M M M M Manual Channel Setup 47 Manual Tracking 28 NTSC Tapes 14 O O O O O On Screen Display O S D 41 P P P P P Pause During Playback 16 Picture Control 29 Playback 14 PlusCode Number 21 Power Save Mode 42 R R R R R Record a Programme While Watching Another 19 Recording 18 Recording Resume Function 20 R...

Page 58: ...subsidiary information 58 MEMO HR S5965 5966EK EN p52 59 2 19 03 04 12 PM 58 ...

Page 59: ...subsidiary information 59 MEMO HR S5965 5966EK EN p52 59 2 19 03 04 12 PM 59 ...

Page 60: ...cording system DA4 Double Azimuth helical scan system Signal to noise ratio 45 dB Horizontal resolution 250 lines VHS 400 lines S VHS Frequency range 70 Hz to 10 000 Hz Normal audio 20 Hz to 20 000 Hz Hi Fi audio Input Output 21 pin SCART connectors IN OUT x 1 IN x 1 RCA connectors AUDIO OUT x 1 t u n e r t i m e r TV channel storage capacity 99 positions AUX position Tuning system Frequency synth...

Reviews: