EN
19
If you select an event to register the file to
before starting recording, the file will be
registered to the selected event, thus making
the file easy to find at playback. There are up to
3 different destinations within each event (for
example: BABY1, BABY2, BABY3).
Preparation:
●
Set the power switch to
.
●
Set the
MODE
switch to
.
To search by event for a file to play back
(
NOTES:
●
By default, the camera is set to record videos in
4:3 size. To record videos in 16:9 size, see
“Changing the Screen Size” (
●
If the camera is not operated during recording
or playback for 5 minutes when using the
battery pack, it turns itself off automatically to
conserve power. To turn the camera on again,
set the power switch to
OFF
, then to
or
.
When using the AC adapter, the camera enters
the sleep mode (the access lamp lights and the
LCD monitor turns off). To cancel the sleep
mode, perform any operation such as zooming.
●
When the camera heats up, the
7
REC
indicator flashes. If the camera continues to
heat up, shooting may be stopped to protect the
recording medium. In this case, turn off the
power, and then wait until the camera cools
down.
●
If data cannot be recorded or saved properly,
the video files are not saved to the [SD_VIDEO]
folder, which is for regular videos. Instead, the
files are saved to the [EXTMOV] folder. To play
back these files, see “To Play Back Files in the
[EXTMOV] Folder” (
●
Video files are given the names
MOV_001.MOD to MOV_009.MOD,
MOV_00A.MOD to MOV_00F.MOD, and
MOV_010.MOD in order of recording.
●
After recording video for 12 consecutive hours,
recording stops automatically.
●
A new file will be created for every 4 GB of
continuous shooting.
●
This camera records video in MPEG2 format
compliant with SD-VIDEO format. Remember
that this camera is not compatible with other
digital video formats.
●
Before recording important video, be sure to
make a trial recording.
●
Do not move or shake the camera suddenly
during recording. If you do, the sound of the
hard disk drive may be recorded.
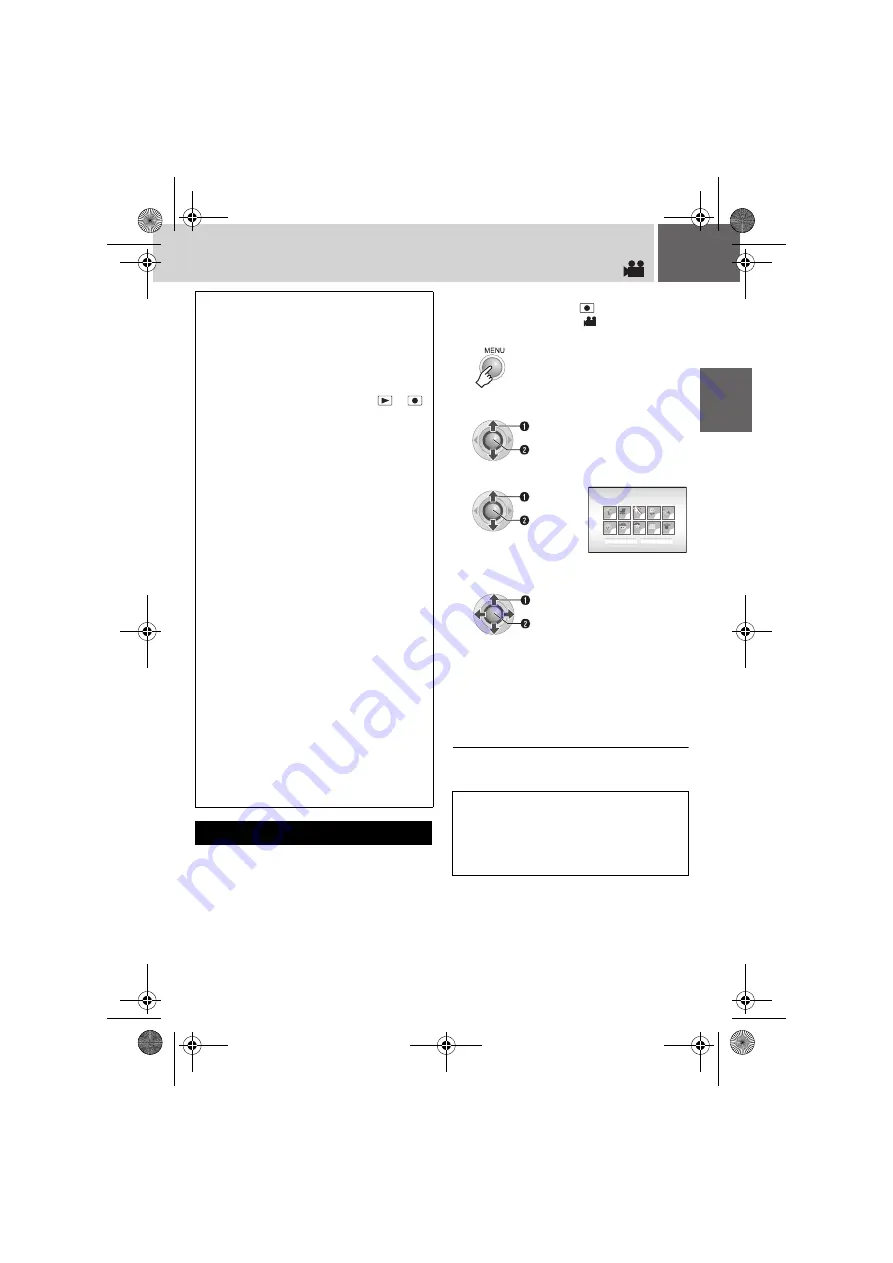
Registering Files to Events
1
2
Select [REGISTER EVENT].
3
Select [ON/SELECT].
4
Select the event that you want to
register the file to.
●
To select a different destination, select
[NEXT PAGE].
●
To cancel the event registration, select
[NON SECTION].
The selected event is displayed on the
screen. Press the
REC/SNAP
button to
start recording.
NOTE:
Once you select to register a file to a certain
event, the setting will remain even if you turn the
power off. Unless you change the setting, you will
register a file to the same event that you had
previously selected.
S
elect
S
et
S
elect
S
et
1
1
1
1
1
1
1
1
1
1
NEXT PAGE
NON
S
ECTION
1/3
SELECT EVENT
VACATION
S
elect
S
et
M6E6US.book Page 19 Wednesday, June 7, 2006 4:20 PM


