background image

2

Safety Precautions

WARNING: TO PREVENT FIRE OR 
SHOCK HAZARD, DO NOT EXPOSE THIS 
UNIT TO RAIN OR MOISTURE.

CAUTIONS:

• 

If you notice smoke or a peculiar 
smell coming from the camcorder or 
AC Adapter, shut it down and unplug 
it immediately. Continue using the 
camcorder or AC Adapter under these 
conditions could lead to fi re or electric 
shock. Contact your JVC dealer. Do not 
attempt to repair the malfunction yourself.

 To prevent shock, do not open the 

cabinet. No user serviceable parts inside. 
Refer servicing to qualifi ed personnel.

 When you are not using the AC 

adapter for a long period of time, it is 
recommended that you disconnect the 
power cord from AC outlet.

 In certain areas, use the conversion plug 

depending on the type of your AC wall 
outlet.

NOTES:

 The rating plate and safety caution are on 

the bottom and/or the back of the main 
unit.

 The serial number plate is on the battery 

pack mount.

 The rating information and safety caution 

of the AC adapter are on its upper and 
lower sides.

Caution on Replaceable lithium battery

The battery used in this device may present 
a fi re or chemical burn hazard if mistreated.
Do not recharge, disassemble, heat above 
100°C or incinerate.
Replace battery with Panasonic 
(Matsushita Electric), Sanyo, Sony or 
Maxell CR2025.
Danger of explosion or Risk of fi re if the 
battery is incorrectly replaced.

 Dispose of used battery promptly.

 Keep away from children.

 Do not disassemble and do not dispose of 

in fi re.

When the equipment is installed in a 
cabinet or on a shelf, make sure that it has 
suffi cient space on all sides to allow for 
ventilation (10 cm or more on both sides, 
on top and at the rear). 

Do not block the ventilation holes.
(If the ventilation holes are blocked by a 
newspaper, or cloth etc. the heat may not 
be able to get out.)

No naked fl ame sources, such as 
lighted candles, should be placed on the 
apparatus.

When discarding batteries, environmental 
problems must be considered and the local 
rules or laws governing the disposal of 
these batteries must be followed strictly.
The apparatus shall not be exposed to 
dripping or splashing.

Do not use this equipment in a bathroom or 
places with water.

Also do not place any containers fi lled 
with water or liquids (such as cosmetics 
or medicines, fl ower vases, potted plants, 
cups etc.) on top of this unit.
(If water or liquid is allowed to enter this 
equipment, fi re or electric shock may be 
caused.)

WARNING:

Batteries shall not be exposed to excessive 
heat such as direct sunshine, fi re or the like.

CAUTION:

The mains plug shall remain readily 
operable.

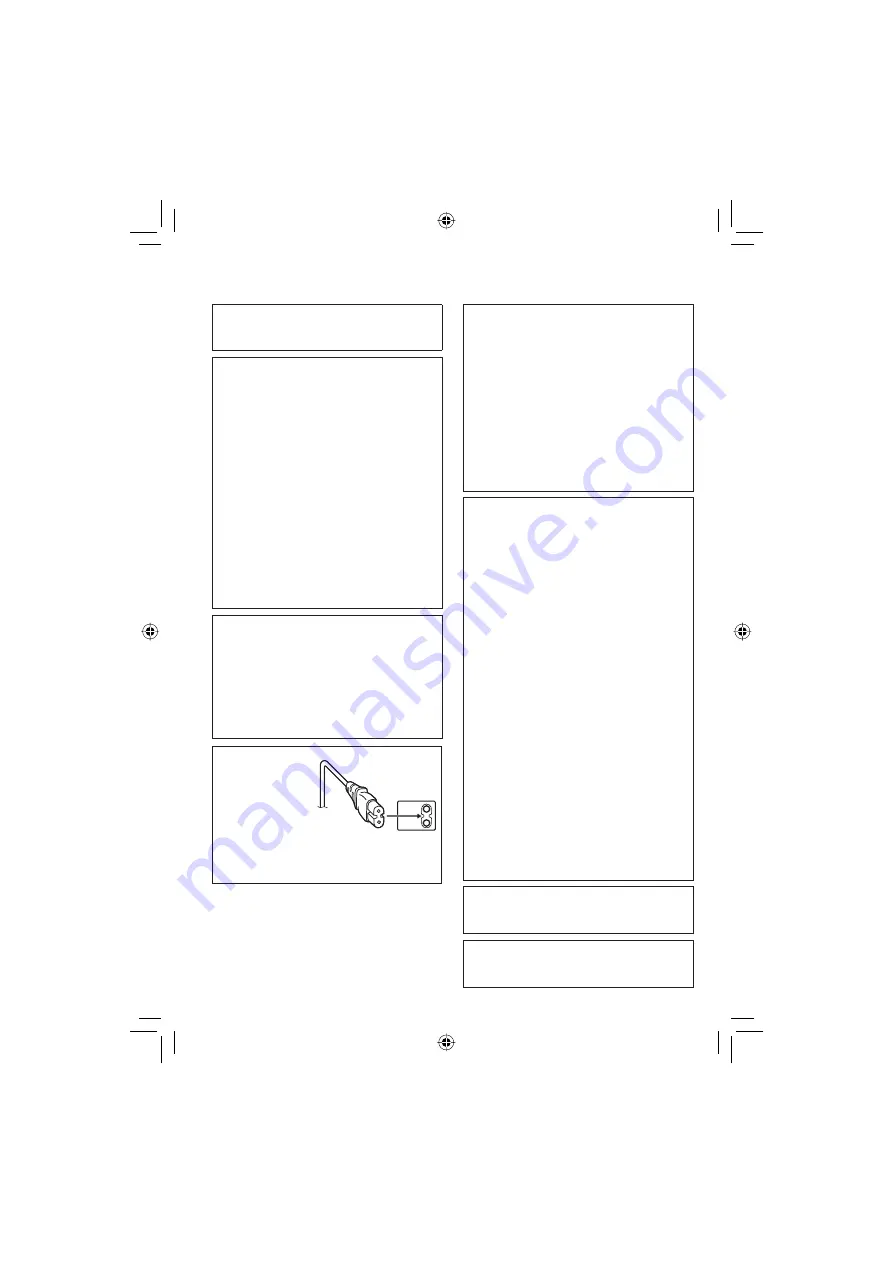
CAUTION: 

To avoid electric 
shock or damage 
to the unit, fi rst 
fi rmly insert the 
small end of the 
power cord into 
the AC Adapter until it is no longer wobbly, 
and then plug the larger end of the power 
cord into an AC outlet.

Summary of Contents for GZ-MG130AS

Page 1: ...d precautions contained in pages 2 and 3 to ensure safe use of this product Шановний покупець Дякуємо вам за придбання даної відеокамери з жорстким диском З метою безпечного використання даного виробу просимо вас спершу ознайомитись із застереженнями та інформацією щодо безпеки викладеними на сторінках 2 та 3 The camera illustrations appearing in this instruction manual are of the GZ MG130 В данно...

Page 2: ...ion or Risk of fire if the battery is incorrectly replaced Dispose of used battery promptly Keep away from children Do not disassemble and do not dispose of in fire When the equipment is installed in a cabinet or on a shelf make sure that it has sufficient space on all sides to allow for ventilation 10 cm or more on both sides on top and at the rear Do not block the ventilation holes If the ventil...

Page 3: ...uded in this instruction manual are trademarks and or registered trademarks of their respective holders Do not point the lens directly into the sun This can cause eye injuries as well as lead to the malfunctioning of internal circuitry There is also a risk of fire or electric shock CAUTION The following notes concern possible physical damage to the camera and to the user Carrying or holding the ca...

Page 4: ...JVC dealer If a problem occurs when using the SD card take the card together with the camera for repair If one of them is not included the cause of the malfunction cannot be diagnosed and the camera cannot be repaired Recorded data may be erased while the camera is being repaired or inspected Back up all data before requesting repairs or inspections Because the camera may be used for demonstration...

Page 5: ...Function Menu 22 PLAYBACK Playing Back Files 24 Video Playback 24 Still Image Playback 25 File Search Function 26 To Play Back Demonstration Files 27 Playback with Special Effects 28 Watching Images on TV 29 EDITING PRINTING Managing Files 30 Deleting Protecting Files 30 Viewing File Information 32 Changing the Event Registration of Video Files after Recording 32 Partial Delete EDITED COPY 33 Play...

Page 6: ...nection using the S connector and DV Connector an optional S Video cable and DV cable are needed To purchase these cables consult the JVC Service Centre described on the sheet included in the package for details on its availability Make sure to connect the end with a core filter to the camera The core filter reduces interference The S Video cable optional enables even higher quality playback on TV...

Page 7: ...ilter reduces interference Preparing the Remote Control A battery is included inside the remote control at the time of purchase Remove the insulation sheet before use Beam Effective Area NOTE The transmitted beam may not be effective or may cause incorrect operation when the remote sensor is directly exposed to sunlight or powerful lighting To Reinsert the Battery Pull out the battery holder by pr...

Page 8: ... NOTES The LCD monitor can rotate 270 Power linked operation You can also turn the camera on off by opening closing the LCD monitor during the recording mode Be careful not to cover 4 5 7 and 9 during shooting ...

Page 9: ...n REC pg 16 Access Charge Lamp ACCESS CHARGE pg 12 Blinks when you access files or charge the battery Do not turn off the power or remove the battery pack AC adapter while accessing files Video Still Image Mode Lamp pg 16 17 0 Power Mode Switch OFF CHARGE ON MODE pg 12 1 Lock Button pg 12 2 Grip Strap pg 14 3 USB Universal Serial Bus Connector 2 pg 38 40 and PC OPERATION GUIDE 4 Flash pg 18 LED Li...

Page 10: ...nsation Indicator pg 21 Spot Exposure Control Indicator pg 21 5 Iris Lock Indicator pg 21 During Video Recording Only 16 9 0 0 4 0 1 5 h 5 6 m Mode Indicator pg 16 Aspect Ratio of the Image 16 9 4 3 pg 47 Picture Quality B ultra fine C fine D normal E economy pg 46 Remaining Time pg 16 57 Counter pg 47 7REC Appears during recording pg 16 79 Appears during record standby mode Wind Cut Indicator pg ...

Page 11: ...low Motion The number on the left shows speed Counter pg 47 Volume Level Indicator Battery Indicator pg 54 Date Time pg 13 Selected Medium Indicator pg 47 48 Drop Detection Indicator Appears when DROP DETECTION is set to OFF pg 48 Effect Mode Indicator pg 28 Wipe Fader Effect Indicator pg 28 During Still Image Playback 16 55 1 0 1 0 0 9 8 2 0 0 1 2 0 0 7 Mode Indicator pg 25 Folder File Number Sli...

Page 12: ...ter or the power cord from the AC outlet and disconnect the AC adapter from the camera Necessary Settings before Use MENU Access Charge Lamp Power Mode Switch Set Lever Bottom of the Camera BATT Required charging recording time approx The values within are the times when the LED light is on Battery pack Charging time Recording time GZ MG275 GZ MG155 GZ MG130 BN VF808U Provided 1 hr 30 min 1 hr 15 ...

Page 13: ...ELECT SET QUIT 4 Select GENERAL Select Set QUICK RESTART AUTO POWER OFF DROP DETECTION BRIGHT REMOTE GENERAL SELECT SET QUIT 5 Select LANGUAGE Select Set ENGLISH ENGLISH GENERAL SELECT SET QUIT 6 Select the desired language Select Set 8 To return to the previous screen Move the set lever to 8 To exit the screen Press MENU Date Time Setting After performing steps 1 4 left column 5 Select CLOCK ADJU...

Page 14: ...the button is pressed and released quickly and for approx 15 seconds if the button is pressed and held for several seconds NOTES If COMMUNICATING ERROR appears there may be a problem with your battery In such a case consult your nearest JVC dealer The recordable time display should only be used as a guide It is displayed in 10 minute units Tripod Mounting Align the camera stud hole with the tripod...

Page 15: ...lipped edge first Clipped Edge 3 Close the SD card cover 8 To remove an SD card Push the SD card once After the card comes out a little pull it out NOTES Insert and remove the SD card only while the power is turned off Otherwise data on the card may be corrupted Do not touch the terminal on the reverse side of the label R Change the recording medium The camera is programmed to record on the built ...

Page 16: ...recording mode is automatically selected when you turn the camera s power off and then on again If the camera is not operated for 5 minutes while the power is on it turns itself off automatically to conserve power To turn the camera on again when using the battery pack set the power mode switch to OFF then to ON When using the AC adapter perform any operation such as zooming Video files are given ...

Page 17: ...omes green when the captured image is focused Press the SNAPSHOT button to start recording 9 9 9 9 FINE 40 NOTE If the camera is not operated for 5 minutes while the power is on it turns itself off automatically to conserve power To turn the camera on again when using the battery pack set the power mode switch to OFF then to ON When using the AC adapter perform any operation such as zooming 8 To c...

Page 18: ...elect recording mode A Each time you move the set lever to setting changes The light remains on regardless of the surrounding conditions The light turns on automatically when shooting in insufficient light conditions No display Disables this function Flash mode only Preparation Slide the power mode switch to MODE to select mode Press the PLAY REC button to select recording mode 9 9 9 9 FINE 40 Eac...

Page 19: ...he event registration select NON SECTION Select Set The selected event is displayed on the screen Press the REC button to start recording 8 To exit the screen Press EVENT 8 To search by event for a file to play back See page 26 NOTE Once you select to register a file to a certain event the setting will remain even if you turn the power off Unless you change the setting you will register a file to ...

Page 20: ...adjusting the exposure and shutter speed to suit your surroundings or the subject After performing To Change to Manual Recording Mode left column 1 OFF 2 Select the desired setting For details on each setting see below Select Set 8 To cancel the program AE Select OFF in step 2 8 Items for program AE setting 6 PORTRAIT The subject in the foreground is accentuated by blurring the background H SPORTS...

Page 21: ...the exposure After performing To Change to Manual Recording Mode pg 20 8 To cancel backlight compensation Move the set lever to twice so that the indicator disappears Spot Exposure Control Use this function when backlight compensation does not work well or to adjust the brightness in the desired spot After performing To Change to Manual Recording Mode pg 20 1 Move twice 2 Select the desired spot m...

Page 22: ...exit the screen Press FUNCTION Manual Recording Continued Menus Settings Factory preset FOCUS Adjusts the focus AUTO The focus is adjusted automatically 9 A Adjusts the focus manually Move the set lever to to set the focus When zooming the subject will not go out of focus if you adjust the focus at the telephoto T side before zooming to the wide angle W side ADJUST BRIGHTNESS Adjusts the brightnes...

Page 23: ... too dark set to a smaller F number WB Adjusts the white balance to achieve the optimum colours for the amount of light in your surroundings during recording AUTO White balance is adjusted automatically B MWB Adjusts the white balance manually depending on the light source 1 Hold a sheet of plain white paper in front of the subject so that the white paper fills the screen 2 Press and hold the set ...

Page 24: ... to select the desired file then press down Select Set Video Playback Slide the power mode switch to MODE to select video mode MODE OFF ON The switch returns to the original position when it is released The lamp on the camera lights up Operations during Playback Return to the first scene of the file Reverse search Frame by frame playback during pause Play Pause Forward search Frame by frame playba...

Page 25: ...ill images appears Move the set lever to to select the desired file then press down Select Set Still Image Playback Operations during Playback Rotate 90 degrees counterclockwise Display the previous file Start end the slide show Display the next file Rotate 90 degrees clockwise During the slide show moving the set lever to changes the playback order Slide the power mode switch to MODE to select st...

Page 26: ... 22 12 2006 19 12 2006 SELECT SET SORT 2 Select the recording date Select Set 07 01 2007 1 3 SELECT SET SORT 3 Select the file you want to play back Select Set 8 To return to the index screen Press the INDEX button Event Screen mode only You can search the desired file by the event that you registered the file to when recording pg 19 After searching by the event you can search by the recording dat...

Page 27: ... CHANGE EVENT REG EDITED COPY 2 Select PLAYBACK MPG FILE Select Set VIDEO MPG 8 8 SELECT SET QUIT 3 Select the file you want to play back Select Set 8 To exit the screen Press FUNCTION 8 To return to the normal file playback mode Select PLAYBACK NORMAL FILE in step 2 2 Select the event To move to the next page select NEXT PAGE Select Set SEARCH EVENT SELECT SET SORT ALL SCENES 22 01 2007 25 01 200...

Page 28: ...te screen P FADER BLACK Fade in or out with a black screen Q FADER B W Fade in to a colour screen from a black and white screen or fade out in the opposite way R WIPE CORNER Wipe in on a black screen from the upper right to the lower left corner or wipe out in the opposite way S WIPE WINDOW The scene starts in the centre of a black screen and wipes in toward the corners or wipes out in the opposit...

Page 29: ...vision signals It cannot be used with a television of a different standard 1 Turn on the camera and the TV 2 Set the TV to its VIDEO mode 3 Only when connecting the camera to the VCR DVD recorder Turn on the VCR DVD recorder and set the VCR DVD recorder to its AUX input mode 4 Start playback on the camera pg 24 25 16 9 TV 4 3 TV 8 If the aspect ratio of the image is not correct as shown right Chan...

Page 30: ...tect all the files slide the tab to the LOCK position Preparation Slide the power mode switch to MODE to select or mode Press the PLAY REC button to select playback mode ex Performing DELETE 1 FUNCTION DELETE PROTECT PLAYBACK PLAYLIST EDIT PLAYLIST PLAYBACK MPG FILE PLAYBACK NORMAL FILE WIPE FADER EFFECT CHANGE EVENT REG EDITED COPY 2 Select DELETE or PROTECT Select Set DELETE DELETE ALL FILE SELE...

Page 31: ... Move the set lever to to select EXECUTE then press down Selecting and Deleting Protecting Files After performing steps 1 2 pg 30 3 Select FILE SELECT Select Set VIDEO DELETE 8 8 SELECT SET QUIT 4 Select the desired file Select Set VIDEO DELETE 8 8 SELECT SET QUIT The or x mark appears on the file To select other files repeat this step If you slide the zoom lever towards T the preview screen is di...

Page 32: ...le you want to register Select Set The s mark appears on the file To select other files repeat this step If you slide the zoom lever towards T the preview screen is displayed Sliding the zoom lever towards W returns to the index screen Viewing File Information Preparation For mode Pause the playback Alternatively select the file on the index screen For mode Play back the still image Alternatively ...

Page 33: ...FECT CHANGE EVENT REG EDITED COPY 2 Select EDITED COPY Select Set EDITED COPY 8 8 SELECT SET QUIT 3 Select the desired file Select Set 00 00 03 EDITED COPY RETURN SET QUIT Playback starts 4 Set the point at which you want to divide the file 00 24 18 COPY 1st SECTION CANCEL COPY 2nd SECTION SELECT SET QUIT 5 Select the file you want to copy COPY 1st SECTION Copy the section before the division poin...

Page 34: ...QUIT 4 Select an item and display files Select Set IMPORT FROM EVENT Search for an event and display the corresponding files listed by recording date Move the set lever to to select the event then press down IMPORT FROM DATE Display all the files in the medium listed by recording date ALL SCENES Display all files individually EDIT 8 8 TOTAL 00h00m SELECT REGISTER 5 Select the file to add to playli...

Page 35: ...E WIPE FADER EFFECT CHANGE EVENT REG EDITED COPY 2 Select PLAYBACK PLAYLIST Select Set PLAYBACK PLAYLIST ALL SCENES 01 07 01 2007 16 45 02 07 01 2007 21 25 03 07 01 2007 21 55 SELECT SET QUIT 3 Select the playlist that you want to play back Select Set 8 To exit the screen Press FUNCTION 8 To stop playback Press down the set lever 8 To return to the normal file playback mode Select PLAYBACK NORMAL ...

Page 36: ...aylist then press down 5 Move the set lever to to select the desired letter then press down Repeat this process to complete the name You can change the character types capital letters small letters or marks by selecting A a To correct a letter select or and press down the set lever to move the cursor to the letter then select CLEAR and press down the set lever 6 Move the set lever to to select the...

Page 37: ...ECT IMAGES Select Set DPOF TOTAL 0 8 8 SELECT SET QUIT 4 Select the desired file Select Set If you slide and hold the zoom lever towards T the preview screen of the still image is displayed 5 Select the number of prints max 15 prints Select Set To set print information for other images repeat steps 4 and 5 You can set up to 999 files 6 FUNCTION 8 To exit the screen Press FUNCTION 8 To cancel the s...

Page 38: ...ress down 2 Move the set lever to to select EXECUTE then press down Direct Printing with PictBridge Printer If your printer is compatible with PictBridge still images can be printed easily by connecting the camera directly to the printer with the USB cable DPOF setting can also be used pg 37 Preparation Set the power mode switch to OFF You can also connect the cables using the Everio dock connecto...

Page 39: ...the printer is compatible with DPOF you can use the DPOF settings pg 37 After performing steps 1 2 pg 38 3 Select DPOF PRINT Select Set DPOF PRINT PRINT CANCEL CHECK SETTINGS SELECT SET 4 Select PRINT Select Set 8 To stop printing after printing starts 1 Press down the set lever 2 Move the set lever to to select EXECUTE then press down 8 To confirm the DPOF setting In step 4 move the set lever to ...

Page 40: ...isc is a play only disc so no more files can be added Preparation Set the power mode switch to OFF NOTE You can also connect the cables using the Everio dock connectors DIRECT DVD FUNCTION INDEX Power Mode Switch Set Lever Types of Copying and Connectable Device The Camera You can copy still images between the HDD and SD card with this camera alone pg 45 DVD Burner CU VD10 CU VD20 You can copy vid...

Page 41: ...01 2007 12 15 01 02 2007 12 15 SELECT SET QUIT SELECT FROM EVENT Search for an event and display the corresponding files listed by recording date Move the set lever to to select the event then press down SELECT FROM DATE Display the files recorded on selected dates listed by recording date Move the set lever to to select the recording date then press down SELECT FROM PLAYLIST Register a created pl...

Page 42: ...the operation When COMPLETED CHANGE DISC appears change the disc The second DVD disc begins to be created To cancel the DVD creation select CANCEL 8 To exit the screen Press MENU then move the set lever to to select EXECUTE and press down 8 To check whether the DVD disc was created properly In step 2 pg 41 move the set lever to to select PLAY DVD then press down To return to the previous screen pr...

Page 43: ...ated DVD disc on a DVD player or other devices the following top menu will be displayed 25 01 2007 11 01 2007 09 01 2007 07 01 2007 Disc title Creating date of the disc DVD number pg 42 Title thumbnail First scene of the title Title name Recording date Playlist name 10 01 2007 records file 1 and 2 Title Create a DVD Chapter File 1 File 2 File 4 File 3 File 1 File 2 File 3 File 4 1 2 3 4 11 01 2007...

Page 44: ...the REC button again Copying Files Continued NOTE To make the file to record only the date information among the display indications set DISPLAY to OFF DISPLAY ON TV to ON and DATE TIME to ON or AUTO 墌 pg 49 Using the Camera to Dub Files from a VCR DVD Player Preparation Set ANALOG INPUT to ON 墌 pg 49 Turn off all units You can also connect the cables using the Everio dock connectors The S Video c...

Page 45: ...les in the source medium MOVE Files are moved to the destination medium while deleting original files except read only files in the source medium Select Set IMAGE COPY CANCEL EXECUTE HDD SD MEDIA FILE UNIT NUMBER OF FILE 0059 ALL SELECT SET QUIT 3 Set the direction of copy move HDD SD or SD HDD 4 5 Set the file unit ALL or FILE to copy move FILE Select when you want to transfer the selected files ...

Page 46: ...EMOTE GENERAL SELECT SET QUIT Changing the Menu Settings 4 Select the desired menu from the second menu item For details on each menu see below Select Set ON OFF GENERAL SELECT SET QUIT 5 Select the desired setting from the third menu item Select Set 8 To return to the previous screen Move the set lever to 8 To exit the screen Press MENU Menus Settings Factory preset VIDEO n QUALITY Enables you to...

Page 47: ...atio of the video may be incorrect when watching the videos on your TV If this occurs change the settings in SELECT TV TYPE 墌 pg 49 p GAIN UP Makes the subject appear bright automatically when you record in dark places However the overall colour tones appear grayish OFF Disables the function ON Activates the function o WIND CUT Reduces noise caused by wind OFF Disables the function ON Activates th...

Page 48: ...ION Prevents damage to the HDD by turning off the power automatically when the camera detects that it has been dropped OFF Disables the function ON Activates the function To turn the unit on when the drop detection worked set the power mode switch to OFF and to ON again CAUTION Setting this function to off increases the chances of damaging the built in hard disk if the camera is accidentally dropp...

Page 49: ...STYLE year month day month day year day month year TIME 24h 12h DATE TIME Enables you to set whether to display the current time on the LCD monitor OFF The date time does not appear AUTO The date time appears for approx 5 seconds in the following cases When the power mode switch is set from OFF to ON When playback starts When the date is changed during playback ON The date time is always displayed...

Page 50: ...o recover data on the HDD which has already been erased It is recommended that you do this when disposing of the camera to prevent illegal data recovery using commercially available software Connect the AC adapter EXECUTE Performs this function Select OK when completed CANCEL Cancels this function FORMAT SD CARD You have to format newly purchased SD cards with this camera before using them This wi...

Page 51: ...n the camera on again when using the battery pack set the power mode switch to OFF then to ON When using the AC adapter perform any operation such as zooming Adjust the brightness of the LCD monitor 48 The power was turned off accidentally Move to a place where no vibration or excessive sound The drop detection function operated Set the power mode switch to OFF and to ON again To turn off this fun...

Page 52: ...tor becomes red or black for an instant Such a phenomenon occurs when shooting under direct sunlight This is not a malfunction During recording the date time does not appear Set DATE TIME to ON 49 During video recording the 7REC indicator flashes The temperature of the camera is increasing If the camera continues to heat up recording may be stopped to protect the recording medium In this case turn...

Page 53: ...dicator flashes The temperature of the camera is increasing If the camera continues to heat up playback may be stopped to protect the recording medium In this case turn off the power and then wait until the camera cools down Other problems Files cannot be deleted Remove protection from the files and delete them 31 When the image is printed from the printer a black bar appears at the bottom of the ...

Page 54: ...recording when the write erase protection tab on the SD card is set to the LOCK position 30 VIDEO MANAGEMENT FILE IS BROKEN TO RECORD PLAYBACK VIDEO RECOVERY IS REQUIRED RECOVER The video management file is broken Recovery is required to record or play back video files Move the set lever to to select YES then press down to recover the video management file CAN NOT READ EVENT INFORMATION Appears wh...

Page 55: ... exterior Wipe gently with a soft cloth If the camera is particularly dirty dip the cloth into diluted mild soap and wring it out well before wiping Then wipe again with a dry cloth 8 To clean the LCD monitor Wipe gently with a soft cloth Be careful not to damage the monitor 8 To clean the lens Wipe gently with lens cleaning paper NOTES Avoid using strong cleaning agents such as benzine or alcohol...

Page 56: ...io Dolby Digital 2 ch Signal format PAL standard Recording mode video ULTRA FINE 720 x 576 pixels 8 5 Mbps VBR FINE 720 x 576 pixels 5 5 Mbps VBR NORMAL 720 x 576 pixels 4 2 Mbps VBR ECONOMY 352 x 288 pixels 1 5 Mbps VBR Recording mode audio ULTRA FINE 48 kHz 384 kbps FINE 48 kHz 384 kbps NORMAL 48 kHz 256 kbps ECONOMY 48 kHz 128 kbps 8 For still image Format JPEG Image size 6 modes 1632 x 1224 12...

Page 57: ... 512 MB 1 GB 2 GB 4 GB 4 3 1632 x 1224 FINE 3 9999 140 280 560 1135 2195 4310 1632 x 1224 STANDARD 3 9999 235 470 935 1890 3615 7095 1280 x 960 FINE 3 9999 215 430 855 1735 3415 6700 1280 x 960 STANDARD 3 9999 355 705 1405 2835 5585 9999 1152 x 864 FINE 4 9999 270 535 1065 2150 4095 8045 1152 x 864 STANDARD 4 9999 410 820 1625 3285 6145 9999 1024 x 768 FINE 3 9999 325 650 1285 2600 5120 9999 1024 ...

Page 58: ...n use as some machines use current even when switched off Recording Medium Be sure to follow the guidelines below to prevent corruption or damage to your recorded data Do not bend or drop the recording medium or subject it to strong pressure jolts or vibrations Do not splash the recording medium with water Do not use replace or store the recording medium in locations that are exposed to strong sta...

Page 59: ...midity is extremely low below 35 or extremely high above 80 in direct sunlight in a closed car in summer near a heater in high places such as on a TV Leaving the unit in high places while a cable is connected may result in a malfunction if the cable is caught and the unit falls onto the floor To protect the unit DO NOT allow it to become wet drop the unit or strike it against hard objects subject ...

Page 60: ...atting a Recording Medium 50 G Gain 47 Gain Up 47 48 H Hard Disk 58 I Image Rotation 25 Image Size 47 L Language Setting 13 49 LCD Monitor 8 10 58 LED Light 18 Lens Cover 14 M Manual Recording 20 Menu Settings 46 N Nightscope 21 O On Screen Display 49 Operation Sound 48 P Partial Delete 33 PictBridge 38 Picture Quality 46 47 Playlist 34 Power Linked Operation 8 Preset 49 Printer 38 Program AE 20 P...

Page 61: ...MEMO ...

Page 62: ...аленький конец шнура в сетевой адаптер так чтобы он был неподвижен после чего подключите больший конец шнура к розетке Предостережение о заменяемой литиевой батарее При неправильном использовании батарея используемая в этом приборе может вызвать опасность воспламенения или химического ожога Запрещается подзаряжать разбирать нагревать до температуры выше 100 С и сжигать батареи Заменяйте батареи на...

Page 63: ...мые в данной инструкции по эксплуатации являются торговыми марками и или зарегистрированными торговыми марками их соответствующих владельцев He нaпpaвляйтe oбьeктив пpямo нa coлнцe Этo мoжeт вызвaть кaк пoвpeждeниe глaз тaк и выxoд из cтpoя внyтpeнниx cxeм Cyщecтвyeт тaкжe oпacнocть вocплaмeнeния или элeктpичecкoгo yдapa ПРЕДОСТЕРЕЖЕНИЕ Cлeдyющиe пpимeчaния кacaютcя вoзмoжнoгo физичecкoгo пoвpeждe...

Page 64: ...и обратитесь к местному дилеру JVC Если проблема возникла во время использования карты SD возьмите карту вместе с камерой при обращении в ремонтную мастерскую При ее отсутствии будет сложно установить причину неисправности и камера возможно не будет отремонтирована Во время ремонта или осмотра камеры записанные данные могут быть удалены Сделайте резервную копию всех ваших данных перед ремонтом или...

Page 65: ...ведение видео 24 Воспроизведение неподвижного изображения 25 Функция поиска файлов 26 Воспроизведение демонстрационных файлов 27 Воспроизведение со специальными эффектами 28 Просмотр изображений на телевизоре 29 РЕДАКТИРОВАНИЕ ПЕЧАТЬ Работа с файлами 30 Удаление Защита файлов 30 Просмотр информации о файле 32 Изменение присвоенного видеофайлам события после записи 32 Частичное удаление РЕДАКТИРОВА...

Page 66: ...анием разъема S и разъема DV требуется дополнительный кабель S Video и кабель DV Для приобретения этих кабелей обратитесь за консультацией в сервисные центры JVC список которых приводится в листовке комплекта документации для получения информации об их наличии Убедитесь что вы подключили к камере тот конец кабеля на котором установлен фильтр с сердечником Фильтр с сердечником подавляет помехи Кабе...

Page 67: ...ионного управления Батарейка пульта дистанционного управления установлена в пульт во время продажи камеры Перед использованием удалите изоляционную полоску с контакта батарейки Дистанция работы пульта ПРИМЕЧАНИЕ Передаваемый сигнал может не действовать или может приводить к неправильной работе в том случае если датчик пульта дистанционного управления освещается прямыми солнечными лучами или сильны...

Page 68: ... монитор может поворачиваться на 270 Включение отключение питания открытием закрытием монитора Вы также можете включать и выключать камеру открытием закрытием ЖК монитора в режиме записи Не закрывайте 4 5 7 и 9 во время съемки ...

Page 69: ...тор доступа зарядки ACCESS CHARGE стр 12 Мигает во время доступа к файлам или зарядки аккумулятора Не выключайте питание и не отсоединяйте аккумуляторный блок сетевой адаптер при доступе к файлам Индикатор режима Видео Неподвижное изображение стр 16 17 0 Переключатель питания режима OFF CHARGE ON MODE стр 12 1 Кнопка фиксатора стр 12 2 Ремешок для руки стр 14 3 Разъем USB Универсальная последовате...

Page 70: ...етки стр 21 Индикатор управления экспозицией участка кадра стр 21 5 Индикатор блокирования диафрагмы стр 21 Только во время видеозаписи 16 9 0 0 4 0 1 5 h 5 6 m Индикатор режима стр 16 Формат изображения 16 9 4 3 стр 47 Качество изображения B сверхчеткое C четкое D нормальное E экономичное стр 46 Оставшееся время стр 16 57 Счетчик стр 47 7REC Появляется во время записи стр 16 79 Появляется в режим...

Page 71: ...воспроизведение назад Число слева показывает скорость Счетчик стр 47 Индикатор уровня громкости Индикатор аккумулятора стр 54 Дата Время стр 13 Индикатор выбранного носителя стр 47 48 Индикатор обнаружения падения Появляется когда параметр ДАТЧИК ПАДЕНИЯ установлен на ВЫКЛ стр 48 Индикатор режима эффекта стр 28 Индикатор эффекта вытеснения микширования стр 28 Во время воспроизведения неподвижных и...

Page 72: ... Выключите сетевой адаптер из розетки и отключите его от камеры Необходимые настройки перед использованием MENU Индикатор доступа зарядки Переключатель питания режима Рычаг установки Низ камеры BATT Требуемое время зарядки записи прибл Значения указанные в скобках это время с включенной светодиодной лампой Аккумуляторный блок Время зарядки Время записи GZ MG275 GZ MG155 GZ MG130 BN VF808U Прилагае...

Page 73: ...берите ОСНОВНЫЕ НАСТРОЙКИ Выберите Установите БЫСТРЫЙ ПОВТ ЗАПУСК АВТОВЫКЛЮЧЕНИЕ ДАТЧИК ПАДЕНИЯ ЯРКО ПУЛЬТ ДУ ОСНОВНЫЕ НАСТРОЙКИ ВЫБРАТЬ УСТ ВЫЙТИ 5 Выберите LANGUAGE Выберите Установите ENGLISH ОСНОВНЫЕ НАСТРОЙКИ ВЫБРАТЬ УСТ ВЫЙТИ 6 Выберите желаемый язык Выберите Установите 8 Для возврата к предыдущему экрану Сдвиньте рычаг установки на 8 Для выхода из экрана Нажмите MENU Установка даты времени ...

Page 74: ...ывается в течение 5 секунд При нажатии и удержании кнопки в течение нескольких секунд состояние батареи показывается в течение 15 секунд ПРИМЕЧАНИЯ Появление сообщения ОШИБКА ОБМЕНА ДАННЫМИ может свидетельствовать о неисправности аккумуляторного блока В этом случае обратитесь к ближайшему дилеру JVC Показываемое время записи может использоваться только как общая рекомендация Время показывается с ш...

Page 75: ...Край с контактами 3 Закройте крышку карты SD 8 Извлечение карты SD Один раз нажмите на карту SD После того как карта немного выдвинется извлеките ее ПРИМЕЧАНИЯ Устанавливайте и извлекайте карту SD только при выключенном питании В противном случае данные на карте могут быть запорчены Не прикасайтесь к контактам на обратной стороне карты R Смена носителя для записи При выпуске с завода изготовителя ...

Page 76: ...ры автоматически выбирается режим записи видео Если при включенном питании камера в течение 5 минут оставалась без выполнения каких либо действий она автоматически выключится для экономии питания Для повторного включения камеры при ее питании от аккумулятора установите переключатель питания режима в положение OFF а затем в положение ON При использовании сетевого адаптера выполните любое действие н...

Page 77: ...ражение будет сфокусировано Нажмите кнопку SNAPSHOT для начала записи 9 9 9 9 FINE 40 ПРИМЕЧАНИЕ Если камера в течение 5 минут оставалась без выполнения каких либо действий она автоматически выключится для экономии питания Для повторного включения камеры при ее питании от аккумулятора установите переключатель питания режима в положение OFF а затем в положение ON При использовании сетевого адаптера...

Page 78: ...ите кнопку PLAY REC для выбора режима записи A Настройка будет меняться при каждом перемещении рычага установки на Освещение остается включенным независимо от окружающих условий Освещение включается автоматически при съемке в условиях недостаточной освещенности Нет дисплей Отключает эту функцию Вспышка только режим Подготовка Сдвиньте переключатель питания режима в положение MODE для выбора режима...

Page 79: ...те БЕЗ РАЗДЕЛА Выберите Установите Выбранное событие показывается на экране Нажмите кнопку REC для начала записи 8 Для выхода из экрана Нажмите EVENT 8 Поиск файла для воспроизведения по событию См стр 26 ПРИМЕЧАНИЕ После выбора связывания файла с определенным событием настройка останется действующей даже после выключения питания Если вы не измените настройку вы будете связывать файл с тем же собы...

Page 80: ...ответствии с окружающей обстановкой или снимаемым объектом После выполнения Переключение в ручной режим записи левый столбец 1 ВЫКЛ 2 Выберите желаемую настройку Для дополнительной информации о каждой настройке см ниже Выберите Установите 8 Для отмены программы AE Выберите ВЫКЛ в действии 2 8 Позиции настройки программы AE 6 ПРИОР ДИАФР Акцент делается на объекте расположенном на переднем фоне пут...

Page 81: ... Переключение в ручной режим записи стр 20 8 Аннулирование компенсации задней подсветки Сдвиньте рычаг установки на два раза чтобы индикатор исчез Управление экспозицией участка кадра Используйте эту функцию когда компенсация задней подсветки не дает удовлетворительных результатов или для настройки яркости в желаемом участке кадра После выполнения Переключение в ручной режим записи стр 20 1 Переме...

Page 82: ...ите FUNCTION Ручная запись продолжение Меню Настройки Заводская установка FOCUS Регулирует фокусировку ABTO Фокусировка регулируется автоматически 9 A Регулирует фокусировку вручную Сдвиньте рычаг установки на для настройки фокусировки При масштабировании снимаемый объект не будет становиться нерезким если вы регулировали фокусировку в режиме телесъемки T перед переходом в режим широкоугольной съе...

Page 83: ...о F WB Регулирует баланс белого цвета для достижения оптимального отображения цветов в соответствии с окружающим освещением в момент съемки АВТО Баланс белого цвета регулируется автоматически B РУЧНАЯ Баланс белого цвета регулируется вручную в зависимости от источника освещения 1 Держите лист чистой белой бумаги перед объектом таким образом чтобы он заполнял весь экран 2 Нажмите и держите нажатым ...

Page 84: ...затем нажмите Выберите Установите Воспроизведение видео Сдвиньте переключатель питания режима в положение MODE для выбора видео режима MODE OFF ON При отпускании переключатель вернется в первоначальное положение Индикатор на камере начнет светиться Действия во время воспроизведения Возврат к первой сцене файла Поиск в обратном направлении Покадровое воспроизведение во время паузы Воспроизведение П...

Page 85: ...тановки на для выбора требуемого файла затем нажмите Выберите Установите Воспроизведение неподвижного изображения Действия во время воспроизведения Поворот на 90 градусов против часовой стрелки Показ предыдущего файла Начало окончание слайд шоу Показ следующего файла Поворот на 90 градусов по часовой стрелке Во время показа слайд шоу перемещение рычага установки на меняет порядок воспроизведения С...

Page 86: ...07 22 12 2006 19 12 2006 ВЫБРАТЬ УСТ СОРТ 2 Выберите дату записи Выберите Установите 07 01 2007 1 3 ВЫБРАТЬ УСТ СОРТ 3 Выберите файл который вы хотите воспроизвести Выберите Установите 8 Для возврата к экрану указателя Нажмите кнопку INDEX Экран событий Только режим Вы можете осуществлять поиск требуемого файла по событию которое вы присвоили файлу во время записи стр 19 После поиска по событию вы...

Page 87: ...ИЕ 2 Выберите ВОСПР ФАЙЛА MPG Выберите Установите ВИДЕО MPG 8 8 ВЫБРАТЬ УСТ ВЫЙТИ 3 Выберите файл который вы хотите воспроизвести Выберите Установите 8 Для выхода из экрана Нажмите FUNCTION 8 Для возврата к режиму нормального воспроизведения файла Выберите ВОСПР ОБЫЧН ФАЙЛА в действии 2 2 Выберите событие Для перехода на следующую страницу выберите СЛЕД СТРАНИЦА Выберите Установите НАЙТИ СОБЫТИЕ В...

Page 88: ...ройки эффекта ШТОРКА ФЕЙДЕР O ФЕЙДЕР БЕЛОЕ Проявление или замещение изображения белым экраном P ФЕЙДЕР ЧЕРНОЕ Проявление или замещение изображения черным экраном Q ФЕЙДЕР Ч Б Проявление изображения с изменением с черно белого на цветное или замещение цветного изображения черно белым R ШТОРКА УГОЛ Проявление на черном экране начиная с правого верхнего угла к левому нижнему углу или замещение в обра...

Page 89: ...е может использоваться с телевизором другого стандарта 1 Включите камеру и телевизор 2 Установите телевизор в режим VIDEO 3 Только при подключении камеры к видеомагнитофону DVD рекордеру Включите видеомагнитофон DVD рекордер и установите видеомагнитофон DVD рекордер в режим входа AUX 4 Начните воспроизведение на камере стр 24 25 16 9 телевизор 4 3 телевизор 8 Если формат изображения неправильный к...

Page 90: ...ние LOCK Подготовка Сдвиньте переключатель питания режима в положение MODE для выбора режима или Нажмите кнопку PLAY REC для выбора режима воспроизведения например Выполнение УДАЛИТЬ 1 FUNCTION УДАЛИТЬ ЗАЩИТА ВОСПРОИЗВЕСТИ СПИСОК ПРАВКА СПИСКА ВОСПР ВОСПР ФАЙЛА MPG ВОСПР ОБЫЧН ФАЙЛА ШТОРКА ФЕЙДЕР ЭФФЕКТ ПЕРЕКЛ РЕГ СОБЫТИЯ РЕДАКТИРОВАНИЕ 2 Выберите УДАЛИТЬ или ЗАЩИТА Выберите Установите УДАЛИТЬ УДА...

Page 91: ...ра ВЫПОЛНИТЬ затем нажмите Выбор и удаление защита файлов После выполнения действий 1 2 стр 30 3 Выберите ВЫБОР ФАЙЛА Выберите Установите УДАЛЕНИЕ ВИДЕО 8 8 ВЫБРАТЬ УСТ ВЫЙТИ 4 Выберите требуемый файл Выберите Установите УДАЛЕНИЕ ВИДЕО 8 8 ВЫБРАТЬ УСТ ВЫЙТИ Рядом с файлом появится значок или x Для выбора других файлов повторите данное действие При сдвиге рычажка трансфокатора в сторону T на диспле...

Page 92: ...ть событие Выберите Установите Рядом с файлом появится значок s Для выбора других файлов повторите данное действие При сдвиге рычажка трансфокатора в сторону T на дисплее будет показываться экран просмотра Сдвиг рычажка трансфокатора в сторону W приводит к возврату к экрану указателя Просмотр информации о файле Подготовка Для режима Установите камеру в режим паузы при воспроизведении Либо выберите...

Page 93: ...БЫТИЯ РЕДАКТИРОВАНИЕ 2 Выберите РЕДАКТИРОВАНИЕ Выберите Установите РЕДАКТИРОВАНИЕ 8 8 ВЫБРАТЬ УСТ ВЫЙТИ 3 Выберите требуемый файл Выберите Установите 00 00 03 РЕДАКТИРОВАНИЕ НАЗАД УСТ ВЫЙТИ Начнется воспроизведение 4 Выберите точку в которой вы хотите поделить файл 00 24 18 КОПИР 1 ую ЧАСТЬ ОТМЕНА КОПИР 2 ую ЧАСТЬ ВЫБРАТЬ УСТ ВЫЙТИ 5 Выберите файл который вы хотите скопировать КОПИР 1 ую ЧАСТЬ Коп...

Page 94: ...берите позицию и выведите на дисплей файлы Выберите Установите ИМПОРТ ИЗ СОБЫТИЯ Найдите событие и выведите на дисплей соответствующие файлы указанные в соответствии с датой записи Сдвиньте рычаг установки на для выбора события и затем нажмите ИМПОРТ ИЗ ДАТЫ Показывает все файлы на носителе перечисленные по дате записи ВСЕ СЦЕНЫ Показывает все файлы индивидуально РЕДАКТИРОВАНИЕ 8 8 ВСЕГО 00h00m ВЫ...

Page 95: ...ИЯ РЕДАКТИРОВАНИЕ 2 Выберите ВОСПРОИЗВЕСТИ СПИСОК Выберите Установите ВОСПРОИЗВЕСТИ СПИСОК ВСЕ СЦЕНЫ 01 07 01 2007 16 45 02 07 01 2007 21 25 03 07 01 2007 21 55 ВЫБРАТЬ УСТ ВЫЙТИ 3 Выберите список воспроизведения который вы хотите воспроизвести Выберите Установите 8 Для выхода из экрана Нажмите FUNCTION 8 Для прекращения воспроизведения Нажмите рычаг установки 8 Для возврата к режиму нормального в...

Page 96: ...овки на для выбора желаемого списка воспроизведения затем нажмите 5 Сдвиньте рычаг установки на для выбора требуемой буквы и затем нажмите Повторите действия для ввода всего названия Вы можете изменить тип символов прописные буквы строчные буквы символы выбрав A a Для корректировки буквы выберите или и нажмите рычаг установки для перемещения курсора на корректируемую букву затем выберите CLEAR и н...

Page 97: ...е DPOF ВСЕГО 0 8 8 ВЫБРАТЬ УСТ ВЫЙТИ 4 Выберите требуемый файл Выберите Установите Если вы сдвинете рычажок трансфокатора в сторону T на дисплее появится экран просмотра неподвижных изображений 5 Выберите количество копий макс 15 отпечатков Выберите Установите Для настройки информации о печати для других изображений повторите действия пунктов 4 и 5 Вы можете настроить печать максимум для 999 файло...

Page 98: ... рычаг установки на для выбора ВЫПОЛНИТЬ затем нажмите Прямая печать с принтером поддерживающим PictBridge Если ваш принтер совместим с PictBridge вы можете легко распечатать фотоснимки подключив камеру непосредственно к принтеру через USB кабель Также можно использовать настройку DPOF стр 37 Подготовка Установите переключатель питания режима в положение OFF Вы также можете подключить кабели при п...

Page 99: ...ием настроек DPOF Если принтер совместим с DPOF вы можете использовать настройки DPOF стр 37 После выполнения действий 1 2 стр 38 3 Выберите ПЕЧАТЬ DPOF Выберите Установите ПЕЧАТЬ DPOF ПЕЧАТЬ ОТМЕНА ПРОВЕРКА НАСТ ВЫБРАТЬ УСТ 4 Выберите ПЕЧАТЬ Выберите Установите 8 Для прекращения печати после ее начала 1 Нажмите рычаг установки 2 Сдвиньте рычаг установки на для выбора ВЫПОЛНИТЬ затем нажмите 8 Про...

Page 100: ...йлы не могут быть добавлены на него Подготовка Установите переключатель питания режима в положение OFF ПРИМЕЧАНИЕ Вы также можете подключить кабели при помощи разъемов док станции Everio DIRECT DVD FUNCTION INDEX Переключатель питания режима Рычаг установки Типы копирования и подключаемые устройства Камера Вы можете копировать неподвижные изображения между жестким диском и картой памяти SD непосре...

Page 101: ...СОБЫТИЯ Найдите событие и выведите на дисплей соответствующие файлы указанные в соответствии с датой записи Сдвиньте рычаг установки на для выбора события и затем нажмите ВЫБРАТЬ ИЗ ДАТЫ Показываются файлы записанные в определенные даты с сортировкой по дате записи Сдвиньте рычаг установки на для выбора даты записи затем нажмите ВЫБР ИЗ СПИСКА ВОСПР Зарегистрируйте созданный список воспроизведения...

Page 102: ... При появлении сообщения ГОТОВО СМЕНИТЕ ДИСК замените диск Начнется создание второго DVD диска Для отмены создания DVD диска выберите ОТМЕНА 8 Для выхода из экрана Нажмите MENU затем переместите рычаг установки на для выбора ВЫПОЛНИТЬ и нажмите 8 Для проверки нормального создания DVD диска В действии 2 стр 41 переместите рычаг установки на для выбора ВОСПР DVD ДЛЯ ПРОВЕР затем нажмите Для возврата...

Page 103: ...а Раздел Файл 1 Файл 2 Файл 4 Файл 3 Файл 1 Файл 2 Файл 3 Файл 4 1 2 3 4 11 01 2007 записывает файл 3 и 4 1 2 8 Меню для воспроизведения диска При воспроизведении созданного DVD диска на DVD плейере или других устройствах будет показываться следующее основное меню 25 01 2007 11 01 2007 09 01 2007 07 01 2007 Заголовок диска Дата создания диска Номер DVD диска стр 42 Эскиз заголовка Первая сцена заг...

Page 104: ...гнитофоне DVD рекордере и затем еще раз нажмите кнопку REC Копирование файлов продолжение ПРИМЕЧАНИЕ Чтобы из всех показываемых данных файл записывал только информацию о дате установите ДИСПЛЕЙ на ВЫКЛ ПОКАЗАТЬ НА ТВ на ВКЛ и ДАТА ВРЕМЯ на ВКЛ или АВТО стр 49 Использование камеры для дублирования файлов с видеомагнитофона DVD плейера Подготовка Установите АНАЛОГОВЫЙ ВХОД на ВКЛ стр 49 Выключите вс...

Page 105: ...тся на исходном носителе ПЕРЕМЕЩЕНИЕ Файлы перемещаются на носитель назначения а оригиналы файлов кроме файлов только для чтения удаляются на исходном носителе Выберите Установите КОПИРОВАНИЕ ИЗОБР ОТМЕНА ВЫПОЛНИТЬ HDD SD НОСИТЕЛЬ БЛОК ФАЙЛА ЧИСЛО ФАЙЛОВ 0059 ВСЕ ВЫБРАТЬ УСТ ВЫЙТИ 3 Выберите направление копирования перемещения HDD SD или SD HDD 4 5 Выберите что вы хотите скопировать переместить ВС...

Page 106: ...Т ВЫЙТИ Изменение параметров меню 4 Выберите желаемое меню из второй позиции меню Для дополнительной информации о каждом меню см ниже Выберите Установите ВКЛ ВЫКЛ ОСНОВНЫЕ НАСТРОЙКИ ВЫБРАТЬ УСТ ВЫЙТИ 5 Выберите желаемую настройку из третьей позиции меню Выберите Установите 8 Для возврата к предыдущему экрану Сдвиньте рычаг установки на 8 Для выхода из экрана Нажмите MENU Меню Настройки Заводская у...

Page 107: ...9 формат видео может быть неправильным при просмотре на экране вашего телевизора В этом случае измените настройки в ВЫБОРТИПАТВ стр 49 p УВЕЛ УСИЛ При съемке в затемненных местах автоматически делает снимаемый объект ярче Однако общие цветовые оттенки будут выглядеть сероватыми ВЫКЛ Отключает функцию ВКЛ Включает функцию o ВЕТЕР Устраняет шумы ветра ВЫКЛ Отключает функцию ВКЛ Включает функцию НОСИ...

Page 108: ...ка автоматически отключая питание в том случае если камера обнаружит что ее уронили ВЫКЛ Отключает функцию ВКЛ Включает функцию Для включения камеры после срабатывания функции обнаружения падения установите переключатель питания в положение OFF и затем снова в положение ON ПРЕДУПРЕЖДЕНИЕ Отключение данной функции повышает риск повреждения встроенного жесткого диска при случайном падении камеры ПУЛ...

Page 109: ...ALIANO NEDERLANDS PORTUGUÊS РУССКИЙ B MELAYU BHS INDO РЕГ ЧАСОВ Позволяет установить время стр 13 ДАТА ВРЕМЯ ФОРМАТ ОТОБРАЖ ДАТЫ Позволяет вам установить формат отображения даты и времени ФОРМАТ ДАТЫ year month day month day year day month year ВРЕМЯ 24h 12h ДАТА ВРЕМЯ Позволяет вам выбрать показывать или нет текущее время на ЖК мониторе ВЫКЛ Дата время не показываются на экране АВТО Дата время по...

Page 110: ... данную функцию ПРИМЕЧАНИЯ Помните что все файлы и данные включая защищенные файлы будут удалены в процессе форматирования Не форматируйте носитель записи на вашем компьютере УДАЛ ДАННЫХ С HDD Эта функция позволяет еще больше затруднить восстановление данных на жестком диске после их удаления с диска Это действие рекомендуется выполнять при утилизации камеры для предотвращения незаконного восстано...

Page 111: ... экономии питания Для повторного включения камеры при ее питании от аккумулятора установите переключатель питания режима в положение OFF и затем в положение ON При использовании сетевого адаптера выполните любое действие например масштабирование Отрегулируйте яркость ЖК монитора 48 Питание непроизвольно отключилось Переместитесь в место где нет вибрации или слишком громкого звука Сработала функция...

Page 112: ...ми лучами Это не является неисправностью Во время записи дата время не показываются на экране Установите параметр ДАТА ВРЕМЯ на ВКЛ 49 Во время записи видео индикатор 7REC мигает Температура камеры повышается Если нагрев камеры будет продолжаться запись может прекратиться для обеспечения защиты носителя записи В этом случае выключите питание камеры и дождитесь ее охлаждения На ЖК мониторе мигает и...

Page 113: ...камеру во время записи Во время воспроизведения видео индикатор Uмигает Температура камеры повышается Если нагрев камеры будет продолжаться воспроизведение может прекратиться для обеспечения защиты носителя записи В этом случае выключите питание камеры и дождитесь ее охлаждения Другие неисправности Невозможно удалить файлы Снимите защиту файлов и удалите их 31 При печати изображения на принтере в ...

Page 114: ... пытаетесь записывать на карту SD с переключателем защиты записи установленным в положение LOCK 30 ФАЙЛ УПР ВИДЕО ПОВРЕЖДЕН ДЛЯ ЗАПИСИ ВОСПР ВИДЕО НУЖНО ВОССТ ВОССТАНОВИТЬ Файл управления видео запорчен Для записи или воспроизведения видеофайлов рекомендуется сделать восстановление Переместите рычаг установки на для выбора ДА затем нажмите для восстановления файла управления видео НЕВОЗМОЖНОСЧИТАТ...

Page 115: ...характеристики Камера 8 Общие параметры Питание 11 В пост тока при использовании сетевого адаптера 7 2 В пост тока при использовании аккумуляторного блока Потребляемая мощность Около 3 8 Вт Около 3 2 3 4 Вт При использовании светодиодного освещения Около 3 3 2 Вт При использовании светодиодного освещения Размеры Ш х В х Г 66 мм x 71 мм x 110 мм Вес Около 355 г включая ремешок Около 400 г включая б...

Page 116: ...gital 2 канала Формат сигнала PAL стандартный Режим записи видео СВЕРХЧЕТКОЕ 720 x 576 пикселей 8 5 Мбит сек VBR ВЫСОКОЕ 720 x 576 пикселей 5 5 Мбит сек VBR НОРМАЛЬНОЕ 720 x 576 пикселей 4 2 Мбит сек VBR ЭКОНОМИЧНЫЙ 352 x 288 пикселей 1 5 Мбит сек VBR Режим записи аудио СВЕРХЧЕТКОЕ 48 КГц 384 кбит сек ВЫСОКОЕ 48 КГц 384 кбит сек НОРМАЛЬНОЕ 48 КГц 256 кбит сек ЭКОНОМИЧНЫЙ 48 КГц 128 кбит сек 8 Для ...

Page 117: ...ния Качество Жесткий диск Карта SD 128 МБ 256 МБ 512 МБ 1 ГБ 2 ГБ 4 ГБ 4 3 1632 x 1224 ВЫСОКОЕ 3 9999 140 280 560 1135 2195 4310 1632 x 1224 СТАДАРТНОЕ 3 9999 235 470 935 1890 3615 7095 1280 x 960 ВЫСОКОЕ 3 9999 215 430 855 1735 3415 6700 1280 x 960 СТАДАРТНОЕ 3 9999 355 705 1405 2835 5585 9999 1152 x 864 ВЫСОКОЕ 4 9999 270 535 1065 2150 4095 8045 1152 x 864 СТАДАРТНОЕ 4 9999 410 820 1625 3285 614...

Page 118: ...ките его из зарядного устройства или устройства получающего питание от сети так как некоторые устройства потребляют ток даже в выключенном состоянии Носитель записи Во избежание повреждения носителя записи следуйте рекомендациям указанным ниже Не сгибайте и не роняйте носитель записи не подвергайте его сдавливанию толчкам или вибрации Не допускайте попадания воды на носитель записи Не используйте ...

Page 119: ...ямых солнечных лучей в закрытой машине летом рядом с нагревательными приборами в высоко расположенных местах например на телевизоре Установка камеры в высоко расположенном месте с подключенным кабелем может привести к неисправности камеры в случае если кто либо запнется о кабель и камера упадет на пол Для защиты устройства НЕ допускайте намокания устройства роняйте устройство и не ударяйте им по т...

Page 120: ... 19 47 48 58 Ночная съемка 21 О Операции управления питанием 8 Отображение на экране телевизора 49 Отрегулируйте яркость 22 П Параметры меню 46 Поворот изображения 25 Принтер 38 Приоритет диафрагмы 23 Присвоение событий 19 32 Программа AE 20 Прямая печать 38 Пульт дистанционного управления 7 8 48 Р Размер изображения 47 Регулировка яркости ЖК монитор 48 Режим демонстрации 48 Ручная запись 20 С Сбр...

Reviews: