ENGLISH
Continued on next page
Preparation: Turn off all units.
8
To connect using the i.LINK connector
(digital dubbing)
NOTES
•
Be sure to use the optional JVC VC-
VDV206U or VC-VDV204U i.LINK cable
depending on the connector type (4 or
6 pins) of the VCR/DVD recorder.
•
To dub videos in high-definition quality:
- Connect a device that supports high-definition
quality videos.
- Use the i.LINK connector.
- Set [i.LINK OUTPUT (DUB)] to [1440 CBR].
(
Z
p. 70)
- Make a playlist consisted of 1440 CBR video
only, and dub the playlist. (
Z
p. 50)
•
To dub videos in standard quality:
- Use the i.LINK connector.
- Set [i.LINK OUTPUT (DUB)] to [DV]. (
Z
p. 70)
8
To return to the top screen
Press the
MENU button, then select [YES].
8
To finalise the disc after copy is finished
1) Connect the camera to the DVD burner.
(
Z
p. 46)
2) Turn on the camera.
3) Select [FINALIZE].
4) Select [EXECUTE].
5) When [COMPLETED] appears, select
[OK].
8
To play back the created disc using the
camera
1) Connect the camera to the DVD burner.
(
Z
p. 46)
2) Turn the DVD burner on first, then turn
the camera on.
3) Select [PLAYBACK].
4) Select the desired folder.
5) Select the desired file. To return to
previous screen, press the
INDEX
button.
NOTE
In case of [CREATE BY PLAYLIST], date/time
on the file information display shows the date
of copying the file, not of the actual recording.
Using a VCR/DVD Recorder to Dub
Files from the Camera
You can connect the camera to a VCR or DVD
recorder, and dub the camera’s files directly
onto those devices.
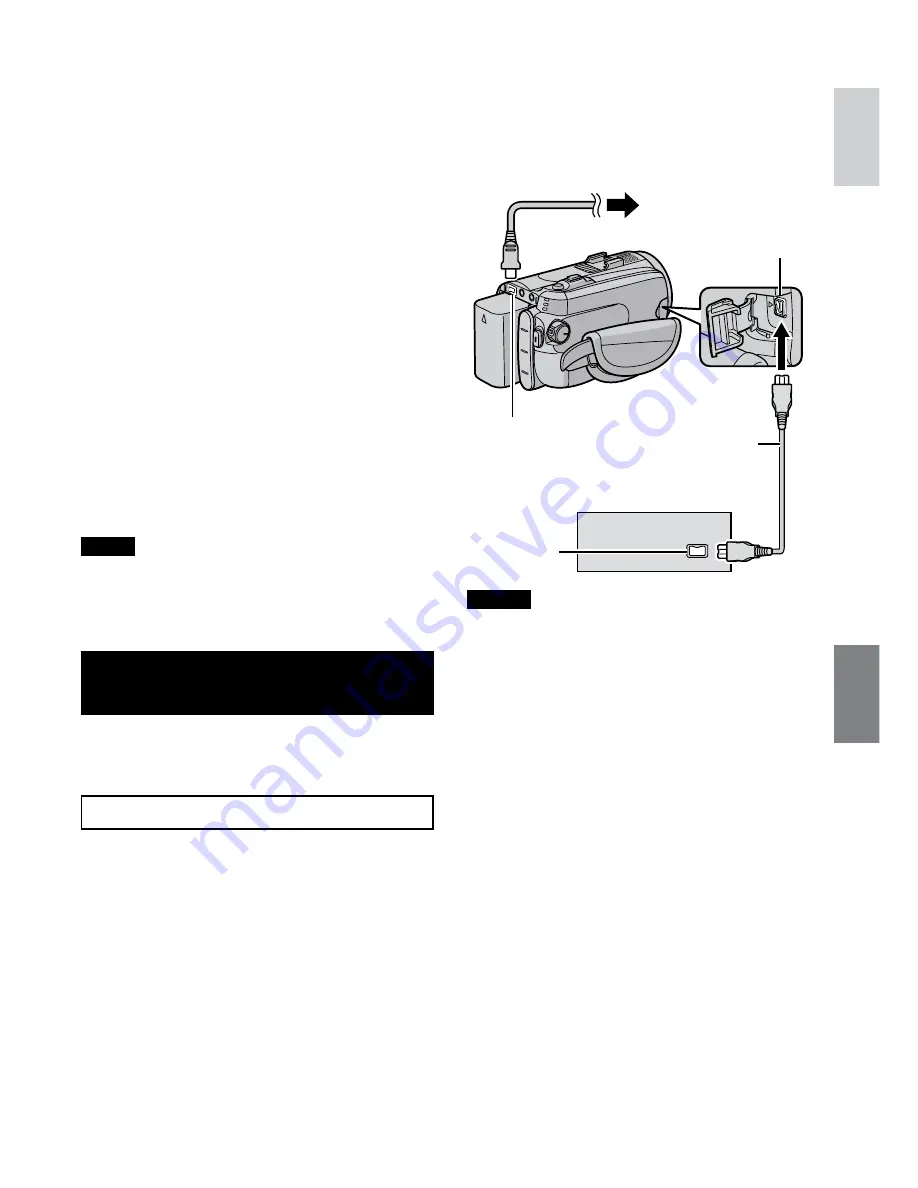
Connection with a VCR/DVD Recorder
You can connect using either the i.LINK
connector or AV connector.
i.LINK
Connector
AC Adapter
VCR/DVD Recorder
i.LINK Connector
i.LINK Cable
(optional)
DC Connector
To AC Outlet


