background image

EN

MasterPage: Safty_Left

IMPORTANT SAFETY INSTRUCTIONS

1. Read these instructions.
2. Keep these instructions.
3. Heed all warnings.
4. Follow all instructions.
5. Do not use this apparatus near water.
6. Clean only with dry cloth.
7. Do not block any ventilation openings. Install in 

accordance with the manufacturer’s instructions.

8. Do not install near any heat sources such as radiators, 

heat registers, stoves, or other apparatus (including 
amplifiers) that produce heat.

9. Only use attachments/accessories specified by the 

manufacturer.

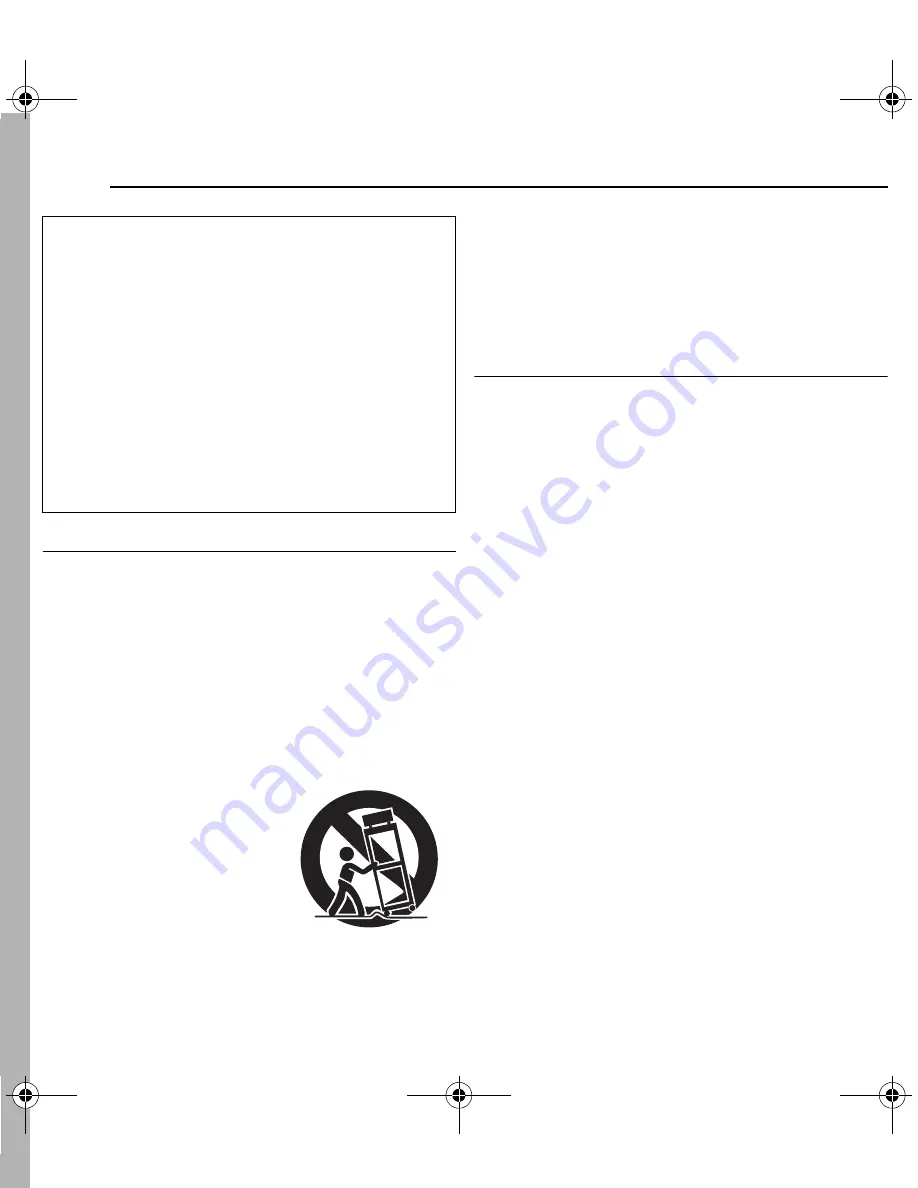
10. Use only with the cart, stand, 

tripod, bracket, or table 
specified by the manufacturer, 
or sold with the apparatus. 
When a cart is used, use 
caution when moving the cart/
apparatus combination to 
avoid injury from tip-over.

11. Unplug this apparatus during 

lightning storms or when 
unused for long periods of time.

12. Refer all servicing to qualified service personnel. Servicing 

is required when the apparatus has been damaged in any 
way, such as power-supply cord or plug is damaged, liquid 
has been spilled or objects have fallen into the apparatus, 
the apparatus has been exposed to rain or moisture, does 
not operate normally, or has been dropped.

Before Using this Camera

This camera is designed exclusively for CompactFlash 
Card (CF card) and SD Memory Card.

The removable hard disk (provided) or Microdrive is a 
type of CF card compliant with CF+ Type II.

This camera records video in MPEG2 format compliant 
with SD-VIDEO format.

Remember that this camera is not compatible with other 
digital video formats.

Remember that this camera is intended for private 
consumer use only.

Any commercial use without proper permission is prohibited. 
(Even if you record an event such as a show, performance or 
exhibition for personal enjoyment, it is strongly recommended 
that you obtain permission beforehand.)

Before recording important video, be sure to make a trial 
recording. 

Play back your trial recording to make sure the video and 
audio have been recorded properly.

Also read “Cautions” on pages 37 to 39.

Do not point the lens directly into the sun. This can cause 
eye injuries, as well as lead to the malfunctioning of internal 
circuitry. There is also a risk of fire or electric shock.

CAUTION!

The following notes concern possible physical damage to 
the camera and to the user.

Carrying or holding the camera by the LCD monitor can 
result in dropping the unit, or in a malfunction.

Do not use a tripod on unsteady or unlevel surfaces. It could 
tip over, causing serious damage to the camera.

CAUTION!

Connecting cables (Audio/Video, S-Video, etc.) to the 
camera and leaving it on top of the TV is not recommended, 
as tripping on the cables will cause the camera to fall, 
resulting in damage.

GZ-MC200US.book  Page 4  Tuesday, September 7, 2004  9:56 PM

Summary of Contents for Everio GZ-MC200EK

Page 1: ...er Use Enter below the Model No and Serial No which is located on the bottom of the camera Retain this information for future reference Model No Serial No REFERENCES INSTRUCTIONS This instruction manual describes the basic operations of the camera For more information read the advanced operation manual provided as HTML format in the CD ROM See page 32 for details GZ MC200US book Page 1 Tuesday Sep...

Page 2: ...s 墌 pg 24 Enjoying Various Playback Features Unlike tape operation playback is simple and easy in this camera since no time is needed for rewinding or fast forward operations Playlist playback effects and other functions are also available for enjoying many different types of playback Refer to the advanced operation manual in CD ROM 墌 pg 32 Editing Files on your PC USB 2 0 enables the smooth trans...

Page 3: ...rating and maintenance servicing instructions in the literature accompanying the appliance NOTES The rating plate serial number plate and safety caution are on the bottom and or the back of the main unit The rating information and safety caution of the AC adapter are on its upper and lower sides This product has a fluorescent lamp that contains a small amount of mercury Disposal of these materials...

Page 4: ...Memory Card The removable hard disk provided or Microdrive is a type of CF card compliant with CF Type II This camera records video in MPEG2 format compliant with SD VIDEO format Remember that this camera is not compatible with other digital video formats Remember that this camera is intended for private consumer use only Any commercial use without proper permission is prohibited Even if you recor...

Page 5: ...ace or store the disk in locations that are exposed to strong static electricity or electrical noise Do not turn off the camera power or remove the battery or AC adapter during shooting playback or when otherwise accessing the recording medium Do not bring the recording medium near objects that have a strong magnetic field or that emit strong electromagnetic waves Since data must be read and writt...

Page 6: ...g shooting Be careful not to cover X during playback The top buttom left or right sides of the 49rtwe button can be pressed to operate like a lever The explanation pressing r in this instruction manual means moving the 49rtwe button in the r direction GZ MC200US book Page 6 Tuesday September 7 2004 9 56 PM ...

Page 7: ...nformation Button INFO Used to display the file information Refer to the advanced operation manual 墌 pg 32 N Menu Button MENU 墌 pg 26 Connectors The connectors are located beneath the covers O USB Universal Serial Bus Connector Refer to the software installation and USB connection guide P Headphone connector 墌 pg 13 Q S Video Audio Video Output Connector AV 墌 pg 25 R DC Input Connector DC 墌 pg 14 ...

Page 8: ...Program AE Mode Indicator 墌 pg 31 N White Balance Indicator 墌 pg 31 O Exposure Adjustment Indicator 墌 pg 31 Backlight Compensation Indicator Appears when backlight compensation is engaged Refer to the advanced operation manual 墌 pg 32 Spot Exposure Control Indicator Appears when spot exposure control is engaged Refer to the advanced operation manual 墌 pg 32 During Video Recording only A Mode Indic...

Page 9: ...manual 墌 pg 32 F Remaining Number Of Shots 墌 pg 42 G Continuous Shooting Mode 墌 pg 22 H Shooting Icon 墌 pg 22 Appears during shooting I Self Timer Recording Indicator 墌 pg 29 During Voice Recording A Remaining Time 墌 pg 43 B Selected Medium Indicator 墌 pg 17 27 C Sound Quality 48 fine 16 standard 8 economy 墌 pg 30 D Recording Level high middle low 墌 pg 30 E Wind Cut Indicator 墌 pg 28 F Counter G B...

Page 10: ... Medium Indicator 墌 pg 17 27 I Effect Mode Indicator 墌 pg 31 J Wipe Fader Effect Indicator 墌 pg 29 During Still Image Playback A Mode Indicator 墌 pg 19 B Folder File Number C U Slide Show 墌 pg 23 D Battery Indicator E Date Time 墌 pg 27 F Selected Medium Indicator 墌 pg 17 27 During Voice Playback A Playback Speed normal fast slow 墌 pg 30 B Selected Medium Indicator 墌 pg 17 27 C Sound Quality 48 fin...

Page 11: ...e 13 for attachment K Core Filter for cables See page 13 for attachment Large S Video Audio Video Cable Medium USB cable Small audio extension cable and AC adapter s cord NOTES In order to maintain optimum performance of the camera provided cables may be equipped with one or more core filter If a cable has only one core filter the end that is closest to the filter should be connected to the camera...

Page 12: ...amera pass your arm through the strap to prevent dropping the camera Tighten the strap at your wrist by sliding the buckle Attaching the Lens Cap To protect the lens attach the provided lens cap to the camera as shown in the illustration NOTE To confirm the lens cap is on correctly make sure the cap is flush to the camera GZ MC200US book Page 12 Tuesday September 7 2004 9 56 PM ...

Page 13: ...ind the cable so that it is not slack 3 Close the core filter until it clicks shut NOTES Take care not to damage the cable When connecting a cable attach the end with the core filter to the camera How to Use the Audio Extension Cable When using optional headphones connect to the provided audio extension cable with a core filter attached then connect the audio extension cable to the camera The core...

Page 14: ... firmly until it locks 5 Connect the AC adapter to the camera 6 Plug the AC adapter into an AC outlet The power charge lamp on the camera blinks to indicate charging has started 7 When the power charge lamp goes out charging is finished Unplug the AC adapter from the AC outlet Disconnect the AC adapter from the camera To detach the battery pack Open the battery CF card cover and remove the battery...

Page 15: ...hat you prepare enough battery packs to cover 3 times the planned recording time Using AC Power Connect the AC adapter to the camera as shown in the illustration 墌 pg 14 NOTE The provided AC adapter features automatic voltage selection in the AC range from 110 V to 240 V ATTENTION Before detaching the power source make sure that the camera s power is turned off Failure to do so can result in a cam...

Page 16: ...se the battery CF card cover firmly until it locks NOTES Read the cautions on CF card 墌 pg 38 Recording Medium Before using a new CF card it is necessary to format the CF card 墌 pg 27 ATTENTION Do not insert or remove the CF card while the camera is turned on as this may cause the CF card to be corrupted or cause the camera to become unable to recognize whether or not the CF card is installed Do n...

Page 17: ...not insert or remove the SD card while the camera is turned on as this may cause the SD card to be corrupted or cause the camera to become unable to recognize whether or not the SD card is installed Select the recording medium before starting recording or playback Example When recording still images to a CF card 1 Set the power switch to or while pressing down the lock button located on the switch...

Page 18: ...ock s Rechargeable Lithium Battery If the camera is not used for approx 3 months the clock s lithium battery will become discharged and the date time stored in memory will be lost When this occurs first connect the camera to an AC outlet using the AC adapter for over 24 hours to charge the clock s rechargeable lithium battery Then perform the date time setting before using the camera Note that the...

Page 19: ... the lock button 2 Recording Playback Mode Press MODE to select the recording playback mode The selected mode lamp lights up Video mode 墌 pg 20 21 Still image mode 墌 pg 22 23 Voice mode 墌 pg 24 3 Auto Manual Mode Press e to switch the auto manual recording mode When manual mode is selected the indicator appears on the LCD monitor Operation Mode Power Charge Lamp Power Switch MODE Lock Button Mode ...

Page 20: ...e turn off the camera power and then wait until the camera cools down 墌 pg 36 When shooting continuously shooting is automatically stopped when a file size of 4 GB is reached If data cannot be recorded or saved properly the video files are not saved to the SD_VIDEO folder for regular video Instead the files are saved to the EXTMOV folder used for saving files created on the PC To play back these f...

Page 21: ...ame playback and playlist creation functions are not available for files in the EXTMOV folder NOTES The playback picture can be viewed in the LCD monitor or on a connected TV 墌 pg 25 If pause mode continues for 5 minutes during playback video still image or voice when using the battery pack the camera s power shuts off automatically To turn the camera on again set the power switch to OFF then to W...

Page 22: ...ry pack the camera s power shuts off automatically To perform shooting again set the power switch to OFF then to When using AC adapter the camera enters the power save mode To cancel the power save mode perform any operation such as zooming To turn the shutter sound off see page 26 For approximate number of storable images see page 42 Continuous Shooting Keeping the recording start stop button pre...

Page 23: ...read the advanced operation manual 墌 pg 32 You can playback all the images stored in recording media automatically 1 Perform steps 1 2 in the left column 2 Press 49 to start the slide show If you press t during the slide show files are displayed in descending order If you press r during the slide show files are displayed in ascending order To end the slide show press 49 again Deleting Still Image ...

Page 24: ...again after recording you cannot delete the file 1 Set the power switch to while pressing down the lock button located on the switch 2 Press MODE to select To change the playback speed see pages 26 and 30 To switch the medium to be played back see pages 26 and 27 3 Press 49 to start playback 4 To pause playback press 49 again To adjust the speaker volume During playback slide the zoom lever toward...

Page 25: ...d TV Date Time Set DATE TIME to AUTO ON or OFF 墌 pg 26 27 Counter Set SCENE COUNTER to ON or OFF 墌 pg 26 27 Pressing INFO button also turns on off the displays NOTES It is recommended to use the AC Adapter as the power supply instead of the battery pack 墌 pg 14 To monitor the picture and sound from the camera without inserting a recording medium set the camera s power switch to then set your TV to...

Page 26: ... press INFO when the menu screen is displayed Factory preset BASIC SETTING EXECUTE Resets all settings to the factory preset CANCEL Returns to menu screen without executing reset OFF Disables the function ON Activates demonstration mode and shows various features on the display OFF Turns off operation sound BEEP The beep sounds when the power is turned on or off and at the beginning and end of rec...

Page 27: ...elected the brightness control indicator appears Adjust the brightness of the display using w e then press 49 OFF The date time does not appear AUTO Displays the date time for approx 5 seconds when the power switch is set from OFF to ON The date time is always displayed OFF Disables the function ON Displays the counter during video mode 墌 Date Time Settings 墌 pg 18 VIDEO MODE Media selection can b...

Page 28: ...es the function ON Compensates for unstable images caused by camera shake particularly at high magnification CAMERA SETTING 10X Only optical zoom is available up to 10X 40X Digital zoom is available up to 40X 200X Digital zoom is available up to 200X OFF Disables the function ON You can shoot a subject as large as possible at a distance of approx 60 cm 2 ft Video Recording Menus QUALITY Mode In or...

Page 29: ...ou can protect files from accidental erasure CURRENT FILE SELECT DELETE ALL You can delete unnecessary files Factory preset FINE STANDARD Select the desired image quality 1600 x 1200 1280 x 960 1024 x 768 640 x 480 Select the desired image size OFF 2SEC 10SEC By setting the self timer a still image is recorded 2 or 10 seconds after pressing recording start stop button OFF ON 墌 Continuous Shooting ...

Page 30: ...d voice recording level NOTE The menu items of WIND CUT are the same as in the description on page 28 Factory preset NORMAL FASTPLAY SLOWPLAY Select the desired voice playback speed NOTE The menu items of PROTECT and DELETE are the same as in the description on page 29 Still Image Playback Menus DPOF DIRECT PRINT EFFECT Voice Recording Menus QUALITY Mode In order of the quality Bit rate FINE 1 536...

Page 31: ... For still image recording AUTO manual If correct focus may not be obtained depending on the shooting condition use the manual focus mode AUTO MWB FINE CLOUD HALOGEN You can adjust the white balance setting manually or select an option AUTO 1 2 1 4 1 8 1 15 1 30 1 60 1 100 1 250 1 500 1 1000 1 2000 1 4000 You can select the shutter speed depending on the subject and shooting condition Not availabl...

Page 32: ...move the battery pack and AC adapter To clean the exterior Wipe gently with a soft cloth Put the cloth in diluted mild soap and wring it well to wipe off heavy dirt Then wipe again with a dry cloth To clean the LCD monitor Wipe gently with a soft cloth Be careful not to damage the monitor To clean the lens Wipe gently with lens cleaning paper NOTES Avoid using strong cleaning agents such as benzin...

Page 33: ...fect DIS and other functions that cannot be used together are selected at the same time Digital zoom does not work ZOOM is set to 10X optical zoom HSet ZOOM to 40X or 200X 墌 pg 28 Playback Playback cannot be performed Recording medium is not selected properly HSelect the recording medium 墌 pg 17 The battery CF card cover is open HClose the cover and set the power switch to OFF then to Playback sta...

Page 34: ...arged The previously set date time is erased HConnect the camera to an AC outlet using the AC Adapter for over 24 hours to charge the clock s lithium battery Then set the date time 墌 pg 18 Files cannot be deleted Files are protected HRemove protection from the files and delete them 墌 pg 29 When the image is printed from the printer a black bar appears at the bottom of the screen This is not a malf...

Page 35: ... you attempt recording when the write protection tab on the SD card is set to the LOCK position THIS CARD IS NOT FOR RECORDING VIDEO Appears when a recording medium which is not capable of video recording is inserted UNSUPPORTED FILE Appears when playing back a file that is not compatible with this camera s file format NO VIDEO FILES STORED Appears if there are no video files when you attempt vide...

Page 36: ... have been moved to MPEG EXTMOV folder PLAY LIST S MANAGEMENT INFORMATION IS BROKEN REMAKE PLAY LIST AGAIN The management information of play list is broken Create the play list again NO REGISTERED SCENES IN PLAY LIST SOME OF SCENES MAY NOT BE PLAYED BACK The video files registered in the play list do not exist Some of the scenes may not be played back REGISTERED SCENES IN PLAY LIST IS EMPTY THIS ...

Page 37: ...argers To prevent damage and prolong service life do not subject to unnecessary shock charge in an environment where temperatures are within the tolerances shown in the chart below This is a chemical reaction type battery cooler temperatures impede chemical reaction while warmer temperatures can prevent complete charging store in a cool dry place Extended exposure to high temperatures will increas...

Page 38: ...LCD monitor and or the back of the LCD monitor may heat up If you leave power on for a long time the surface around the LCD monitor becomes hot Main Unit For safety DO NOT open the camera s chassis disassemble or modify the unit short circuit the terminals of the battery pack Keep it away from metallic objects when not in use allow inflammables water or metallic objects to enter the unit remove th...

Page 39: ...ence and 2 this device must accept any interference received including interference that may cause undesired operation Changes or modifications not approved by JVC could void the user s authority to operate the equipment This equipment has been tested and found to comply with the limits for a Class B digital device pursuant to Part 15 of the FCC Rules These limits are designed to provide reasonabl...

Page 40: ...nel TFT active matrix system Speaker Monaural Flash Within 2 m recommended shooting distance Format SD VIDEO Recording Playback format Video MPEG 2 PS Audio Dolby Digital AC 3 2 ch Signal format NTSC standard Recording mode video ULTRA FINE 720 x 480 pixels 8 5 Mbps CBR FINE 720 x 480 pixels 5 5 Mbps CBR NORMAL 720 x 480 pixels 4 2 Mbps VBR ECONOMY 352 x 240 pixels 1 5 Mbps VBR Recording mode audi...

Page 41: ...p p 75 Ω analog Audio output 300 mV rms 1 kΩ analog stereo Headphone output ø2 5 mm stereo USB Mini USB B type USB 1 1 2 0 compliant AC Adapter Power requirement AC 110 V to 240 Vd 50 Hz 60 Hz Output DC 11 V 1 A Design and specifications subject to change without notice For connectors GZ MC200US book Page 41 Tuesday September 7 2004 9 56 PM ...

Page 42: ... Lexar SanDisk or Hagiwara Sys Com Approximate number of storable images for still image Removable hard disk SD Card Recommended SD cards are products of Panasonic Toshiba or SanDisk Quality 2 GB 4 GB ULTRA FINE 30 60 FINE 45 90 NORMAL 60 120 ECONOMY 150 300 Quality 128 MB 256 MB 512 MB 1 GB ULTRA FINE 2 4 8 16 FINE 3 6 12 24 NORMAL 4 7 15 31 ECONOMY 10 21 43 86 Image size quality 2 GB 4 GB 640 x ...

Page 43: ...isk Image size quality 64 MB 128 MB 256 MB 1 GB 640 x 480 FINE 425 1115 2235 7756 640 x 480 STANDARD 755 2605 5215 9999 1024 x 768 FINE 200 430 865 3412 1024 x 768 STANDARD 375 865 1735 9999 1280 x 960 FINE 125 280 560 2188 1280 x 960 STANDARD 250 560 1120 7110 1600 x 1200 FINE 65 145 290 1398 1600 x 1200 STANDARD 110 245 490 4570 Quality 4 GB FINE 320 STANDARD 960 ECONOMY 1960 GZ MC200US book Pag...

Page 44: ...MasterPage Right 2004 Victor Company of Japan Limited US Printed in Japan 0904HOH AL VP EN GZ MC200US book Page 40 Tuesday September 7 2004 9 56 PM ...

Reviews: