Selecting Files to Copy
Select the 2D/3D video or still image mode.
o
For video mode
1
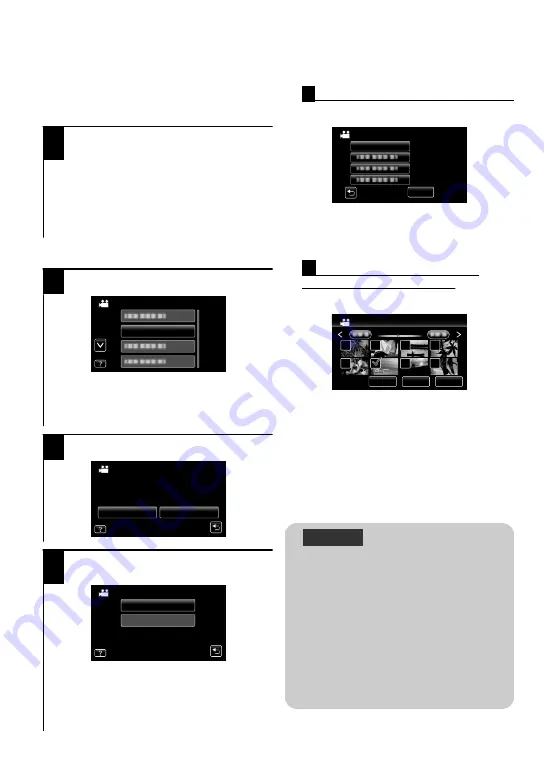
Tap “CREATE BY DATE” (during 2D mode
only) or “SELECT FROM SCENES”.
0
“CREATE BY DATE”: Videos are sorted and
copied according to the date on which they
were recorded.
Æ
To
A
0
“SELECT FROM SCENES”: Select and
copy the desired videos individually.
Æ
To
B
o
For still image mode
1
Tap “SELECT AND SAVE”.
.
SELECT AND SAVE
STILL IMAGE BACKUP
0
You can change the media to save to by
selecting “CHANGE REC. MEDIA”.
(For details, refer to the Detailed User
Guide.)
2
Tap on the media to copy.
.
SD CARD
BUILT-IN MEMORY
SELECT THE MEDIA TO BACK UP
SELECT AND SAVE
3
Tap “SAVE BY DATE” or “SELECT
FROM IMAGES”.
.
SELECT FROM IMAGES
SAVE BY DATE
SELECT AND SAVE
0
“SAVE BY DATE”: Still images are sorted
and copied according to the date on which
they were recorded.
Æ
To
A
0
“SELECT FROM IMAGES”: Select and copy
the desired still images individually.
Æ
To
B
A
CREATE BY DATE/SAVE BY DATE
A
Tap to select a recording date.
.
JAN.1.2011
QUIT
CREATE BY DATE
0
Only files of the selected date will be
copied.
0
The subsequent operations are the same
as steps 4 - 8 on the previous page.
B
SELECT FROM SCENES/
SELECT FROM IMAGES
A
Select a file.
.
2011
SAVE
QUIT
CHECK
SELECT FROM SCENES
0
A check mark appears on the selected
file.
B
After selecting all the files, tap
“SAVE”.
0
The subsequent operations are the same
as steps 4 - 8 on the previous page.
o
To check the disc created
Select “PLAYBACK” in step 1.
CAUTION
0
Do not turn off the power or remove
the USB cable until copying is
complete.
0
If copying is canceled while it is in
progress, the disc will become
unusable.
0
Videos and still images cannot be
copied to the same disc.
0
Files that are not on the index
screen during playback cannot be
copied. Special files cannot be
copied either.
24
For more information, refer to the Detailed User Guide
http://manual.jvc.co.jp/index.html/


