8
English
Setting the Clock
Before operating the unit, set the correct time.
You can set the clock whether the Unit is on or off.
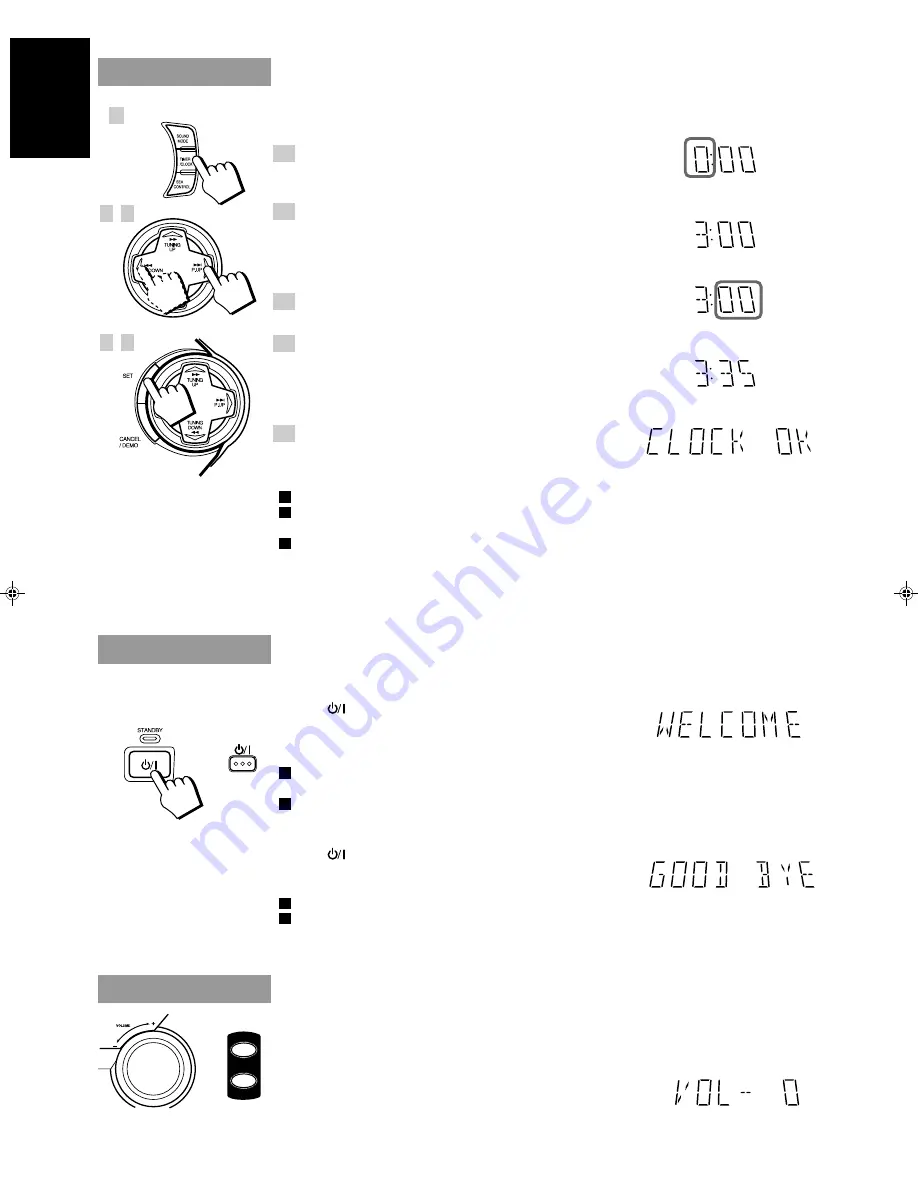
1. Press TIMER/CLOCK.
The hour digits begin flashing.
2. Press
4
P. DOWN or
¢
P. UP on
the MULTI CONTROL to set the hours.
Press
¢
P. UP to increase the hour. Press
4
P. DOWN
to decrease the hour. Holding down continuously changes
the hour setting more rapidly.
3. Press SET.
The minute digits begin flashing.
4. Press
4
P. DOWN or
¢
P. UP on
the MULTI CONTROL to set the minutes.
Press
¢
P. UP to increase the minutes. Press
4
P. DOWN
to decrease the minutes. Holding down continuously changes
the minute setting more rapidly.
5. Press SET.
“CLOCK OK” appears on the display.
The clock stops flashing, and the clock timer starts from 0 second.
If the clock is not set, “0:00” will flash instead of the clock indication.
When the time has been set, TIMER/CLOCK can be used to operate the Daily Timer and Recording
Timer.
To adjust the time once the clock has been set, press TIMER/CLOCK 5 times and follow the proce-
dure above.
CAUTION: If there is a power failure, the clock loses its setting.
The display shows “0:00”, and the clock must be reset.
Turning the Power On and Off
Turning the System On
——————————————————
Press
.
“WELCOME” appears on the display and the STANDBY indicator
goes out.
The System comes on ready to continue in the mode it was in when the power was last turned off.
If the last thing you were doing was listening to a tape in Deck B, you are now ready to listen to a
tape again in Deck B, or you can change to another source.
If you were listening to the Tuner last, the Tuner comes on playing the station it was last set to.
Turning the System Off ——————————————————
Press
again.
“GOOD BYE” appears on the display for a while and the STANDBY
indicator lights up. The clock time appears on the display.
Some power (10 watts) is always consumed even though the power is on standby.
To switch off the Unit completely, unplug the AC power cord from the AC outlet. When you unplug
the AC power cord, the clock will be reset to 0:00 immediately, and preset Tuner stations will be
erased in a few days.
Adjusting the Volume
Turn VOLUME clockwise to increase the volume or anticlockwise to decrease it.
Turning VOLUME quickly also adjusts the volume level quickly.
When using the Remote Control, press to increase the volume or press VOLUME – to
decrease it.
You can adjust the volume level between 0 and 50.
or
1
2 , 4
3 , 5
VOLUME
+
–
Flashing
Flashing
or
EN.CA-D432/452TR[E]/f
98.3.26, 10:56 PM
8


