background image

38

Additional menu operations

AV-32/28X5SU/BU / LCT1797-001A-U / English

Downloading the data to VCR

You can transmit to the latest Programme 
numbers (PR) data to the VCR with the T-V 

LINK function.

Caution

• Only when the T-V LINK compatible VCR 

is connected to the EXT-2 terminal, this 

operation is enabled.

• Only when the T-V LINK menu is being 

displayed, this operation is enabled.

1 Turn on the VCR

2 Press the 

a

 button

The data transmission begins.

The T-V LINK menu disappears once the 
data transmission ends.

When the T-V LINK menu is 

changed over to another menu:

The menu operation at the TV side is 

completed and it is shifted to the menu 
operation at the VCR side. Refer to the 
VCR Instruction Manual and operate the 

VCR.

If “FEATURE NOT AVAILABLE” 
appears at the T-V LINK menu, ensure 
the following three items are correct; then 

press the 

a

 button to retry data 

transmission.

• Has the T-V LINK compatible VCR 

been connected to the EXT-2 
terminal?

• Has the VCR power been turned on?
• Does the SCART cable that is 

connected to the EXT-2 terminal to T-
V LINK compatible VCR have all 

proper connections?

Changing the COUNTRY 

setting

After the AUTO PROGRAM function is 
completed, you can change the country you 
have already set by using the AUTO 

PROGRAM function.
When registering the TV channels for French 
broadcast stations (SECAM-L system), 

perform this operation to change the country.

1 Display the INSTALL menu

When the EDIT menu is currently 

being displayed:

Press the 

h

 (Information) to return to the 

INSTALL menu.

2 Press the 

6

 buttons to choose 

AUTO PROGRAM. Then press the 

a

 button

A COUNTRY menu appears as a sub-
menu of the AUTO PROGRAM function.

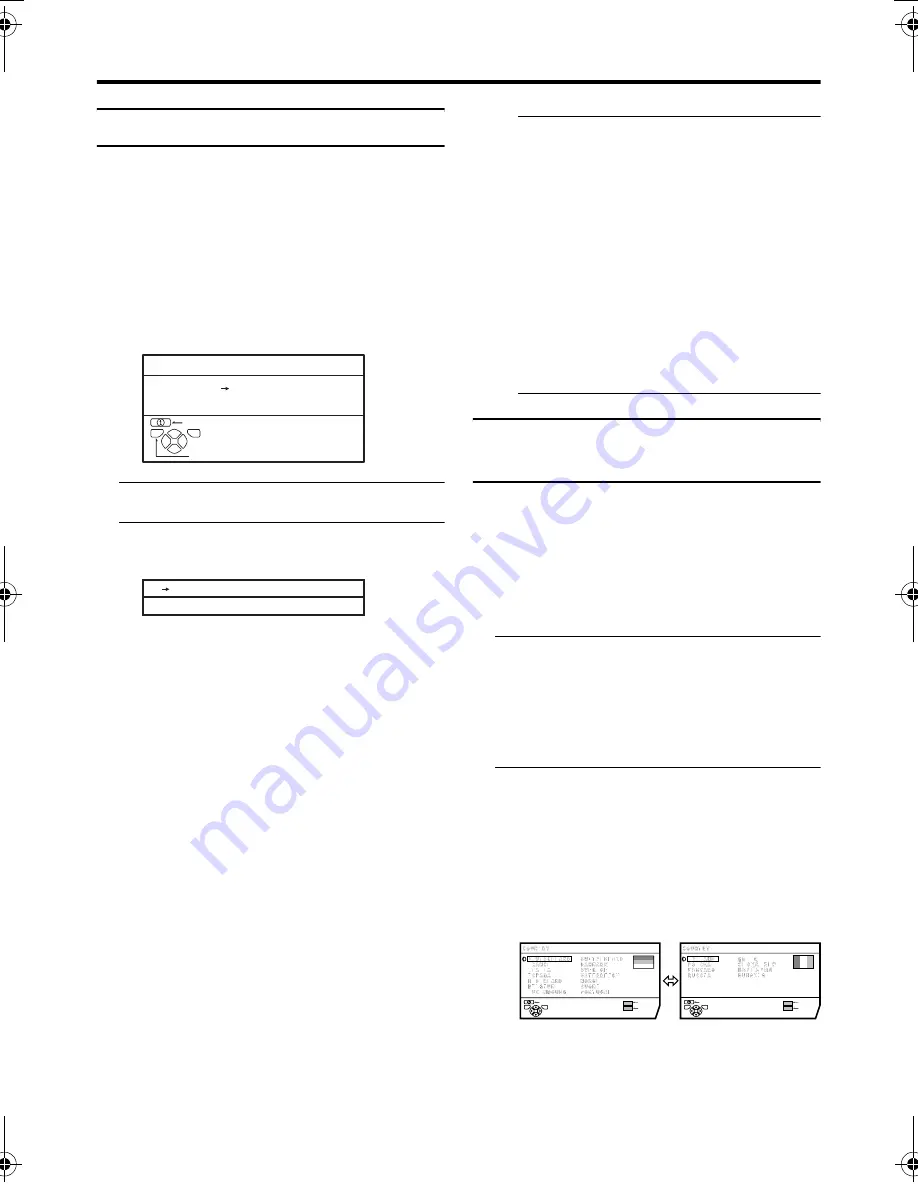
There are two COUNTRY menus. 
Pressing the yellow button changes the 
COUNTRY as follows:

D0005-EN

BACK

DOWNLOAD    TV 

T-V LINK

TV

OK

EXIT

RECORDING DEVICE

D0037-EN

TRANSFER. . . . . 

TV RECORDING 

DEVICE

BACK

MORE

START

TV

OK

BACK

MORE

START

TV

OK

D0003-EN

AV-32&28X5SUBU_Eng.book  Page 38  Wednesday, December 22, 2004  10:15 AM

Summary of Contents for AV-28X5BU

Page 1: ...EUR COULEUR MANUEL D INSTRUCTIONS KLEURENTELEVISIE GEBRUIKSAANWIJZING TELEVISOR A COLOR MANUAL DE INSTRUCCIONES TELEVISORE A COLORI ISTRUZIONI TELEVISOR A CORES INSTRUÇÕES AV 32X5SU AV 28X5SU AV 32X5BU AV 28X5BU ENGLISH DEUTSCH FRANÇAIS NEDERLANDS CASTELLANO ITALIANO PORTUGUÊS ...

Page 2: ...1 ENGLISH How to move the TV When moving the TV make sure that it is held by two people as shown in the illustration Be careful not to trap your hands when putting the TV down 1 2 3 ...

Page 3: ...uipment fire or electric shock may be caused DO NOT place any naked flame sources such as lighted candles on the TV WARNING TO PREVENT FIRE OR SHOCK HAZARD DO NOT EXPOSE THIS APPLIANCE TO RAIN OR MOISTURE CAUTION Operate only from the power source specified AC 220 240 V 50 Hz on the unit Avoid damaging the AC plug and power cord When you are not using this unit for a long period of time it is reco...

Page 4: ...ation 16 Using the List Mode 16 Hold 17 Sub page 17 Reveal 17 Size 17 Index 17 Cancel 18 Using the TV s menu 19 Basic operation 19 PICTURE SETTING 20 PICTURE MODE 20 Picture Adjustment 20 COLOUR TEMP 20 PICTURE FEATURES 21 DIGITAL VNR 21 DigiPure Pro 21 COLOUR SYSTEM 22 MOVIE THEATRE 22 4 3 AUTO ASPECT 23 PICTURE TILT 23 SOUND SETTING 24 STEREO I II 24 Sound Adjustment 24 HYPER SOUND 24 3D CINEMA ...

Page 5: ...ls refer to your VCR instruction manual To connect additional external devices please see Additional preparation on page 40 To connect speakers and amplifier please see Connecting Speakers Amplifier on page 41 When a decoder is connected to a T V LINK compatible VCR set the DECODER EXT 2 function to ON For details see Using the DECODER EXT 2 function on page 39 Otherwise you will not be able to vi...

Page 6: ...for setting up and testing your TV please replace them as soon as necessary If the remote control does not work properly replace the batteries Initial settings When the TV is first turned on it enters the initial setting mode and the JVC logo is displayed Follow the instructions on the on screen display to make the initial settings 1 Press the Main power button on the TV The Power lamp lights and ...

Page 7: ...UTO PROGRAM function Press the b button After the TV channels have been registered in the Programme numbers PR the EDIT menu appears You can proceed to edit the Programme numbers PR using the EDIT MANUAL function For details see EDIT MANUAL on page 32 If you do not need to use the EDIT MANUAL function go to the next step If ACI START ACI SKIP appears in the AUTO PROGRAM menu You can use the ACI Au...

Page 8: ...is not registered in Programme number PR 0 AV When you want to register a TV channel to PR 0 AV manually set it using the MANUAL function For details see EDIT MANUAL on page 32 T V LINK FUNCTIONS When a T V LINK compatible VCR is connected to the EXT 2 Terminal on the TV it is easier to set up the VCR and to view videos T V LINK uses the following features To use T V LINK functions A T V LINK comp...

Page 9: ...on a decoder When recording a TV channel by using the TV s output because that TV channel cannot be properly received on the VCR s tuner Operation via the TV is not possible Generally the VCR cannot record a TV channel that cannot be received properly by the VCR s tuner even though you can view that TV channel on the TV However some VCRs can record a TV channel by using the TV s output if that cha...

Page 10: ...o the pages in parentheses for details 1 Main power button 5 10 2 Power lamp 5 10 3 Remote control sensor 4 r Volume button 10 5 P p buttons q buttons 10 6 Headphone jack mini jack 40 7 EXT 4 terminal 26 40 R L MONO S P EXT 4 R L MONO S P EXT 4 ...

Page 11: ...e AC supply If you are not going to use this TV for a long period of time be sure to disconnect the AC plug from the AC socket Turn the TV on from standby mode Press the P p buttons to turn the TV on from standby mode When the TV is turned on the power lamp dims slightly Choose a TV channel Press the P p buttons to choose a programme number PR or an EXT terminal Adjust the volume 1 Press the r Vol...

Page 12: ...D switch g Text button D buttons Turn the TV on or off from standby mode Press the standby button to turn the TV on or off When the TV is turned on the power lamp dims slightly The power can be turned on by pressing the b button 6 buttons or Number buttons Choose a TV channel Use the number buttons Enter the programme number PR of the channel using the number buttons Example PR 6 press 6 PR 12 pre...

Page 13: ...ear and you cannot watch the TV channel To watch the TV channel see CHILD LOCK on page 28 If the picture is tilted correct it See PICTURE TILT on page 23 Adjust the volume Press the 5 buttons to adjust the volume The Volume indicator appears and the volume changes as you press the q buttons Muting the sound Press the l muting button to turn off the sound Pressing the l muting button again restores...

Page 14: ...llows The VCR RF channel is sent as the RF signal from the VCR Also refer to your VCR instruction manual ZOOM function You can change the screen size according to the picture aspect ratio Choose the optimum one from the following ZOOM modes AUTO For any picture format except Normal Picture 4 3 Aspect Ratio the picture will be automatically displayed in the optimum screen size For Normal Picture 4 ...

Page 15: ...e picture expands and the chosen ZOOM mode is displayed in about 5 seconds The ZOOM mode may be automatically changed due to the control signal from an external device When you want to return to the previous ZOOM mode choose the ZOOM mode again Adjusting the visible area of the picture If subtitles or the top or bottom of the picture are cut off adjust the visible area of the picture manually 1 Pr...

Page 16: ...atching videos an incorrect current time is sometimes displayed Return to TV channel instantly You can return to a TV channel instantly Press the b button The TV returns to the TV mode and a TV channel appears Operating a JVC brand VCR or DVD player You can operate a JVC brand VCR or DVD player Pressing the button having the same appearance as the original remote control button of a device makes t...

Page 17: ...s on the country which was set on the COUNTRY menu If characters on a Teletext programme do not appear properly change the COUNTRY Setting to other country s For detail Changing the COUNTRY setting on page 38 The last teletext page displayed is memorised The last teletext page is cleared under following conditions Turning the power off Changing the channel Switching the TV input Using the List Mod...

Page 18: ...d function Press C Hold button again Sub page Some teletext pages include sub pages that are automatically displayed 1 Choose a teletext page that includes sub pages Sub page numbers that can be viewed are automatically displayed at the top of the screen 2 Press the D buttons to choose a sub page number Reveal Some teletext pages include hidden text such as answers to a quiz You can display the hi...

Page 19: ...text page 2 Press H Cancel button The TV programme appears When the TV finds the teletext page its page number appears in the upper left of the screen 3 Press H Cancel button to return to a teletext page when the page number is on the screen The TV mode cannot be resumed even by pressing the H Cancel button A TV programme is temporarily displayed instead of the teletext programme ...

Page 20: ...he 6 buttons to choose a function For details of the functions in the menus see the following pages 4 Press the 5 buttons to choose the setting of that function If you want to operate a function which appears only with its name follow the descriptions of that function on the following pages The display appearing at the bottom of a menu shows you a button on the remote control that you can use when...

Page 21: ...reenish You can change the HUE setting picture hue when the colour system is NTSC 3 58 NTSC 4 43 See Specifications on page 47 To return to the default settings in each PICTURE MODE Press the blue button This returns the picture settings in the PICTURE MODE mode you have chosen to the default settings and stores them in the PICTURE MODE mode COLOUR TEMP You can select one of three COLOUR TEMP mode...

Page 22: ...technology to give you a natural looking picture DigiPure function This function helps to create a natural looking picture by eliminating unnecessary edges from high contrast and crisp images For images with low contrast edges are added to produce a sharper more detailed picture You can choose from the three DigiPure function settings of AUTO MIN and MAX The TV and external input may be given diff...

Page 23: ...nction detects a colour system from the input signal Only when you are viewing a picture from Programme number PR 0 AV or EXT terminal you can choose using the AUTO function The AUTO function may not function properly if you have poor signal quality If the picture is abnormal in the AUTO function choose another colour system manually When in the Programme numbers PR 0 AV to PR 99 you cannot choose...

Page 24: ...UTO ASPECT then press the a button 2 Press the 6 buttons to choose a ZOOM mode Then press the a button PICTURE TILT There are cases where the Earth s magnetic force may make the picture tilt If this happens you can correct the picture tilt 1 Press the 6 buttons to choose PICTURE TILT Then press the a button 2 Press the 6 buttons until the picture becomes level Then press the a button ...

Page 25: ...e sound 2 weaker 3 strong TREBLE You can adjust the high tone of the sound 2 weaker 3 strong BALANCE You can adjust the volume balance between the left and right speaker 2 turn the left speaker s volume level up 3 turn the right speaker s volume level up HYPER SOUND Mono sound is converted to simulated stereo for a more enjoyable audio experience ON This function is turned on OFF This function is ...

Page 26: ...udio needs to be stereo sound When the audio is mono sound use HYPER SOUND see page 24 SURROUND Adjust the surround effect You can choose HIGH MID or LOW Choosing LOW will reduce the surround effect and choosing HIGH will increase the surround effect BASS BOOST Adjust the bass sound You can choose HIGH MID or LOW Choosing LOW will reduce the bass sound and choosing HIGH will increase the bass soun...

Page 27: ...ignal composite signal To cancel the S IN S VIDEO input setting Press the yellow button and turn off S IN S VIDEO input mark The regular video signal composite signal pictures are resumed The EXT 1 terminal does not support S VIDEO signal Y C signal and you cannot set S IN S VIDEO input in the EXT 1 terminal Setting S IN S VIDEO input changes the head character from E to S For example E2 is change...

Page 28: ...ss the 6 buttons to choose an EXT terminal or TV Then press the a button The arrow in the menu represents a signal flow The left side of the arrow denotes a signal source output from the EXT 2 terminal EXT 1 EXT 3 EXT 4 The output signal of the device connected to an EXT terminal passes through the TV and is output from the EXT 2 terminal TV The picture and sound of the TV channel you are currentl...

Page 29: ... remaining time To cancel the SLEEP TIMER function Press the 2 button to set a period of time to OFF BLUE BACK You can set the TV to automatically change to a blue screen and mute the sound if the signal is weak or absent or when there is no input from an external device ON This function is turned on OFF This function is turned off CHILD LOCK When there is a TV channel you wish your children not t...

Page 30: ...hannel 2 Press the h Information button while the n CHILD LOCK is displayed The ID NO ID NO input screen appears 3 Press the Number buttons to enter the ID number The lock is temporarily released so you can view the TV channel If you have forgotten the ID number Perform step 1 of To set the CHILD LOCK function After confirming the ID number press the b button to exit the menu Even if you reset the...

Page 31: ... can use this function To operate this function see Using the DECODER EXT 2 function on page 39 Caution If you have not connected a Decoder with a T V LINK compatible VCR connected to the EXT 2 terminal setting this function to ON by mistake causes the picture sound of a TV channel you are currently viewing not to be issued ...

Page 32: ...ocated 3 Press the blue button to start the AUTO PROGRAM function The AUTO PROGRAM menu appears and received TV channels are automatically registered in the Programme numbers PR To cancel the AUTO PROGRAM function press the b button After the TV channels have been registered in the Programme numbers PR the EDIT menu appears You can proceed to edit the Programme numbers PR using the EDIT MANUAL fun...

Page 33: ...The EDIT MANUAL functions are divided into two types editing of the current Programme numbers PR EDIT functions and manual registration of a TV channel you want to view to the Programme number PR MANUAL function The details about these functions are as follows Caution Using the MOVE DELETE or INSERT function rewrites the current Programme numbers PR list Resultingly the Programme number PR of some...

Page 34: ...annel in a Programme number PR 3 Press the a button to complete the settings The T V LINK menu appears 4 If you do not have a T V LINK compatible VCR connected Press the b button to exit the T V LINK menu The T V LINK menu disappears and all the settings are completed If you have a T V LINK compatible VCR connected to the EXT 2 terminal Follow the operating procedure Downloading the data to VCR on...

Page 35: ...ompleting the Channel name ID Then press the a button to register the Channel name ID to the TV channel INSERT Preparation A CH CC number unique to this TV and corresponding to the Channel number of a TV channel is required Find the corresponding CH CC number from a table CH CC numbers on page 42 based on the Channel number of the TV channel When the COUNTRY setting is not FRANCE use a two digit C...

Page 36: ...hoose a TV channel Every time you press the 6 buttons the Programme number PR is changed over and the picture of the TV channel registered in the Programme number PR appears on the screen 2 Press the yellow button to delete the TV channel The TV channel is deleted from the Programme numbers PR list MANUAL Preparation As long as you register the TV channel SECAM L system from a French station be su...

Page 37: ...In this case retry to set the SYSTEM again correctly so that no problem arises 4 Press the green or red button to search for a TV channel Scanning stops when the TV finds a TV channel Then the TV channel is displayed 5 Press the green or red button repeatedly until the TV channel you want appears If the TV channel reception is poor Press the blue or yellow button to fine tune the TV channel If you...

Page 38: ... AUTO PROGRAM menu ACI ERROR denotes that the ACI function is not working properly Press the a button to start the ACI function again If ACI ERROR still appears even after you have tried to start the ACI function several times press the 3 button to start the AUTO PROGRAM function It does not cause any problem because all the TV channels are registered to the Programme numbers PR by the AUTO PROGRA...

Page 39: ...transmission Has the T V LINK compatible VCR been connected to the EXT 2 terminal Has the VCR power been turned on Does the SCART cable that is connected to the EXT 2 terminal to T V LINK compatible VCR have all proper connections Changing the COUNTRY setting After the AUTO PROGRAM function is completed you can change the country you have already set by using the AUTO PROGRAM function When registe...

Page 40: ... the 6 buttons to choose DECODER EXT 2 Then press the 5 buttons to choose ON An unscrambled picture appears To cancel the DECODER EXT 2 function Press the 5 buttons to choose OFF 6 Press the a button to complete the setting The T V LINK menu appears 7 Follow the operating procedure Downloading the data to VCR on page 38 to transmit the Programme number PR data to the VCR 8 If you have another TV c...

Page 41: ...ing connection diagram see the table to choose the best EXT terminal Note that connecting cables are not supplied If the VCR s audio output is in mono connect the VCR s AUDIO OUT audio output terminal and the TV s EXT 4 AUDIO L MONO terminal with an audio cable 1 VCR composite signal 2 VCR composite signal S VIDEO signal 3 T V LINK compatible VCR composite signal S VIDEO signal 4 Decoder 5 DVD pla...

Page 42: ... output of the video sound signal from the EXT 2 terminal It is useful when you want to dub the video sound from another device on the VCR connected to the EXT 2 terminal For details on how to do this operation see DUBBING on page 27 TV output from the EXT 1 terminal The output of video sound signal of a TV channel you are currently viewing is always output from the EXT 1 terminal Changing over a ...

Page 43: ...CC 12 CC 212 S12 CC 13 CC 213 S13 CC 14 CC 214 S14 CC 15 CC 215 S15 CC 16 CC 216 S16 CC 17 CC 217 S17 CC 18 CC 218 S18 CC 19 CC 219 S19 CC 20 CC 220 S20 CC 21 CC 221 S21 CC 22 CC 222 S22 CC 23 CC 223 S23 CC 24 CC 224 S24 CC 25 CC 225 S25 CC 26 CC 226 S26 CC 27 CC 227 S27 CC 28 CC 228 S28 CC 29 CC 229 S29 CC 30 CC 230 S30 CC Channel CC 31 CC 231 S31 CC 32 CC 232 S32 CC 33 CC 233 S33 CC 34 CC 234 S3...

Page 44: ...C number Find the CH CC number CC110 to CC161 corresponding to the TV channel SECAM L system from a French cable TV station based on the broadcast frequency of the TV channel When you do not know the broadcast frequency please contact the cable TV station The CH CC numbers of CH102 CH169 and CC110 CC161 correspond to the TV channels being broadcast by a SECAM L system The other CH CC numbers corre...

Page 45: ... the description BLUE BACK on page 28 to try to change the BLUE BACK function setting to OFF Have you connected the headphones to the TV Connecting the headphones to the TV causes sounds not to be issued from the TV speakers If the SYSTEM setting for a TV channel is incorrect it may prevent the sound from being issued Follow the description EDIT MANUAL on page 32 to use the MANUAL function to try ...

Page 46: ...emote control become exhausted Follow the description Putting the batteries into the Remote control on page 5 and replace them with new batteries to try to solve the problem Have you attempted to use the remote control at the sides or rear of the TV or at a location more than seven meters apart from the TV location Operate the remote control in the front of your TV or a location less than seven me...

Page 47: ... image is displayed This is not a malfunction This is the time required for the image to stabilize before it can be displayed The TV may emit a crackling sound due to a sudden change in temperature It does not matter if a picture or sound does not show any abnormality If you hear crackling sounds frequently while you are viewing the TV other causes may be assumed For precautionary purposes request...

Page 48: ...20 240 V AC 50 Hz Power consumption 130 W Standby 2 5 W 120 W Standby 2 5 W Picture tube size Viewable area 76 cm measured diagonally Viewable area 66 cm measured diagonally Audio output Rated Power output 10 W 10 W Speakers 13 cm 6 5 cm oval 2 EXT 1 terminal Euroconnector 21 pin SCART Video input Audio L R inputs and RGB inputs are available TV broadcast outputs Video and Audio L R are available ...

Page 49: ...48 ...

Page 50: ... 2005 Victor Company of Japan Limited LCT1797 001A U 0205MKH CR MU ...

Reviews: