background image

9

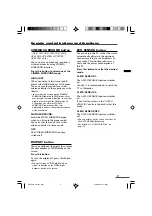
CINEMA SURROUND button

<

AV-21V311/AV-21V331/AV-21W311/

AV-25V311/AV-25V331/AV-29V311/
AV-29V331 only

>

You can enjoy an enhanced sound for a
wider audience by using CINEMA
SURROUND function.

Press this button to select one of the
CINEMA SURROUND mode.

HIGH/LOW:

When you listen to the stereo sound,
please select HIGH mode or LOW mode.
You can enjoy the sound for a wider
audience similar to the experience at the
theatre.

• In case that you setting up the CINEMA

SURROUND function to HIGH mode, there
may be slight volume distortion. In case that
occurs, please switch the HIGH mode to
LOW mode, the effect of CINEMA
SURROUND functions will be less
noticeable, however, the volume distortion
will be corrected.

MONO SURROUND:

Select the MONO SURROUND mode,
when you listen to the mono sound.
You can enjoy the sound for a wider
audience similar to stereo sound.

OFF:

The CINEMA SURROUND function
swiches off.

DISPLAY button

You can continuously display the current
channel number or VIDEO mode on the
screen.

Press this button.

To turn the display off, press this button
again.

• When selecting a VIDEO mode with no

signal, indication of the VIDEO mode
becomes fixed on the screen.

ECO SENSOR button

You can adjust this TV so that the screen
automatically adjusts to the optimum
contrast according to the brightness of
your room. This function reduces eye
strain and the power consumption of
this TV.

Press this button to select the desired
mode.

AI ECO SENSOR 1:

The AI ECO SENSOR function switches
on.

Usually, it is recommended to watch the
TV in this mode.

AI ECO SENSOR 2:

The AI ECO SENSOR function switches
on.

If you feel the screen in the “AI ECO
SENSOR 1” mode is too dark, select this
mode.

AI ECO SENSOR OFF:

The AI ECO SENSOR function switches
off.

• You can display on the screen the effect of

the AI ECO SENSOR function.
For details, see “AI ECO DISPLAY” on
page 19.

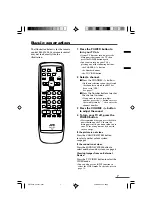
Remote control buttons and functions

GGT0016-29V331-E401

22/08/2003, 15:38pm

9

Summary of Contents for AV-21V311, AV-21V511, AV-21V53

Page 1: ... and functions 8 MUTING button 8 BASS button 8 PICTURE BOOSTER button 8 COLOUR SYSTEM button 8 SOUND SYSTEM button 8 CINEMA SURROUND button 9 DISPLAY button 9 ECO SENSOR button 9 PICTURE MODE button 10 OFF TIMER button 10 RETURN button 10 CHANNEL SCAN button 11 FAVORITE CH button 11 Using the TV s menus 12 Basic operation 12 INPUT 13 PICTURE TILT 13 VNR 13 COMPRESS 16 9 13 AUTO SHUTOFF 14 CHILD LO...

Page 2: ...face of the TV screen is easily damaged Be very careful with it when handling the TV Should the TV screen become soiled wipe it with a soft dry cloth Never rub it forcefully Never use any cleaner or detergent on it When you don t use this TV for a long period of time be sure to disconnect the power plug from the AC outlet The apparatus shall not be exposed to dripping or splashing and that no obje...

Page 3: ...FF TIMER ECO SENSOR PICTURE MODE CHANNEL SCAN SYSTEM COLOUR SOUND MENU CHANNEL RETURN POWER DISPLAY TV VIDEO VOLUME 1 2 3 4 5 6 7 8 9 0 CINEMA SURROUND FAVORITE CH TV RM C1308 MUTING OFF TIMER ECO SENSOR PICTURE MODE CHANNEL SCAN SYSTEM COLOUR SOUND MENU CHANNEL RETURN POWER DISPLAY TV VIDEO VOLUME 1 2 3 4 5 6 7 8 9 0 PICTURE BOOSTER TV RM C1313 FAVORITE CH 2 Insert the batteries into the remote c...

Page 4: ...n that case do not connect it to the TV with a video cable If you connect the VCR to the TV only with an aerial cable you should preset the video channel from the VCR to the AV channel channel number 0 on this TV See MANUAL CH PRESET on page 16 and preset it manually Connecting the aerial and VCR VIDEO 1 INPUT OUTPUT COMPONENT VIDEO 2 INPUT R R R CR To RF output To video output VCR VHF UHF outdoor...

Page 5: ...turned off Connect components outputting a component signal Y CB CR signal such as a DVD player to the VIDEO 2 terminal and set VIDEO 2 SET function to COMPONENT See page 14 The following illustrations are for the AV 21V311 AV 21V331 AV 25V311 AV 25V331 Your TV s front and rear panels may not look exactly like the illustrations Front Camcorder or TV game Headphones Rear VIDEO 1 INPUT OUTPUT COMPON...

Page 6: ...Y 3 The AUTO PROGRAMMING function will start and the indicator blinks STOP BY SETUP TOUR NOW PROGRAMMING To stop the AUTO PROGRAMMING function press the CHANNEL m or the MENU buttons When all the TV channels that can be received on your TV have been preset the display goes out and the AUTO PROGRAMMING function operation is completed If a TV channel you want to view is not set to the channel set it...

Page 7: ... to which the SKIP has been set to YES See page 17 Press the Number buttons to enter the channel number If you want to enter a two digit number press the button to select the two digit mode then enter the channel number 3 Press the VOLUME button to adjust the sound 4 To turn your TV off press the POWER button We recommend that you press the Main power button on the TV to turn the main power off if...

Page 8: ... minimum OFF The Picture Booster is off If the picture becomes abnormal when you set the Picture Booster to HIGH then set it to LOW or OFF COLOUR SYSTEM button If the picture is not clear or no colour appears change the current colour system to another colour system Press this button to select the colour system AUTO PAL SECAM NTSC3 58 NTSC4 43 AUTO Automatic colour system selection For the colour ...

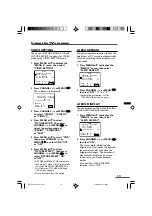
Page 9: ...EMA SURROUND function swiches off DISPLAY button You can continuously display the current channel number or VIDEO mode on the screen Press this button To turn the display off press this button again When selecting a VIDEO mode with no signal indication of the VIDEO mode becomes fixed on the screen ECO SENSOR button You can adjust this TV so that the screen automatically adjusts to the optimum cont...

Page 10: ...t the period of time to 0 The OFF TIMER function will not turn off the TV s main power RETURN button You can set a channel you frequently view to the Return Channel and you can view that channel at any time with one touch To set the channel to the Return Channel 1 Select the channel you want to set to the Return Channel 2 Press this button and hold until the message RETURN PLUS PROGRAMMED appears ...

Page 11: ... button again to stop scanning FAVORITE CH button You can correlate 4 channels out of 99 channels PR01 PR99 with FAVORITE CH buttons RED GREEN YELLOW and BLUE Press one of the FAVORITE CH buttons for more than 3 seconds to correlate currently watching channel After the channel and button are correlated you can directly select favorite channel by the correlated button When MENU is displayed FAVORIT...

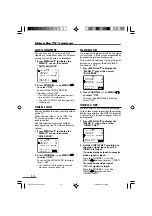
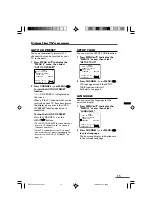
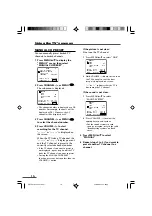
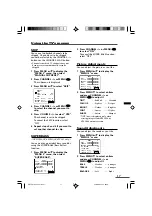
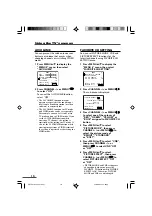
Page 12: ...K OFF BLUE BACK ON VIDEO 2 SET COMPONENT SELECT BY EXIT BY OPERATE BY D I SPLA Y MENU 2 AUTO SHUTOFF ON CHILD LOCK OFF BLUE BACK ON VIDEO 2 SET COMPONENT SELECT BY EXIT BY OPERATE BY D I SPLA Y With some functions the operation method may differ 5 Press the DISPLAY button to turn the display off To operate a menu using the buttons on the front panel of the TV refer to Operating menus on page 22 Ch...

Page 13: ...HANNEL or MENU until the picture becomes level VNR You can reduce picture noise 1 Press MENU T to display the MENU 1 menu then select VNR MENU 1 INPUT TV VNR ON COMPRESS 16 9 ON PICTURE TILT 00 SELECT BY EXIT BY OPERATE BY D I SPLA Y 2 Press CHANNEL or MENU to select ON To cancel the VNR function select OFF COMPRESS 16 9 This function converts a normal picture 4 3 aspect ratio into a wide picture ...

Page 14: ...n you turn the power off BLUE BACK If no signal is being received or the signal is very weak a blue screen automatically becomes the picture background If you wish to continue viewing the poor picture you must set the BLUE BACK function to OFF 1 Press MENU T to display the MENU 2 menu then select BLUE BACK MENU 2 AUTO SHUTOFF ON CHILD LOCK ON BLUE BACK ON VIDEO 2 SET COMPONENT SELECT BY EXIT BY OP...

Page 15: ...channel to the AV channel channel number 0 If the TV cannot preset the TV channel you want to view preset it manually For details see MANUAL CH PRESET on page 16 SETUP TOUR You can start the SETUP TOUR function 1 Press MENU T to display the MENU 3 menu then select SETUP TOUR MENU 3 AUTO CH PRESET MANUAL CH PRESET SETUP TOUR LANGUAGE ENGLISH SELECT BY EXIT BY OPERATE BY D I SPLA Y 2 Press CHANNEL M...

Page 16: ...V channel you want to preset is not displayed repeat step 4 until the TV finds the TV channel you want to preset To stop the MANUAL CH PRESET function press any button other than the VOLUME m button Using the TV s menus If the picture is not clear Fine tune the TV channel 1 Press MENU t to select FINE MANUAL FINE SKIP NO SOUND SYSTEM B G EXIT SELECT BY PR 1 VL PROGRAM BY EXIT BY FINE BY VOL D I SP...

Page 17: ...isplay the MENU 5 menu then select SUPER BASS MENU 5 BASS TREBLE BALANCE AI VOLUME ON SUPER BASS ON SELECT BY EXIT BY OPERATE BY D I SPLA Y 2 Press CHANNEL or MENU to select ON To cancel the SUPER BASS function select OFF Picture Adjustments You can adjust the picture as you like 1 Press MENU T to display the MENU 4 menu MENU 4 TINT COLOUR BRIGHT CONT SHARP SELECT BY EXIT BY OPERATE BY D I SPLA Y ...

Page 18: ... SETTING You can set PICTURE MODE VNR and PICTURE EFFECT functions for the favorite channels using FAVORITE CH SETTING menu 1 Press MENU T to display the MENU 6 menu then select FAVORITE CH SETTING MENU 6 FAVORITE CH SETTING VIDEO SETTING AI ECO SENSOR 1 AI ECO DISPLAY ON SELECT BY EXIT BY OPERATE BY D I SPLA Y 2 Press CHANNEL or MENU The sub menu is displayed FAVORITE CHANNEL PR xx PICTURE MODE S...

Page 19: ...CTURE EFFECT is ON Otherwise PICTURE MODE and VNR are not changed Press 0 button to reset the setting AI ECO SENSOR You can enable this function so that the brightness of TV screen is automatically adjusted according to the brightness of your room 1 Press MENU T to display the MENU 6 menu then select AI ECO SENSOR MENU 6 FAVORITE CH SETTING VIDEO SETTING AI ECO SENSOR 1 AI ECO DISPLAY ON SELECT BY...

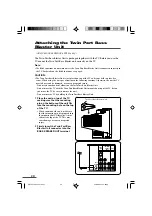
Page 20: ...he TV Note The BASS functions do not work unless the Twin Port Bass Blaster Unit is connected correctly to the TV For details on the BASS functions see page 8 CAUTION The Twin Port Bass Blaster Unit is just placed on top of the TV and is not held in place by a screw When using the unit pay attention to the following cautions Otherwise the unit or TV may fall over and be damaged or cause unexpected...

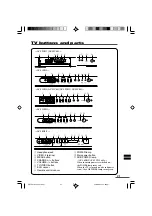
Page 21: ... parts 1 Headphone jack 2 VIDEO 3 terminal 3 MENU button 4 CHANNEL m buttons 5 VOLUME m buttons 6 TV VIDEO button 7 ECO sensor 8 Remote control sensor 9 POWER lamp 0 Main power button SUB POWER lamp AV 16N311 AV 21Y311 only When the main power is switched on the POWER lamp turns red When the TV is turned on the sub power is on the SUB POWER lamp turns green GGT0016 29V331 E401 22 08 2003 15 38pm 2...

Page 22: ... page 7 If the TV has no TV VIDEO button select the VIDEO mode with the INPUT function in MENU 1 Operating menus You can operate function in menus using the front control buttons on the TV 1 Press MENU y to display a menu 2 Press MENU y repeatedly to display the menu you want to use 3 Press MENU y to select the desired function or item 4 Press CHANNEL or VOLUME to carry out the desired operation F...

Page 23: ...r colour system see page 8 Adjust the picture settings see page 17 Is a component signal output device such as a DVD player connected correctly see page 5 Is the VIDEO 2 SET function setting correct see page 14 If noise snow totally blocks out the picture check the following Have the TV and aerial been connected properly Has the aerial cable been damaged Is the aerial pointing in the right directi...

Page 24: ...ly Audio output 5 W 5 W 5 W 5 W 7 W 7 W Rated power output Speakers 5 cm x 9 cm x 2 6 cm x 12 cm x 2 6 5 cm x 13 cm x 2 External input VIDEO 1 VIDEO input S VIDEO input VIDEO input AUDIO L R input output AUDIO L R input VIDEO 2 VIDEO input AUDIO L R input COMPONENT VIDEO Y CB CR input VIDEO 3 VIDEO input AUDIO L R input OUTPUT VIDEO output AUDIO L R output Headphone jack stereo mini jack 3 5 mm di...

Page 25: ...ea 590 mm diagonally Audio output 7 W 7 W 7 W 7 W 13 W 7 W 7 W Rated power output Speakers 6 5 cm x 13 cm x 2 6 5 cm x 13 cm x 2 6 5 cm x 13 cm x 2 13 cm round x 1 External input VIDEO 1 S VIDEO input VIDEO input AUDIO L R input output VIDEO 2 VIDEO input AUDIO L R input COMPONENT VIDEO Y CB CR input VIDEO 3 VIDEO input AUDIO L R input OUTPUT VIDEO output AUDIO L R output Headphone jack stereo min...

Page 26: ...ly Audio output 7 W 7 W 13 W 10 W 10 W 7 W 7 W 13 W Rated power output Speakers 6 5 cm x 13 cm x 2 6 5 cm x 13 cm x 2 6 5 cm x 13 cm x 2 13 cm round x 1 13 cm round x 1 External input VIDEO 1 S VIDEO input VIDEO input AUDIO L R input output VIDEO 2 VIDEO input AUDIO L R input COMPONENT VIDEO Y CB CR input VIDEO 3 VIDEO input AUDIO L R input OUTPUT VIDEO output AUDIO L R output Headphone jack stere...

Reviews: