background image

Introduction


Thank you for choosing a JUWEL Aquarium product.


Our products represent over 40 years experience in the manufacturing of aquariums
and their accessories applying the most modern production techniques in bringing
together the JUWEL Aquarium system, which is both easy to use and simple to
maintain.


Safety instructions:

This appliance can be used by children aged from 8 years and above and persons
with reduced physical, sensory or mental capabilities or lack of experience and
knowledge if they have been given supervision or instruction concerning use of
the appliance in a safe way and understand the hazards involved. Children shall
not play with the appliance. Cleaning and user maintenance shall not be made by
children without supervision.

Always unplug all immersed electrical equipment from mains before placing your
hands into the water.

Operation with the RC circuit breaker only, max. 30mA.

The power plugs of the electrical devices must not become moist. Connect the
power plugs to the power supply at such a height that the connection cable
forms a loop which would enable the water to drip down.

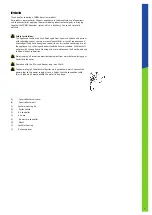
A)

Foam collector unit cover


B)

Foam collector unit


C)

SeaSkim housing lid


D)

Outlet nozzle


E)

Air controller


F)

Air hose


G)

Air pressure controller


H)

Mount


I)

SeaSkim housing


J)

Distance pieces


2

Summary of Contents for SeaSkin

Page 1: ...C F G H D I J E B A Instruction Manual SeaSkim www juwel aquarium com...

Page 2: ...ncerning use of the appliance in a safe way and understand the hazards involved Children shall not play with the appliance Cleaning and user maintenance shall not be made by children without supervisi...

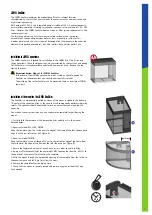
Page 3: ...retailer The matching flap set for SeaSkim can be purchased there as an original JUWEL spare part Installation of the mount for the JUWEL SeaSkim The SeaSkim is permanently installed by means of the...

Page 4: ...e separation wall Attach the air controller to the end of the hose 2 Connect the air hose to the venturi nozzle 3 and route it through the upper hose guide in the separation wall Route the air pressur...

Page 5: ...the foam chamber unit through the opening of the lighting cover to the foam collector 4 Close the foam collector by means of the cap 5 Align the outlet in accordance with the environmental situation i...

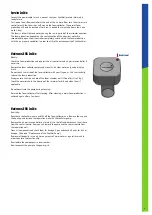
Page 6: ...e of the foam collector with your fingers as this substantially reduces the foam production Always ensure that the air hole of the foam chamber unit is free of dirt ref fig Check the waterintake in th...

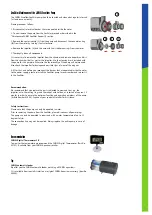
Page 7: ...that are operated inside the water to the power supply please reinstall the SeaSkim pump in reverse order and reinsert it in the SeaSkim 3 C B A Recommendation We recommend that you replace the parts...

Page 8: ...uce the air supply until dark foam is being produced Insufficient water contamination The water contamination by fish determines the colour of the foam Light stocking light foam heavy stocking dark fo...

Page 9: ...period and settlement procedure 1 The guarantee period begins on the day of the purchase of the product from the retailer Claims under this guarantee will not be honoured if a the damage is caused as...

Reviews: