•
ESD grounding strap
•
Antistatic bag or an antistatic mat
•
Replacement power supply
•
Removing an AC Power Supply from an SRX4200 Services Gateway on page 56
•
Installing an AC Power Supply in an SRX4200 Services Gateway on page 57
Removing an AC Power Supply from an SRX4200 Services Gateway
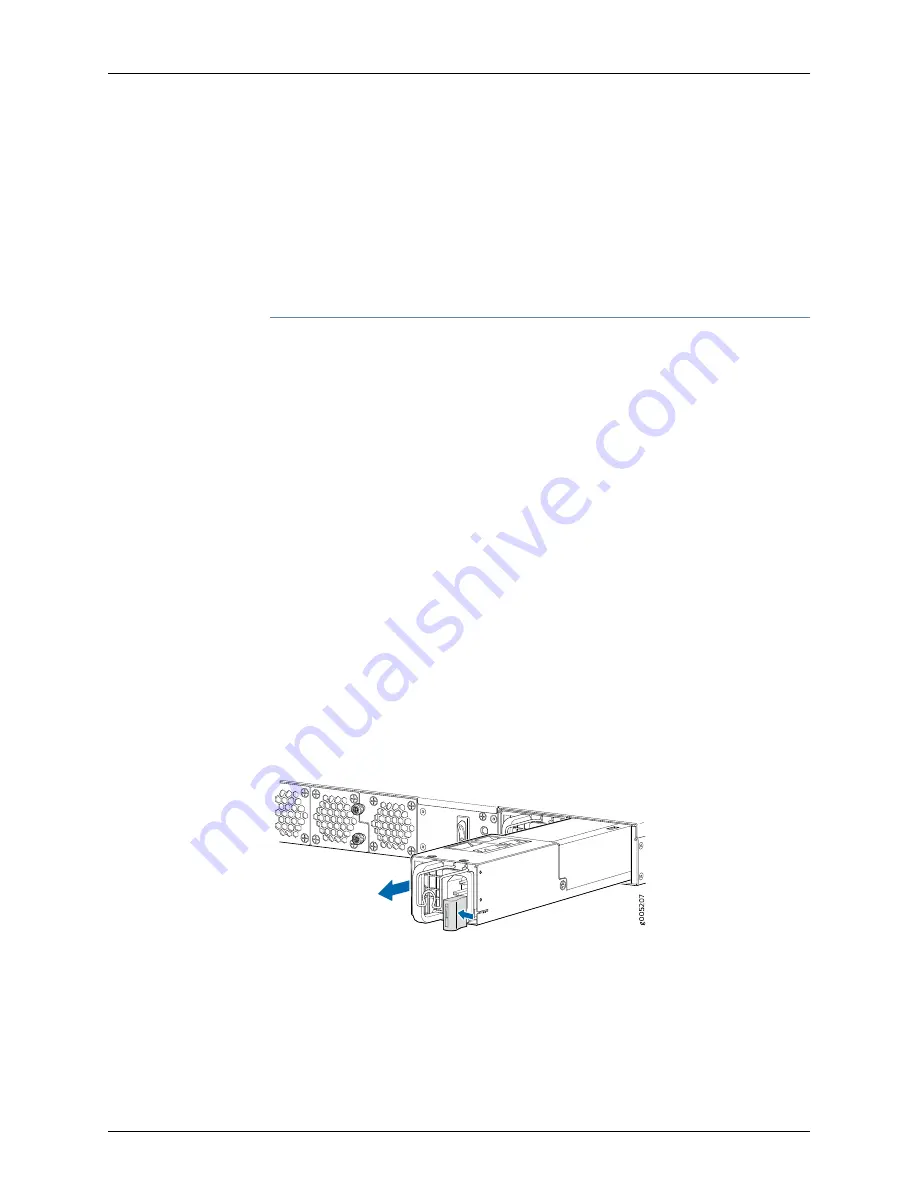
To remove a power supply from the services gateway (see
):
1.
Place the antistatic bag or the antistatic mat on a flat, stable surface.
2.
Attach an electrostatic discharge (ESD) grounding strap to your bare wrist and connect
the strap to the ESD point on the chassis.
3.
If the AC power source outlet has a power switch, set it to the off (0) position and
pull out the power cord connected to the power source outlet.
4.
Remove the power cord from the power supply faceplate.
5.
Slide the ejector lever toward the left until the power supply is unseated.
6.
Grasp the power supply handle and pull firmly to slide the power supply halfway out
of the chassis.
7.
Place one hand under the power supply to support it and slide it completely out of
the chassis. Take care not to touch power supply components, pins, leads, or solder
connections.
Figure 20: Removing an AC Power Supply
8.
Place the power supply in the antistatic bag or on the antistatic mat placed on a flat,
stable surface.
Copyright © 2019, Juniper Networks, Inc.
56
SRX4200 Services Gateway Hardware Guide
Summary of Contents for SRX4200
Page 8: ...Copyright 2019 Juniper Networks Inc viii SRX4200 Services Gateway Hardware Guide...
Page 10: ...Copyright 2019 Juniper Networks Inc x SRX4200 Services Gateway Hardware Guide...
Page 30: ...Copyright 2019 Juniper Networks Inc 30 SRX4200 Services Gateway Hardware Guide...
Page 64: ...Copyright 2019 Juniper Networks Inc 64 SRX4200 Services Gateway Hardware Guide...
Page 70: ...Copyright 2019 Juniper Networks Inc 70 SRX4200 Services Gateway Hardware Guide...


