Prosurv CE Installation and Quick Start Guide for Allegro CE
Page 10
Prosurv CE Quick Start Guide
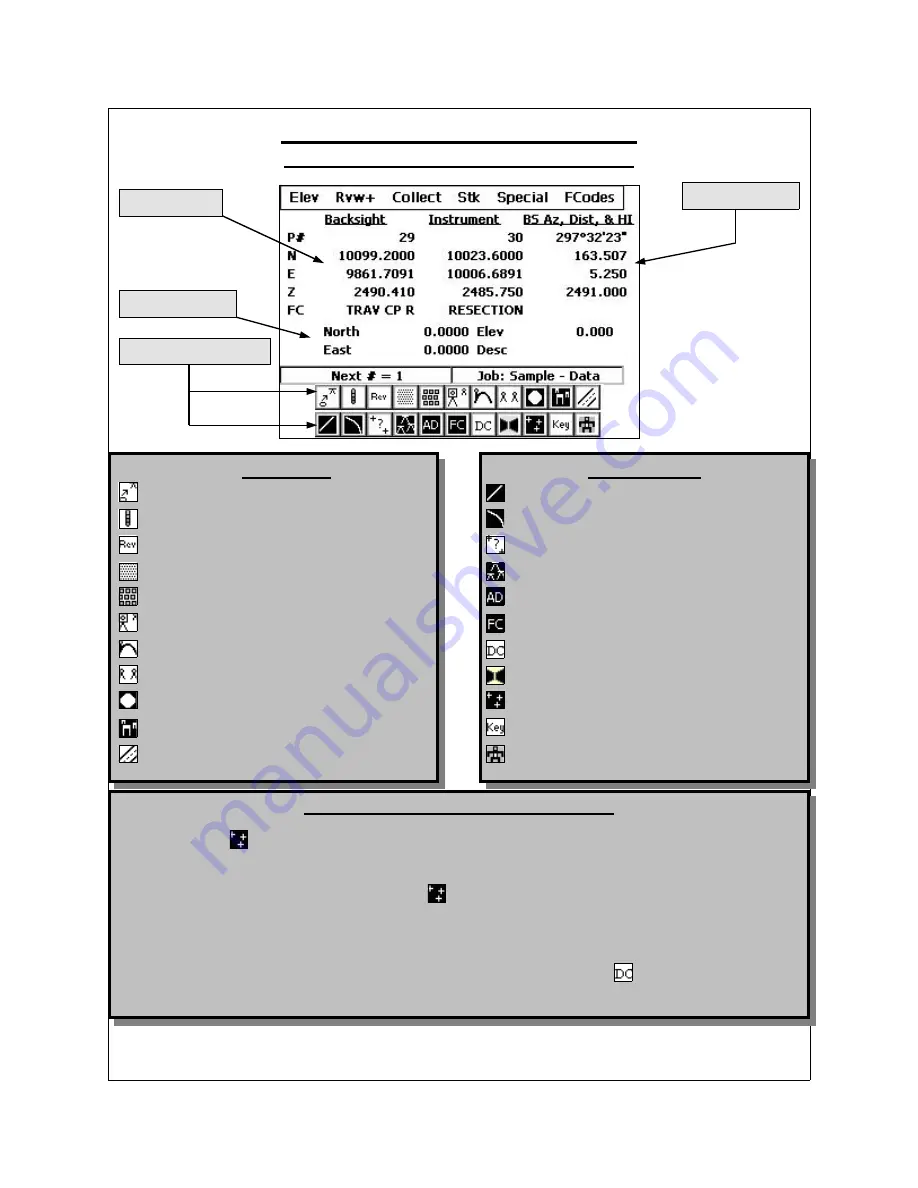
The Prosurv CE Data Collection Menu
DC Info Screen
Last Shot’s Data
Shortcuts for DC Routines
Top Toolbar
•
Bring Elevation From Benchmark
•
Temperature, Pressure, Scale Factor
•
Review Raw Data
•
Enter a Note
•
Keyboard Entry (Add New Point)
•
Setup
•
Topo/Sideshot
•
Resection (2 & 3 Point)
•
Start Project (Using Bg/Az to BS)
•
Stakeout (Radial Staking of Points)
•
Stake Alignment
Bottom Toolbar
•
Stake to a Line 2D or 3D
•
Stake to a Curve 2D or 3D
•
3D Inverse of two points
•
Traverse by Closing the Horizon
•
Auto-Draw Settings
•
Feature Code Settings
•
Refresh Info Screen
•
Exit Data Collection
•
View Plot Screen while in DC
•
Activate Hot Keys
•
Robotic Parameters and Control
Viewing the Plot Screen while in Data Collection
•
Tap the Plot
button while in Data Collection to see the plot screen and access the Quick Pick and
plotting functions. The info screen will disappear, and the Plot button will appear under the DC but-
ton on the main screen. Tap the plot button
to toggle back to viewing the info screen.
•
You’ll notice that, although you’re viewing the plotting screen, the Menu is still the full Data Collection
menu. However, if you scroll the graphics, pick a QP function, or tap the screen, the Menu will disap-
pear, leaving you with a disabled Main menu instead. Simply tap the DC
button to re-activate the
Data Collection Menu without leaving the Plotting screen.
Setup Information


