


RSP-Z2 Quick Start Guide
Interoperability Now
Page 7 of 8
RSP-Z2 Quick Start Guide
Additional Channel Configuration Settings
Help with configuration settings is always available by clicking the question mark
for
context-sensitive help.
2.3.2
Front Panel Level Indicator
The RSP-Z2 has a set of audio level indicating LEDs on the front panel. The indicator can be
applied to any one of the unit’s channels. The level shown is the selected channel’s external RX
input after the channel's Receive (Input) Level audio adjustment has been applied. This allows
the indicator to give visual evidence of optimal adjustment which should be the same for every
channel. When the Receive Input Level is properly set, the first red LED on the Level Meter will
flash red on voice peaks for a person speaking at a normal volume, for example a few times a
second, depending on speech cadence.
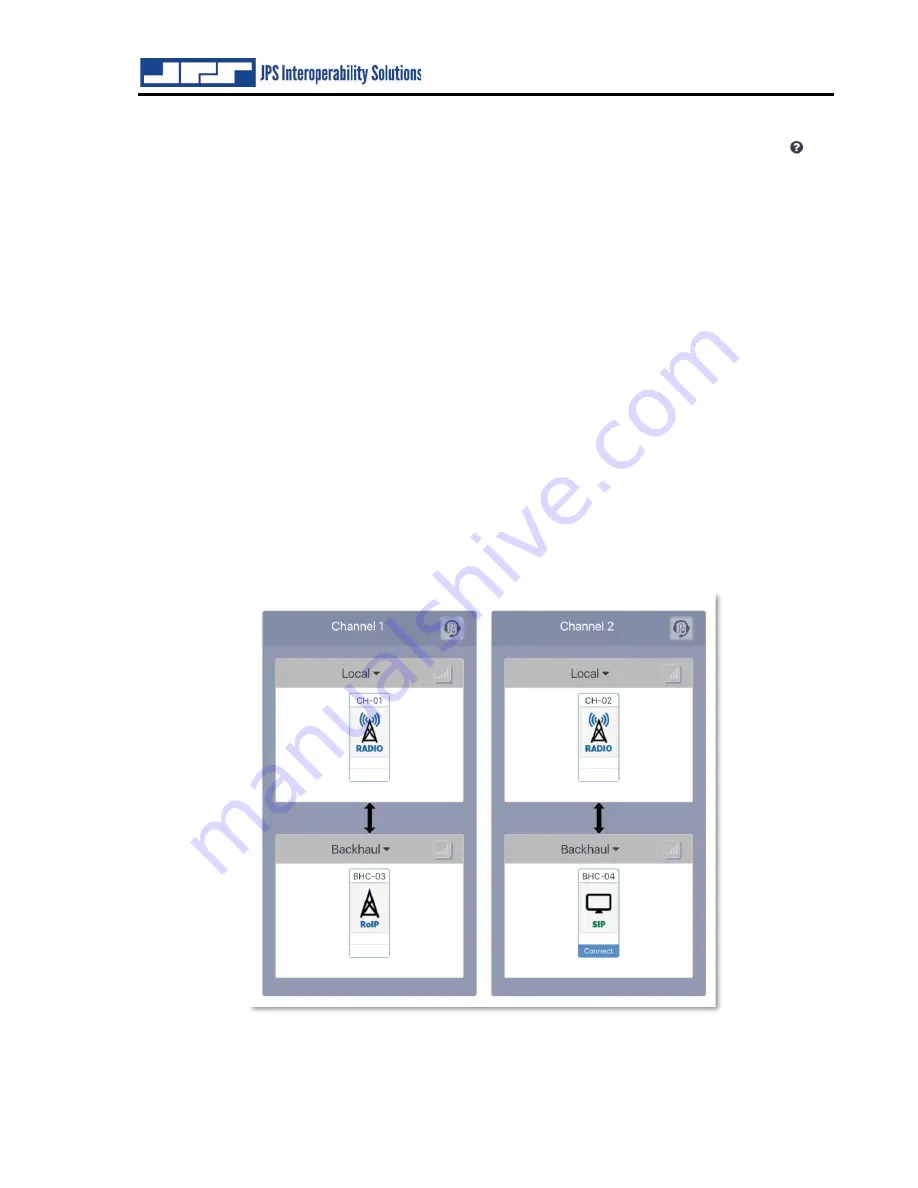
Click on the icon with the rising bars in the upper right of each interface to select which channel
is using the level meter. (These bars only visible after configuration is set). After selection, the
level icon in the selected channel will turn green.
2.3.3
USB Headset
If a JPS-approved USB headset is plugged in at power-up, an icon will appear in the upper right
corner of CH1 and CH2. Click on one of these headset icons to select what audio source it will
be connected to. This selection makes a difference only for the Independent Passthrough
configuration, because with all other configurations, all the channels are patched together.
Figure above: Home Screen with Headset plugged in but not yet selected. Level Indicator also
not yet selected.


