background image

25

5

5

5

5

5

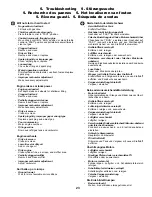
Il motore non parte o ha difficoltà di avviamento

Manca il carburante
Rifornire

Coamndo del gas mal posizionato
Portare il comando su “FAST” (veloce)

Motore ingolfato, errore di choke
Poortare lo chocke su “RUN” o il comando del gas su
“FAST” (veloce) e tirare la cordicella di avviamento
diverse volte per pulire il motore.

Serbatoio del carburante ostruito
Smontare e pulire

Filtro dell'aria sporco
Smontare e pulire o sostituire

Candela sporca o distanza dell'elettrodo irregolare

Pulire, regolare o sostituire

Cavi lenti
Controllare il cavo e la candela

Acqua nella benzina o benzina vecchia
Svuotare il seratoio e il carburatore, usare benzina
nuova e sostituire la candela

Difetto di registrazione del carburatore
Effettuare gli interventi necessari

Il motore perde potenza

Motore sooto sforzo
Intervenire sul regolatore di profondità e sulle ruote per
diminuire la profondità di lavorazione

Serbatoio del carburante ostruito
Smotare e pulire

Depuratore d'aria parzialmente ostruito
Somontare e pulire o sostituire

Difetto di registrazione del carburatore
Effettuare gli interventi necessari

Prese d'aria sporche
Pulire

Candela sporca o non adeguata, o distanza
dell'elettrodo irregolare
Pulire, regolare o sostituire

Poca compressione
Revisione completa del motore

Olio nella benzina
Pulire e rifornire serbatoio e carburatore

Il motore surriscalda

Prese d'aria sporche
Pulire

Manca olio nel motore
Aggiungere o cambiare completamente

Marmitta parzialmente ostruita
Somntare e pulire la marmitta

Motore sporco
Pulire presa d'aria e alette di raffreddamento, marmitta

Difetto di registrazione del carburatore
Effettuare gli interventi necessari

Il terreno non si rompe bene

Troppo bagnato
Attendere condizioni più favorevoli

I

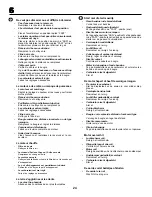
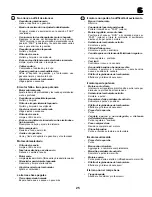
No arranca o difícil de arrancar

Depósito de gasolina vacio
Llene el depósito con gasolina

Mando de aceleración no ajustado debidamente

Ponga el mando de aceleración en la posición “FAST”
(acelerada)

Uso incorrecto de estrangulador, motor ahogado
Desplace el mando del estrangulador a la posición
“RUN”  (marcha) o ponga el mando del acelerador en la
posición “FAST” (acelerada) y tire del arrancador varias
veces para eliminar la gasolina

Deposito de gasolina taponado
Quítelo y límpielo

Filtro de aire sucio
Quítelo y límpielo ó reemplácelo

Bujía sucia o distancia entre electrodos incorrecta
Limpie, ajuste distancia o reemplace

Cables sueltos
Compruebe el cableado y la bujía

Agua en gasolina o combustible viejo
Vacie el depósito de gasolina y el carburador, use
gasolina limpia y cambia la bujía

Ajuste incorrecto del carburador
Haga ajustes necesarios

El motor falla o tiene poca potencia

Motor sobrecargado
Ajuste la barra de profundidad y las ruedas para laboreo
menos profundo

Depósito de combustible taponado
Quítelo y límpielo

Filtro de aire parcialmente taponado
Quítelo y límpielo o reemplácelo

Ajuste incorrecto del carburado
Haga ajustes necesarios

Filtro de aire sucio
Limpie el filtro de aire

Bujía sucia, distancia incorrecta entre electrodos o
tipo incorrecto
Reemplace la bujía y ajuste la distancia

Mala compresión
Revisión a fondo del motor

Aceite en la gasolina
Vacie y llene el depósito de gasolina y el carburador

Motor sobrecalentado

Filtro de aire sucio
Limpie el filtro de aire

Nivel de aceite bajo o aceite sucio
Rellene o cambie el aceite

Motor sucio
Limpie aletas del cilindro, filtro de aire y área del silenciador

Silenciador parcialmente taponado
Desmonte y limpie el silenciador

Ajuste incorrecto del carburador
Ajuste el carburador

La tierra se hace pegotes

Tierra demasiado húmeda
Espere hasta que se seque un poco más

Esp

Summary of Contents for FT5

Page 1: ...nstructions Merci de lire trés attentivement le manuel d instructions Assurez vous d avior tout compris avant d utiliser ce tracteur Manual de las instrucciones Por favor lea cuidadosamente y comprenda estas intrucciones antes de usar esta maquina Manuale di istruzioni Prima di utilizzare la macchina leggete queste istruzioni con attenzione ed accertatevi di averle comprese bene Instructieboekje L...

Page 2: ...edeling 1 2 3 4 5 6 3 7 13 20 23 26 Safety rules Veiligheidsregels Sicherheitsvorschriften Reglas de seguridad Règles de sécurité Norme antinfortunistiche Assembly Montering Zusammenbau Montaje Montage Montaggio Start and operation Starten en rijden Start und betrieb Arranque y operación Mise en marche et conduite Aviamento e guida Maintenance Onderhound Wartung Mantenimiento Entretien Manutenzion...

Page 3: ...nungsgemäßen Gebrauch der Maschine vertraut Auf keinen Fall Kindern oder Personen die nicht mit diesen Anleitungen vertraut sind den Gebrauch dieser Maschine gestatten Möglicherweise wird das Mindestalter der BedienungspersondurchörtlicheVorschriftenbestimmt AufkeinenFallinderNähevonanderenPersonen insbesondere KindernoderHaustierenarbeiten Darandenken daßdieBedienungspersonoderderBesitzerfür Unfä...

Page 4: ...oetditinde openluchtgebeuren 1 RÈGLES DE SÉCURITÉ FORMATION Lisezsoigneusementcesinstructions Familiarisez vousavec les commandes pour apprendre a utiliser correctement voter équipement N autorisezjamaisquedesenfantsutilisentvotremachine Ne permettezpasquedesadultesl utilisents ilsn ontpasreçules instructions nécessaires Des lois locales peuvent avoir des restrictionsdel âgedel opérateur Nepasutil...

Page 5: ...onservazionedelcarburante liberidamaterialivegetativiegrassoeccessivo Ascopodisicurezza sostituireparticonsumateodanneggiate Seilserbatoiodelcarburantedeveesseresvuotato farequesta operazioneall aperto 1 REGLAS DE SEGURIDAD ENTRENAMIENTO Lea las instucciones cuidadosamente Familiarícese completamente con los controles y con el uso adecuado del equipo Nuncapermitaquelosniñosoperenelequipo Nuncaperm...

Page 6: ...RIÉTAIRE GEBRUIKERSHANDLEIDING LEZEN LEA EL MANUAL DE DUEÑO LEGGERE IL MANUALE DELL OPERATORE LÄS ANVÄNDARHANDBOKEN LES BRUKSANVISNINGENE LÆS BETJENINGSVEJLEDNINGEN LUE OMISTAJAN OHJEKIRJA WARNING WARNUNG AVERTISSEMENT WAARSCHUWING ATENCIÓN AVVERTENZA VARNING ADVARSEL ADVARSEL VAROITUS F R HAND PLACEMENT HAND HIER AUFLEGEN PLACEMENT DE MAIN PLAATSING VAN DE HANDEN POSICIIÓN DE LA MANO POSIZIONE MA...

Page 7: ...er festziehen Montage du guidon Serrer fermement D D F F Eng Eng 1 Tine control 2 Handles 3 Bolt 4 Handle Panel 5 Nut 6 Reverse Control 1 Zinkensteuerung 2 Handgriffe 3 Schloßschraube 4 Handgriffblech 5 Mutter 6 Rückwärtsgang 1 Commande de dent 2 Guidons 3 Boulon de chariot 4 Panneau du guidon 5 Écrou 6 Marche atrás 1 3 4 5 2 6 ...

Page 8: ...te I NL I NL 1 Tandbediening 2 Handgreep 3 Slotschroef 4 Handgreeppaneel 5 Moer 6 Achteruit rijden 1 Control de llantas 2 Mango 3 Perno de acarreo 4 Panel del perno 5 Tuerca 6 Marcha atrás 1 Leva di comando rebbio 2 Maniglie manovelle 3 Bullone carrello 4 Pannello maniglia manovella 5 Dado 6 Retromarcia Esp Esp 1 3 4 5 2 6 ...

Page 9: ...Die Tiefenstange muß sich frei bewegen Falls das nicht der Fall ist die Stützschraube lockern 1 Engine Brackets 2 Nut A 3 Hex Bolts 4 Depth Stake Support 5 Depth Stake 6 Support Bolt 7 Stake Spring 8 Engine Brackets 9 Nuts Both Sides 10 Handle Panel 1 Motorhalterungen 2 Mutter A 3 Sechskantschrauben 4 Stütze der Tiefenstange 5 Tiefenstange 6 Stützschraube 7 Stangenfeder 8 Motorhalterungen 9 Mutter...

Page 10: ...ls die losgedraaid moest worden De dieptestaak moet vrij kunnen bewegen Als dat niet het geval is draai de steunbout dan losser 2 1 7 6 5 4 3 8 10 9 Regler la poignée Si vous désirez une hauteur plus élevée desserrez les quatre écrous qui fixent le panneau de poignée aux supports de moteur Glissez le panneau à l emplacement désiré Serrez à fond les quatre écrous Handgreepafstellen Als een hogere h...

Page 11: ... piolo di profondità deve potersi muovere liberamente Se necessario allentare il bullone del supporto 8 10 9 2 1 7 6 5 4 3 Ajustar el mango Si se desea una mayor altura para el mango suelte las cuatro tuercas que aseguran el panel del mango en los puntales del motor Deslice el panel del mango a la ubicación deseada Apriete las cuatro tuercas en forma segura Regolare la maniglia manovella Se si des...

Page 12: ...pfstift 2 Haarnadelsplint 3 Innere Zinken 4 Äußere Zinken 1 Axle de chape 2 Attache en épingle à cheveux 3 Dents internes 4 Dents extérieures 1 Asondersteuningspen 2 Splitpen 3 Binnenste tanden 4 Buitenste tanden 1 Clavija de horquilla 2 Abrazadera de horquilla 3 Llantas del interior 4 Llantas del exterior 1 Perno con testa 2 Fermaglio 3 Rebbi interni 4 Rebbi esterni 3 A C C A Tandenmontage De bui...

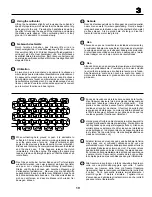
Page 13: ...ornimento mentre à avviato il motore Accoppiaménto il cavo di accensione Filling petrol Fill the fuel tank with pure petrol only not a petroloil mixture Unleaded or leaded petrol may be used Do not fill petrol while the engine is running Connect the spark plug lead Benzineeinfüllung Füllen sie reines nicht mit Öl vermischtes Benzin ein wobei die Wahl zwischen bleifreiem und verbleitem Benzin ganz ...

Page 14: ... position Once the engine starts slide the choke to the run position AnlassendeskaltenMotors Stellen Sie den Gashebel auf max Position und die Starter klappe auf choke position ein Sobald der Motor anspringt wird die Starterklappe in run position geführt Démarrage du moteur à froid Placez la manette des gaz en position max Placez le manette du starter en position choke Quand le moteur démarre mett...

Page 15: ...e il regolatore del gas in posizione max Mettete lo starter in posizione run D F I NL D F I NL Start the engine with a quick pull of the recoil starter Set the desired number of r p m between max and min Der MotorwirddurchraschesZiehenamGriffderStartschnur angelassen Stellen Sie die erwünschte Drehzahl zwischen max und min ein Lancer le moteur en tirant sur la poignée de démarrage Réglez le nombre...

Page 16: ...ng loslaat Marchaatrás El mando de embrague para hacer retroceder el cultivador está situado en el lado derecho del manillar Al apretar el mando las cuchillas retroceden Al soltar el mando las cuchillas paran instantáneamente Retromarcia Il manico di guida per la retromarcia è servito dalla parte destra del manico i coltelli si fermano immediatamente Stopping the engine Stop the engine by pushing ...

Page 17: ... roues pendant le labourage Il modère la vitesse du motoculteur vers l avant de sorte que les couteaux rotatifs travaillent la terre Instelling De freesdiepte en de snelheid zijn afkankelijk van de positie van de wielen en de rem De rem dient altijd dieper dan de wielen te steken tijdens het frezen Hierdoor wordt de voorwaartse snelheid van de machine beperkt waardoor de rotorbladen de grond kunne...

Page 18: ...to in avanti alternativamente indietro D F I NL To regulate the height of the arrester bar Tip the cultivator forwards Remove the spring cotter pin and withdraw the locking bolt 1 Set the arrester bar lower if you want the cultivator to till deeper 2 Set the arrester bar higher if you want the cultivator to till less deeply 3 The nromal position is the 3rd hole from the top 4 The braking effect of...

Page 19: ...viously worked direction cross cultivation Stones and roots may become jammed between the blades and the chain case If this happens release the clutch immediately Stop the engine Disengage the spark plug lead and remove all foreign objects so that the blades can rotate freely Das Fräsen sollte bei hartem Boden oder Torf mehrmals wiederholt werden und zwar jedesmal ein bisschen tiefer und quer zur ...

Page 20: ...ange d huile à la fin de chaque saison ou aprés 25 heures d utilisation Contrôlez la bougie au moins une fois toutes les 100 heures d utilisation Nettoyez le système de refroidissement et le reste du moteur D F I NL Onderhoud Haal altijd de bougiekabel los voor reparaties schoonmaak of onderhoudswerkzaamheden Na 5 draaiuren dient de olie ververst te worden en alle schroeven en moeren dienen gecont...

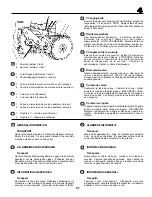
Page 21: ...LINFORMATION TRANSPORT Remove the spark plug lead Fold the handle down carefully Empty the fuel tank If using public transport the machine must be emptied of both oil and petrol ALLGEMEINEERLÄUTERUNGEN Transport Nehmen Sie das Zündkerzenkabel ab Legen Sie das Gerät behutsam auf die Steuergriffe nieder Entleeren Sie den Benzintank Beim Transport mit öffentichen Verkehrsmitteln muss die Maschine fre...

Page 22: ...otor en laat deze lopen totdat hij stopt door benzinetekort 2 Terwijly de motor nog warm is tapt u de olie af en vult u de machine met verse olie 3 Schroef de bougie eruit en verdeel er 2 3 eetlepels olie over Trek 2 3 keer aan het startsnoer om de olie te verdelen Schroef de bougie weer op z n plaats 4 Maak het koelsysteem en de rest van de motor schoon 5 Sla de freesmachine op een droge en schon...

Page 23: ...toderstartetschwer Kein Kraftstoff im Tank Kraftstoff auffüllen Gashebel nicht richtig eingestellt Gashebel auf FAST schnell einstellen FalscheEinstellungdesChoke Motorschwimmtüber Chokehebel auf RUN einstellen oder Gashebel auf FAST schnell einstellen und den Starthandgriff mehrmals ziehen um den Kraftstoff loszuwerden Kraftstofftank verstopft Entfernen und reinigen Luftfilter verschmutzt Entfern...

Page 24: ...es ailettes du cylindre le filtre à air et la zone du pot d échappement Le pot d échappement est partiellement obstrué Démontez et nettoyez le pot d échappement Le carburateur est mal réglé Faites les réglages nécessaires La terre s agglutine sur les dents Le sol est trop humide Attendez des conditions de sol plus favorables 5 5 5 5 5 F Start niet of start moeilijk Geen benzine in de brandstoftank...

Page 25: ...pobagnato Attendere condizioni più favorevoli I No arranca o difícil de arrancar Depósito de gasolina vacio Llene el depósito con gasolina Mando de aceleración no ajustado debidamente Ponga el mando de aceleración en la posición FAST acelerada Uso incorrecto de estrangulador motor ahogado Desplace el mando del estrangulador a la posición RUN marcha o ponga el mando del acelerador en la posición FA...

Page 26: ...ground at 85 of maximum engine speed with operator in place TECHINISCHEDATEN Typ FT5 Motorbetriebene Ackerfräse Antrieb Erfotgt duch Erdwiderstand der arbeitenden messer Ein und Ausschalten am Steuerhandgriff Vorwärtsgang Sicherheits vorrichtung Totpunktgriff Gewicht 56 kg Transport und Stütz Räder Durchmesser 20 cm Sind vor der Tiefeneinstellung angebracht Arbeitsbreite Max 61 cm Arbeitstiefe 25 ...

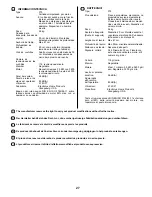
Page 27: ...ngen durchzufúhren Le fabricant se réserve le droit de modifier sans prévis les produits De producent behoudt zich het recht voor zonder kennisgeving wijzigingen in het produkt aan te brengen El productr se reserva el derecho de proder cambiar los productos sin aviso previo Ll produttore si riserva il dirtto di effettuare modifiche al prodotto senza preavviso INFORMACIONTECNICA Type FT5 Cultivador...

Page 28: ...Jonsered Motor Ab S 433 81 Partille Sweden 532176613 Rev 1 12 19 00 TR Printed in U S A ...

Reviews: