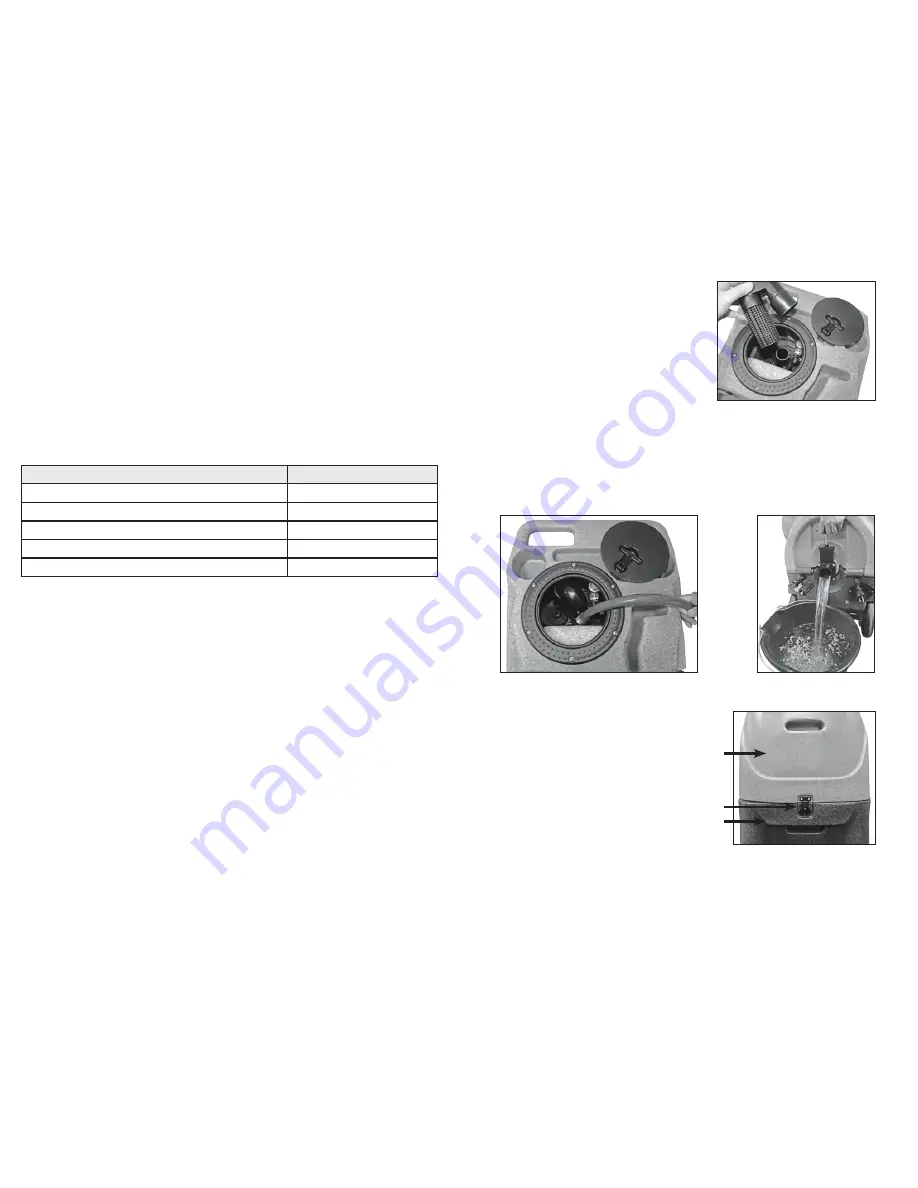
5.2 Clean Vacuum Float Assembly Screen Continued
This screen should be cleaned frequently if
the Carpet Extractor is being operated in an
environment which has an abnormal build-
up of lint and debris, such as cleaning newly
installed carpet. Loss of vacuum is most
normally associated with lint build-up in this
filter at the top of the vacuum stand pipe.
5.3 Rinse Out Recovery Tank
Build-up of fine silt and debris can damage the
auto-dump pump and dump valve. Clean out
the recovery tank on a regular basis to extend the
life of these components as well as keep the tank and machine smelling better.
To rinse out recovery tank, remove the recovery tank lid and open the dump valve. Place
a bucket under the dump valve. Use a hose to rinse the dirt and debris out of the recovery
tank. Close the dump valve and spray the tank with deodorizer or disinfectant. Proceed to
waste pump cleaning and replace the recovery tank lid. Dispose of dirty water and debris.
5.4 Clean Pump Inlet Filter
CAUTION: before proceeding
with this procedure, make
sure both the power cords are
disconnected.
• To examine the filter, open the
solution tank lid on the front of
the machine. The filter is in the
bottom of the solution tank.
• Grasp the filter cap and
unscrew the filter from the
brass nipple by turning counter-
clockwise. Clean or replace the filter as needed.
•
Tilt the tanks back onto the base and secure the latch.
(8) 12-Gallon, 100 PSI Carpet Extractor
12-Gallon, 100 PSI Carpet Extractor (9)
5.0 Maintenance
Regular maintenance is required to keep your Carpet Extractor in proper working
condition. Failure to properly maintain your machine could void warranty. Thoroughly
clean all equipment and accessories after each use:
•
Rinse the solution and recover tanks with clean water.
•
Flush the pump system with clean water, including all hoses and wand(s).
•
Do not allow water to remain in the tanks after use.
•
Lubricate all quick disconnects with WD-40 or similar lubricant.
• Clean vacuum float assembly screen.
WARNING: Disconnect electrical power cord before performing any service or
maintenance inside the machine base or before testing or repairing switches or power
cords. Failure to do so may result in severe personal injury or death.
Operation
Interval
Clean Chemical Feed Filter
Daily- After Each Job
Clean Vacuum Assembly Screen
Daily- After Each Job
Rinse Out Recovery Tank
Daily
Flush Solution Tank and Pump
Daily
Clean Pump-Inlet Filter
Weekly - As Needed
5.1 Clean Fresh Water Tank Filter
The fresh water tank filter is located at the bottom of the solution tank. Unscrew the filter
counterclockwise and rinse with fresh water. If necessary, use a tooth brush to remove
detergent build-up. Note, a heavy build-up is a warning sign that the solution system
should be flushed. See the “Flush Chemical System” section.
5.2 Clean Vacuum Float Assembly Screen
Inside the recovery tank, on top of the stand pipe, is the vacuum float assembly. It
functions to prevent debris and water from being sucked into the vacuum motors.
Operating the Carpet Extractor without the float assembly or with a poorly maintained
assembly, will greatly decrease the life of the vacuum motors and will void the warranty.
If debris builds up on this filter, it will reduce the vacuum air flow and may cause a
significant decrease in the rate of water recovery. If debris prevents the float ball from
moving or seating inside the assembly, it may not stop the airflow when the tank fills with
water and the water will be sucked in the vacuums and blow out the exhaust.
To clean, twist off the float assembly from the stand pipe and clean the screen. Pull fibers
and lint off and rinse with clean water. Push the assembly back onto the stand pipe and
replace the recovery tank lid.
Vacuum Float Assembly
Solution Tank
Latch
Base


