7
WARNING:
Remove the reciprocating saw from the carton and examine it
carefully. Do not discard carton or any packaging material until all parts are examined.
WARNING:
If any part of the saw is missing or damaged, do not plug the
reciprocating saw in until the damaged part is repaired or replaced.
WARNING:
To avoid injury, ALWAYS turn the switch OFF and disconnect the
reciprocating saw from the power outlet before installing or changing the saw blade.
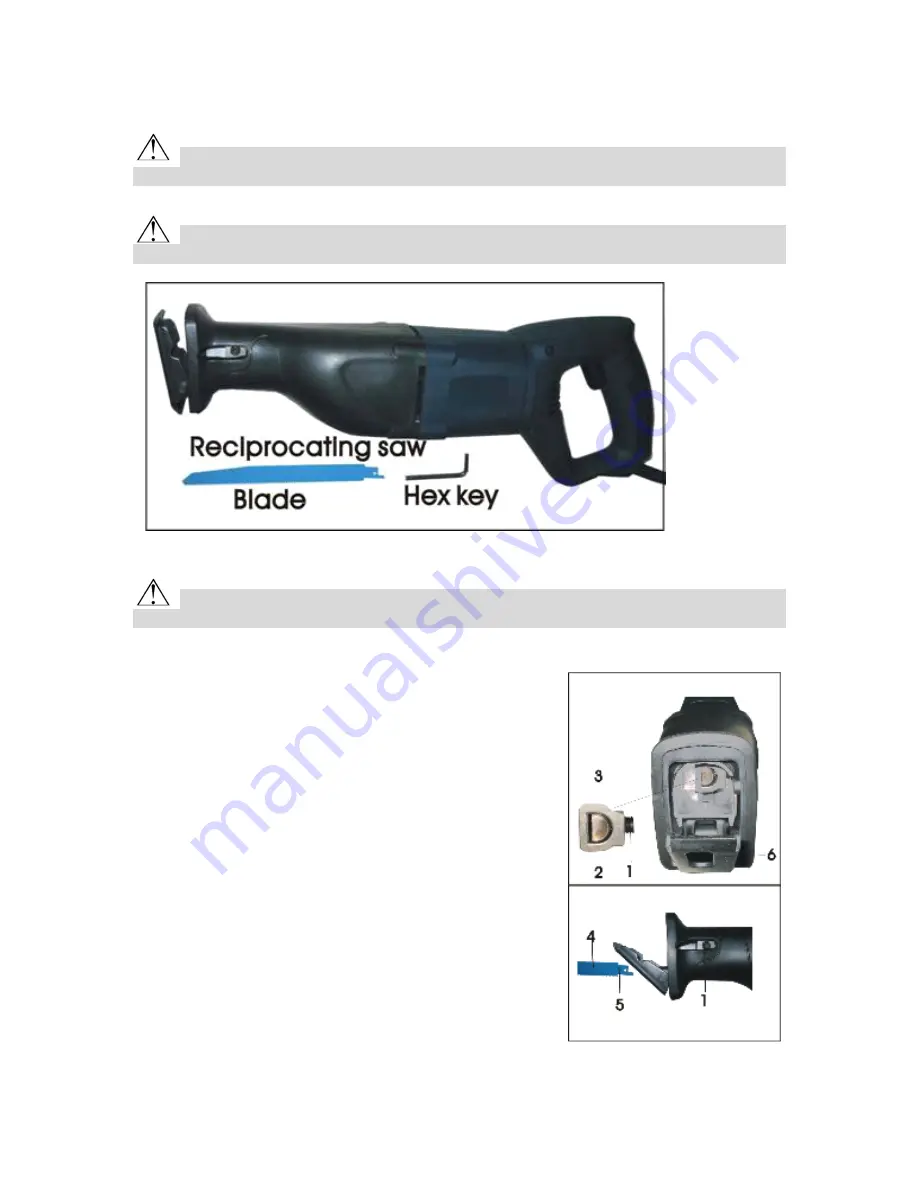
INSTALLING AND REMOVING THE BLADES (FIG. 4)
1. Turn the blade holder set screw (1) counter-clockwise
to loosen the blade holder clamp (2). Use the hex key
provided.
2. The set screw has a pin at its base that passes
through the spindle (3) and clamp. Make sure the pin
is fully receded into the blade holder clamp.
3. Insert the blade (4) between the blade clamp and the
spindle until the tang (5) is all the way in and against
the spindle. Make sure the blade passes through the
pivot shoe slot (6), and the teeth are facing forward.
NOTE: The blade may be installed with the teeth pointing
either up or down, according to the needs of the cutting
operation, but the teeth must face forward.
4. Using the hex key, tighten the blade holder set screw
clockwise. Align the blade tang so the set screw pin
passes through the blade hole, and tighten securely.
5. To remove the blade, repeat the procedure in step 1
and 2.
Fig. 3
Fig. 4


