Page 5 • JL Audio, Inc., 2016
Continued on Next Page
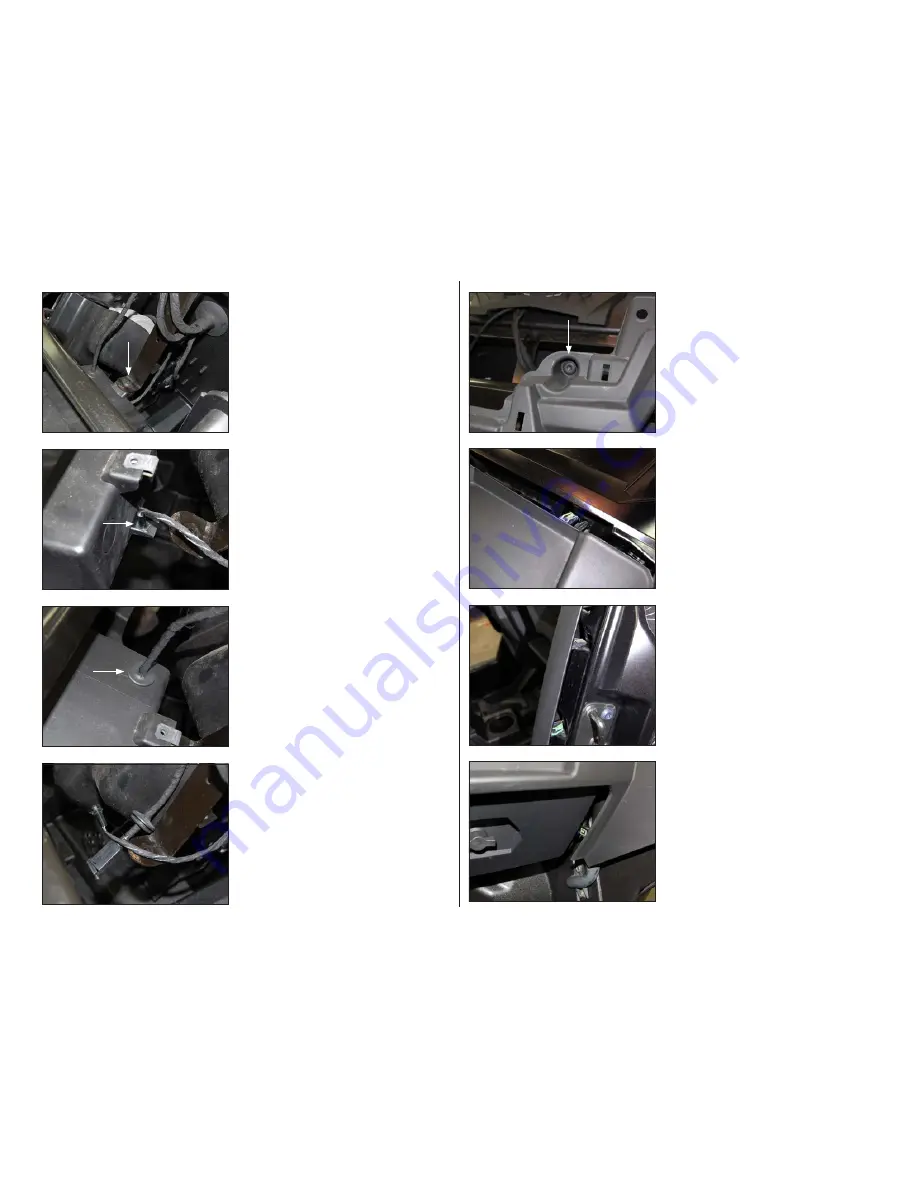
S T E P 16
Carefully unclip the dash panel from around
the glove compartment, and remove panel
from the vehicle.
S T E P 15
Carefully unclip the side of the dash panel.
S T E P 14
Carefully unclip the top of the dash panel.
S T E P 13
Remove the indicated Torx bolt from the dash
panel, along with the one on the opposite side.
S T E P 12
Pictured are the dash light and USB grommet
removed from the dash panel.
S T E P 11
Remove the indicated grommet for the USB
connector from the dash panel, if equipped.
S T E P 10
Remove the indicated dash light from the dash
panel.
S T E P 9
Remove the indicated screw from the dash
panel bracket.
SB-POL-RZG2/10TW3 INSTR_SKU# 011446


