


JKS Steering Stabilizer Relocation Bracket Installation
PN OGS162
Page 3 of 3
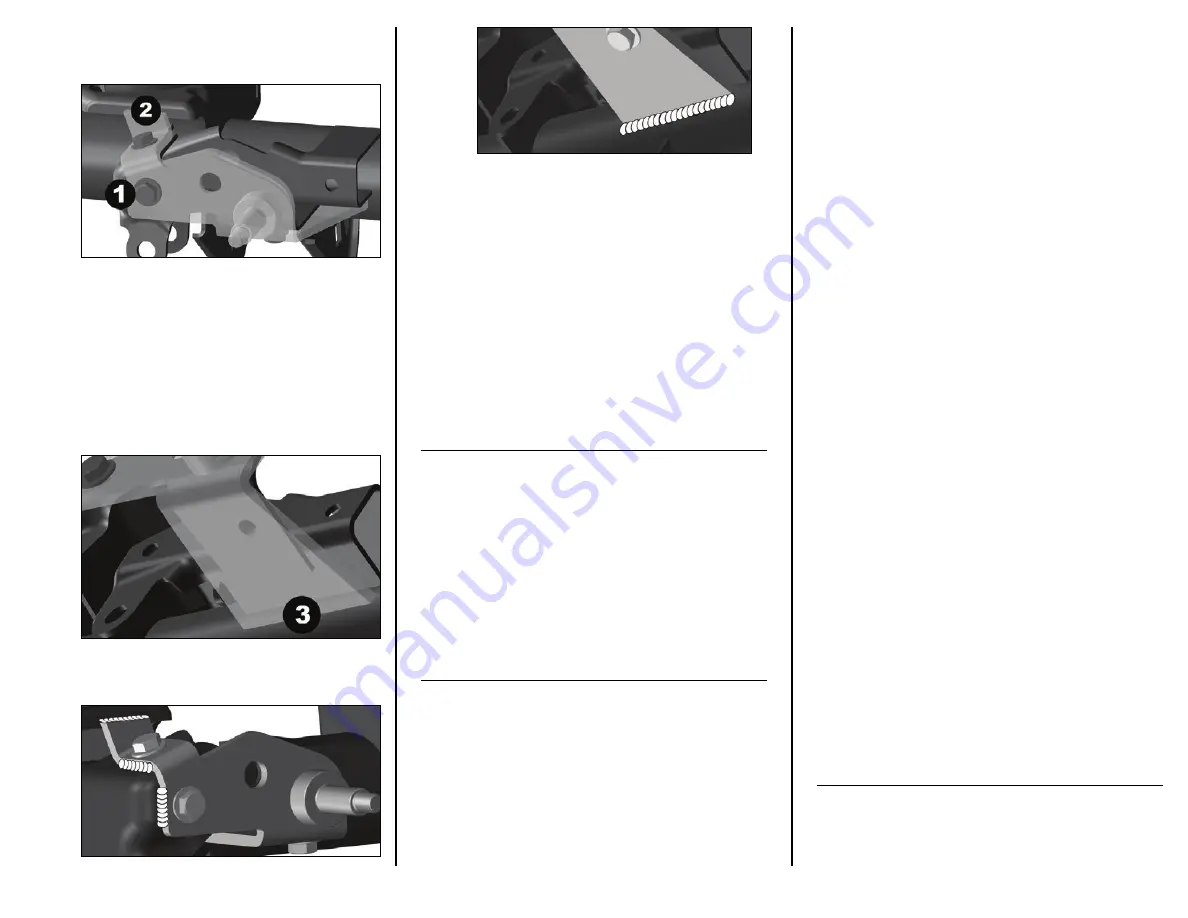
Tack weld Steering Stabilizer Relocation
Bracket (A) to axle in the sequence indicated
below.
Tack weld front of Relocation Bracket to
factory track bar bracket.
Tack weld back of Relocation Bracket to
factory coil spring mount.
Tack weld bottom of Relocation Bracket to
axle tube.
HINT:
A small gap between
Relocation Bracket and axle tube provides
clearance for the factory track bar bracket
weld. This gap should be filled when
making final fillet weld during next step.
Next, fillet weld Steering Stabilizer Relocation
Bracket (A) to axle housing at all locations
indicated by an “X” in step 2.
IMPORTANT: Avoid overheating axle tube
and factory track bar bracket by welding a
small section and allowing the surface to
cool off regularly.
Finally, plug weld Steering Stabilizer Relocation
Bracket (A) to factory track bar bracket at pre-
drilled mounting holes on top and bottom of
Relocation Bracket.
Once all welding is complete, spray paint entire
Steering Stabilizer Relocation Bracket (A) and
any bare metal on axle housing to prevent
corrosion. All exposed metal must be
completely covered.
HINT
: Avoid painting
threads of new steering stabilizer mounting stud
to ensure proper fitment of supplied nut.
Proceed to Section 5.
4. BOLT RELOCATION BRACKET
TO AXLE HOUSING
Reposition Steering Stabilizer Relocation
Bracket (A) on factory track bar bracket.
Insert the three 3/8” x 1” GR5 Bolts (B) with Flat
Washers (C) into the corresponding mounting
holes in Relocation Bracket.
Install a 3/8” Flat Washer (C) and Ovalok Nut
(D) on each bolt to secure bracket in position.
Using a torque wrench, tighten each 3/8”
Ovalok Nut (D) to 40 ft-lbs.
5. REINSTALL STEERING DAMPER
& TRACK BAR
The factory steering damper mounting position on the
axle housing will no longer be used. Instead, the damper
will mount directly to the stud located on the Relocation
Bracket. The bracket will accommodate any factory or
aftermarket steering damper with a rubber or urethane
bushing that is designed to fit the JK Wrangler.
Insert axle end of track bar into reinforced axle
bracket and loosely install original mounting
hardware.
Vehicle must be on level ground
with coil springs supporting the full vehicle
weight before hardware is tightened.
Using a torque wrench, tighten track bar
mounting hardware to 125 ft-lbs.
Mount body end of steering damper onto new
mounting stud followed by the supplied 7/16”
Fender Washer (E) and 7/16” Ovalok Nut (F).
HINT
: If reusing factory damper, first remove
steel sleeve from bushing ID.
Tighten nut as indicated below depending on
type of damper installed:
For OE damper with narrow rubber
bushing, tighten Ovalok Nut (F) until
Fender Washer (E) contacts shoulder of
stud.
HINT:
A loose fit between bushing
and washer is normal.
For aftermarket damper with wide urethane
bushing, tighten Ovalok Nut (F) until at
least one or two threads are protruding
beyond the nut.
HINT:
A snug fit between
bushing and washer is recommended.
Remove the U-bolts that secure the factory
steering damper bracket to the tie rod and spin
the bracket 180 degrees so the mounting stud
is located on passenger side of U-bolts.
Reinstall the U-bolts and finger tighten
hardware so that factory steering damper
bracket can slide freely on tie rod. Determine
the appropriate mounting position and tighten
the original hardware to factory torque
specifications.
Mount shaft end of steering damper to tie rod
using original mounting hardware. Tighten
hardware to factory torque specifications.
If desired, you may remove original steering
damper mounting tabs from axle housing for
improved clearance as they are no longer
necessary.
2011 JKS Manufacturing, Inc & Aftermarketing, LLC
Revision Date 1/4/2011