22
OO
Mortiser (available as an option)
Precautions to be observed
1. Always place the guard on the planer shaft.
2. Use only left-handed flat mortise bits, preferably short bits.
3. Always tighten firmly.
4. Always secure the workpiece to the drill table using the wood clamp (1).
5. An additional adjustable stop (2) can be placed behind the workpiece.
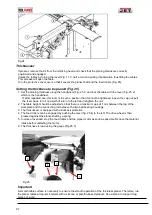
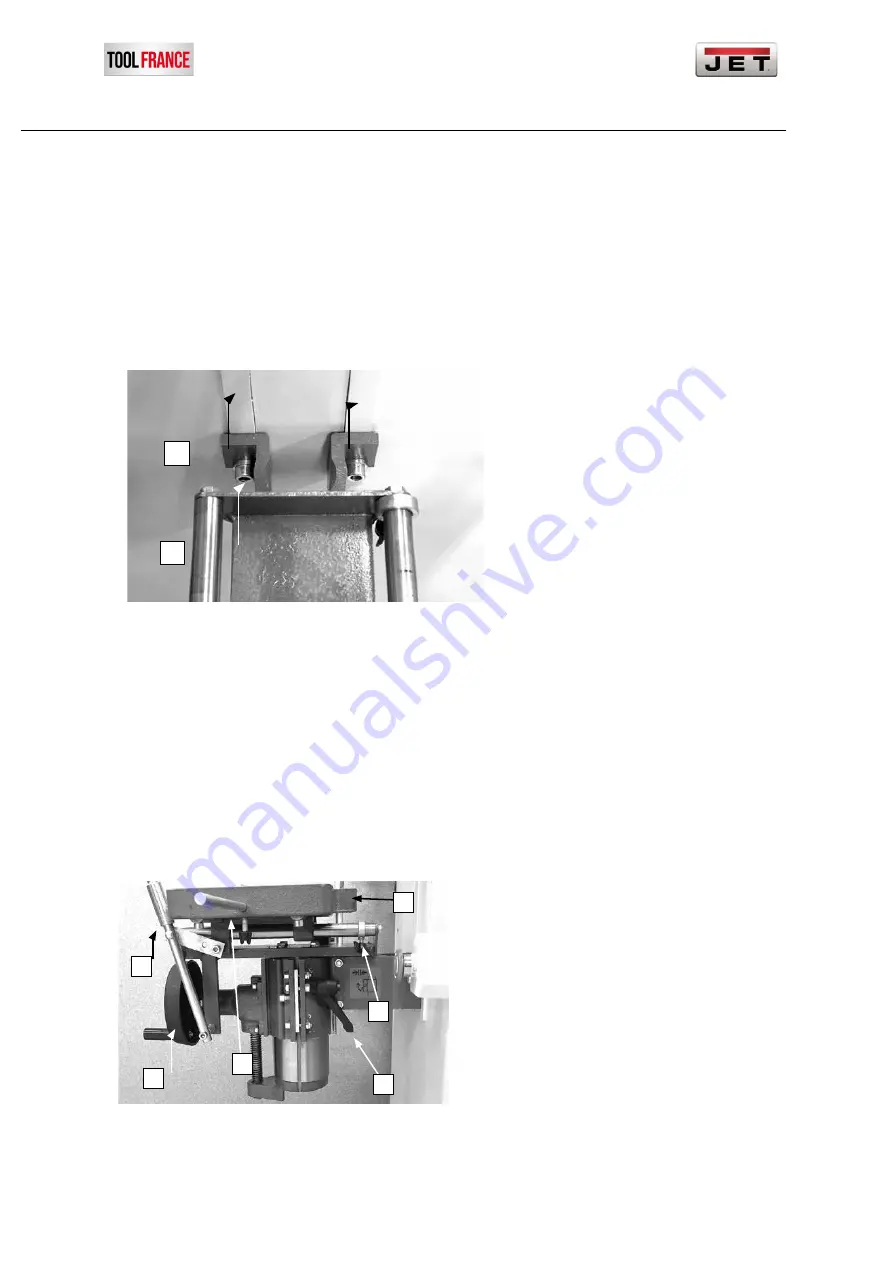
Installing the mortiser (fig. 26)
1 Clean the 2 mounting surfaces (1) on the side of the frame.
2 Clean the mounting surfaces of the bracket (2).
3 Mount the bracket (2) on the mounting surfaces and on the bolts with their washers and springs (3).
4 Check that the mortiser is correctly positioned on the bolts, then tighten it.
Fig. 26
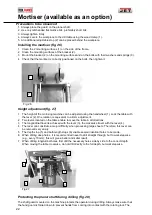
Height adjustment (fig. 27)
1 The height of the mortising machine can be adjusted using the handwheel (1). Lock the table with
the lever (2). One rotation is equivalent to a 4mm adjustment.
2 Two levers located on the table enable to move the table in all directions.
3 The longitudinal travel is achieved with the lever (3), the crosswise travel with the lever (4).
4 The lever can constitute a major difficulty when processing large sheets. Therefore, this lever can
be removed very easily.
5 The depth stop (5) and both length stops (6) enable several identical holes to be made.
6 When drilling deep holes, it is recommended never to drill straight through, but to work stepwise
(e.g., every 10 mm); this will give a better and safer result.
7 When drilling longitudinal holes, first drill the necessary holes side by side to the correct depth.
When moving the table crosswise, do not drill directly to the full depth, but work stepwise.
Fig 27
Protecting the planer shaft during drilling (fig. 28)
The shaft guard mounted on the machine protects the operator during drilling. Always make sure that
the hand guard is folded down to prevent hands from coming into contact with the rotating tool. The
1
2
4
3
5
1
6
2

