
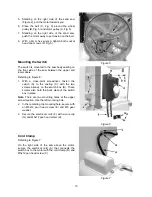
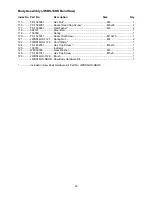


13
in Figure 13. Contact your local authorized WMH
Tool Group service center or qualified electrician
for proper procedures to install the plug. The
band saw must comply with all local and national
codes after the 230-volt plug is installed.
The band saw with a 230-volt plug should only
be connected to an outlet having the same
configuration (Figure 13). No adapter is
available or should be used with the 230-volt
plug.
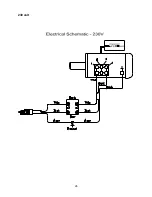
Figure 13
Important
: In all cases (115 or 230 volts), make
certain the receptacle in question is properly
grounded. If you are not sure, have a registered
electrician check the receptacle.
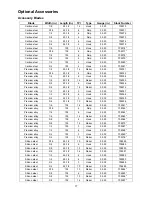
Extension Cords
Use only three wire extension cords that have
three-prong grounding plugs and three-pole
receptacles that accept the tool’s plug.
Make sure the cord is in good condition, and
heavy enough to carry the current your band
saw will draw. An undersized cord will cause a
drop in line voltage, resulting in loss of power
and overheating. Table 1 shows the correct size
to use depending on cord length and the ampere
rating on your machine’s nameplate. If in doubt,
use the next heavier gauge. The smaller the
gauge number, the heavier the cord.
Repair or replace a damaged or worn cord
immediately.
Power
Extension Cord
Currant
(Amps)
Line
voltage
Cord length in
feet
Cord gauge
(AWG)
0 to 25
18
25 to 50
16
50 to 100
16
0-6 120
over 100
14
0 to 25
18
25 to 50
16
50 to 100
14
6-10 120
over 100
12
0 to 25
16
25 to 50
16
50 to 100
14
10-12 120
over 100
12
0 to 25
14
25 to 50
12
12-16 120
over 50
not recommended
Table 1
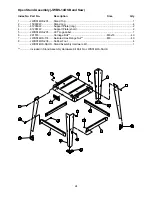
Summary of Contents for JWBS-140S
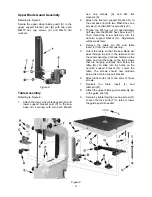
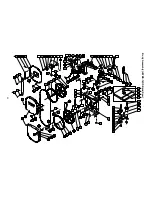
Page 23: ...23 Body Assembly JWBS 14OS Band Saw...
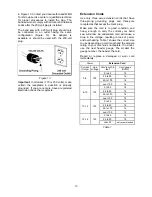
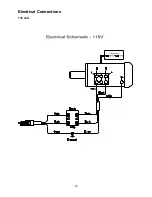
Page 25: ...25 Electrical Connections 115 volt...
Page 26: ...26 230 volt...
Page 27: ...27 Notes...


