background image


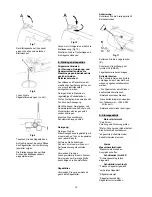
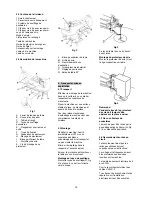
Fig 5


Tilt the table to the left until the 
desired angle on the scale (G) has 
been reached. 

Retighten the locking knob. 


Fig 6 

Attention: 

Angle cutting requires more care. 
Be careful. 


7.  Setup and adjustments 

General note: 
Setup and adjustment work may 
only be carried out after the 
machine is protected against 
accidental starting by pulling the 
mains plug. 

7.1 Changing the sawblade 

The machine accepts pin blades and 
plain end blades. 

Check sawblade for flaws (cracks, 
broken teeth, bending) before 
installation. Do not use faulty 
sawblades. 

The sawblade teeth must point in 
cutting direction (down) 

The sawblades may only be 
changed when the mains plug is 
pulled! 

Open the transparent sawguard. 

Remove the table insert (M) 

Release blade tension. 


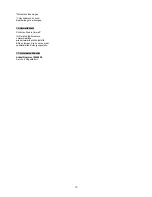
Fig 7 

The quick release blade tension knob 
(A) allows a quick and easy blade 
change. 


Fig 8 

Loosen the upper and lower blade 
holder screws (L and I). 


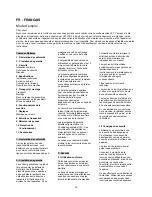
Fig 9 

Replace the sawblade. 

The teeth of the blade must point in 
the cutting direction (down). 

The sawblade tension can be 
adjusted by turning the tension knob. 


Fig 10 

Turn clockwise to increase tension 
(Fig 10). 

Reposition the table insert and the 
transparent sawguard. 


8. Maintenance and inspection 

General notes: 
Maintenance, cleaning and repair 
work may only be carried out after 
the machine is protected against 
accidental starting by pulling the 
mains plug. 

Repair and maintenance work on the 
electrical system may only be carried 
out by a qualified electrician. 

Clean the machine regularly. 

Inspect the proper function of the dust 
extraction daily. 

All protective and safety devices must 
be re-attached immediately after 
completed cleaning, repair and 
maintenance work. 

Defective safety devices must be 
replaced immediately. 

Cleaning: 

Regularly clean the machine housing 
with a soft cloth preferably after each 
use. 

If the dirt does not come off use a soft 
cloth moistened with soapy water.  

Never use solvents such as petrol, 
alcohol, ammoniac water, etc. These 
solvents may damage the plastic 
parts. 

Saw blades: 

Only use sharp saw blades. 

Lubrication: 

Lubricate the arm bearings after 
every 50 hours of use. 

Summary of Contents for JSS-16

Page 1: ...Instructions Translations D Gebrauchsanleitung F Mode d emploi Walter Meier Tool AG T mperlistrasse 24 CH 8117 F llanden Switzerland Phone 41 44 806 47 48 Fax 41 44 806 47 58 jetinfo eu waltermeier c...

Page 2: ...ctive 2004 108 EC EMC Directive Electro Magnetic Compatibility 2006 95 EC Low Voltage Directive 2002 95 EC RoHS Directive Reduction of Hazardous Substances designed with consideration of the standards...

Page 3: ...details can be found in the General Terms and Conditions GTC The GTC can be viewed at www jettools com or can be sent by post upon request The Seller reserves the right to make changes to the product...

Page 4: ...or minimum size of the workpiece must be observed Do not force the power tool It will do a better and safer job and give you much better service if it is used at the rate for which it was designed Ne...

Page 5: ...ble regulations The mains voltage must comply with the information on the machine licence plate The mains connection must have a 10A surge proof fuse Only use power cords marked H05VV F Connections an...

Page 6: ...int in the cutting direction down The sawblade tension can be adjusted by turning the tension knob Fig 10 Turn clockwise to increase tension Fig 10 Reposition the table insert and the transparent sawg...

Page 7: ...switch motor or cord consult an electrician Motor brushes worn Replace brushes Machine vibrates excessively Stand on uneven surface adjust base for even support Cut is not square Bevel stop setting i...

Page 8: ...tergehende Anspr che sind ausgeschlossen Die vorliegende Garantie umfasst s mtliche Garantieverpflichtungen seitens des Verk ufers und ersetzt alle fr heren Erkl rungen und Vereinbarungen betreffend G...

Page 9: ...rgonomische K rperhaltung Sorgen Sie f r sicheren Stand und halten Sie jederzeit das Gleichgewicht Arbeiten Sie niemals unter dem Einfluss von Rauschmitteln wie Alkohol und Drogen an der Maschine Beac...

Page 10: ...rbeitstisch D Staubblasrohr E Blatt und Werkzeugstauraum F Befestigungsbohrungen G Schwenkskala H Schwenkklemmung I Untere S geblattklemmung J S geschutzhaube K S geschutz Klemmschraube Fig 2 L Obere...

Page 11: ...iertes Abheben Entfernen Sie das Werkst ck vom S geblatt bevor Sie die Maschine starten Werkst ck langsam in Richtung des angezeigten Risses dem S geblatt zuf hren und durch Drehen den Schnittverlauf...

Page 12: ...t einem weichen Tuch vorzugsweise nach jedem Einsatz Entfernen Sie hartn ckigen Schmutz mit einem weichen mit Seifenwasser angefeuchteten Tuch Verwenden Sie keine L sungsmittel wie Benzin Alkohol Ammo...

Page 13: ...erzwingen 10 Umweltschutz Sch tzen Sie die Umwelt Ihr Ger t enth lt mehrere unterschiedliche wiederverwertbare Werkstoffe Bitte entsorgen Sie es nur an einer spezialisierten Entsorgungsstelle 11 Liefe...

Page 14: ...ranties Le d lai de garantie s applique pour une dur e d exploitation de huit heures par jour Au del le d lai de garantie diminue proportionnellement au d passement mais pas en de de trois mois Le ren...

Page 15: ...poussi res trop lev e La poussi re de bois est explosive et peut tre nocive pour la sant Retirer les clous et autres corps trangers de la pi ce avant de d buter l usinage Se tenir aux sp cifications...

Page 16: ...ut aussi tre fix e la surface Pour des raisons techniques d emballage la machine n est pas compl tement mont e la livraison 5 2 Montage D baller la machine Avertir imm diatement JET si vous constatez...

Page 17: ...re la main sous la table de travail lorsque le moteur est en marche L tat de la lame de scie doit tre contr l avant chaque travail Ne travailler qu avec des lames bien aiguis es et en parfait tat Coup...

Page 18: ...travail Fig 11 Retirer les 4 couvercles du palier B Lubrifier g n reusement avec de l huile l g re SAE 20 Remonter les couvercles du palier Brosses de collecteur Les brosses de collecteur du moteur so...

Page 19: ...Parts Breakdown For JSS 16 Scroll Saw Parts List For JSS 16 Scroll Saw Index Part Description Size Qty No No...

Page 20: ...WASHER 4 2 24 JSS16 024 HEX HEAD BOLT M4X10 2 25 JSS16 025 BEARING FLANGE 4 26 JSS16 026 PAN HEAD SCROW M5X6 0 05 2 27 JSS16 027 ROUND HEAD SCROW M6X25 2 28 JSS16 028 RETAINER 0 05 2 29 JSS16 029 UPPE...

Page 21: ...SCREW M5X30 2 67 JSS16 067 BLOWER TUBE 1 68 JSS16 068 KNOB 1 69 JSS16 069 BEARING FENCE 1 70 JSS16 070 SET PLATE 1 71 JSS16 071 SWITCH CASE 1 72 JSS16 072 POWER SWITCH 230V 1 73 JSS16 073 HEX NUT M5...

Reviews: