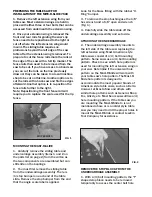
Look for the brass fitting with the rubber “O-
Ring” bumper.
3. To remove the stop bushing use the 1/8”
hex wrench and a 5/8” open end wrench
(Fig. 1).
4. Carefully slide the table slide off the
undercarriage assembly and set aside.
ATTACHING THE UNDERCARRIAGE
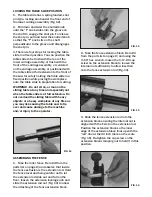
2. The undercarriage assembly mounts to
the left side of the table saw replacing the
left extension wing. Most American style
table saws consist of a (3) bolt mounting
pattern. Some saws use a (4) bolt mounting
pattern. Check to see which hole pattern is
used for mounting the left extension wing on
your saw. Determine if the universal hole
pattern on the Mast-R-Slide will work with
your table saw’s hole pattern. The Mast-R-
Slide hole pattern is designed to
accommodate the most popular brands of
American style table saws, such as a Delta
Unisaw, Jet Exacta Saw and others with
similar hole patterns such as General, Shop
Fox, Grizzly, etc. Most Sears saws utilize a (4)
hole mounting pattern. If the table saw you
are mounting the Mast-R-Slide to is not
mentioned above or is an older style table
saw you may need to drill the proper holes to
mount the Mast-R-Slide or contact JessEm
Tool Company for assistance.
PREPARING THE TABLE SAW FOR
INSTALLATION OF THE MITE-R-SLIDE 7500
1. Remove the left extension wing from your
table saw. Most extension wings are held in
place with either three or four bolts that can be
accessed from underneath the extension wing.
2. Once your extension wing is removed the
front and rear rails for guiding the saw’s rip
fence need to be repositioned to the right or
cut off where the left extension wing would
mount. The sliding table requires no
protrusions beyond the left edge of the saw
table after the extension wing is removed. To
prepare to cut the fence rails mark the rails at
the edge of the saw with a felt tip marker. The
fence rails then need to be removed from the
saw to be cut. If you have access to a band saw
you can cut the rails on the line previously
drawn or they can be taken to a local machine
shop to be cut on this line. Another option is to
cut the rails with a hack saw and file the edges
afterward. Another option is to re-position the
fence rails further to the right.
Note: Repositioning the front fence rail will
require you to replace the scale used for the rip
fence.
MOUNTING THE MAST-R-SLIDE
1. Carefully remove the sliding table and
undercarriage assembly (items 1 and 2 on
the parts list on page 2) from the carton as
the two components are assembled but can
still slide on the bearings.
2. You must first remove the sliding table
from the undercarriage assembly. There is
(1) stop bumper on each end of the table
slide. Remove the stop bumper from the end
that the angle scale label is applied.
FIG. 1
STOP BUMPER
FIG. 2
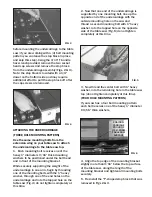
REMOVE THE STOP BLOCK FROM THE
UNDERCARRIAGE ASSEMBLY.
1. With a (3) bolt mounting pattern, the “T”
shaped stop block needs to be removed
temporarily to access the center bolt hole


