background image

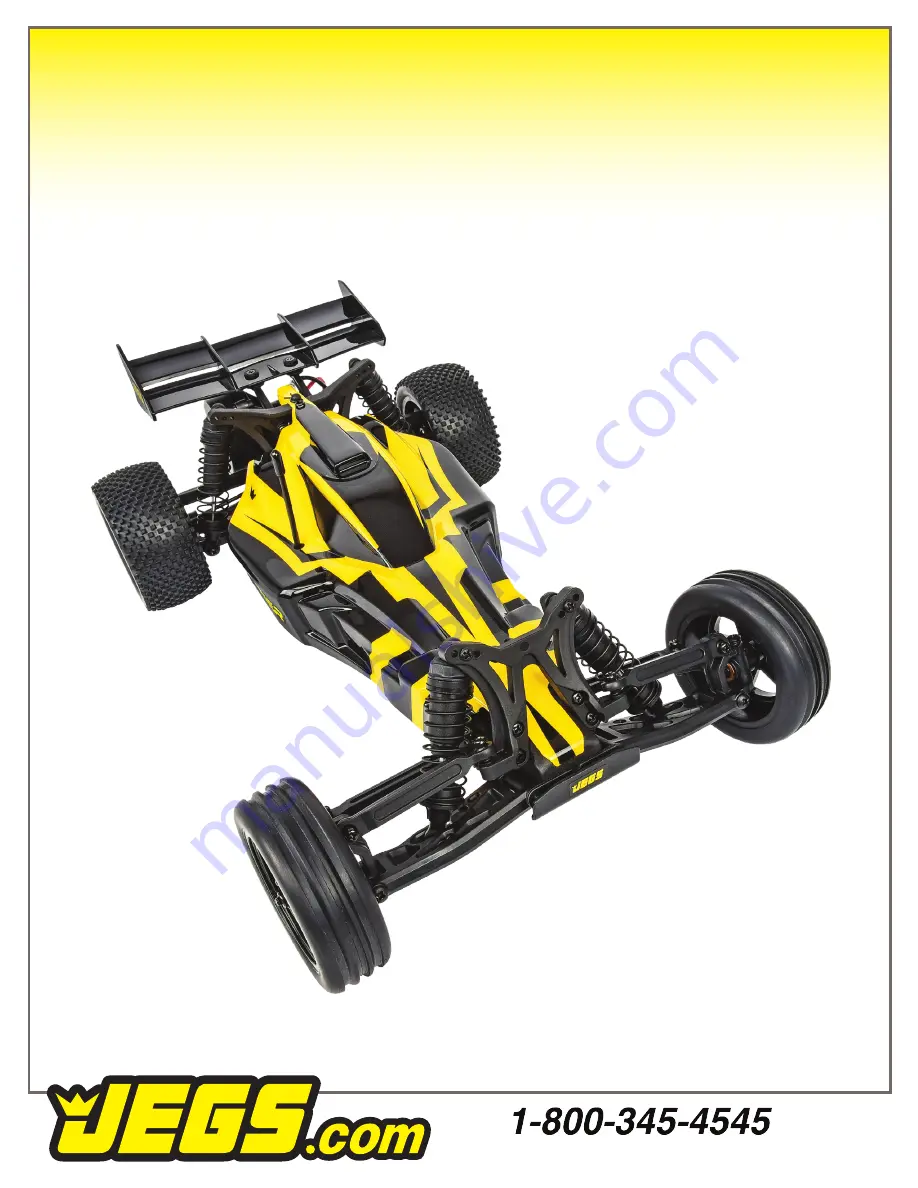
Buggy Assembly Guide

555-44100 - Stinger

Assembly Instruction & Parts List

Summary of Contents for Buggy Stinger 555-44100

Page 1: ...Buggy Assembly Guide 555 44100 Stinger Assembly Instruction Parts List ...

Page 2: ... of many moving parts like gears shafts and tires Avoid touching these areas when the battery is connected Many parts of the Stinger will become hot after running Allow the parts to sufficiently cool before conducting any maintenance Beginning a Run 1 Place the Stinger so that the wheels are off the ground 2 Confirm that the speed controller switch is OFF and connect the motor and battery 3 Switch...

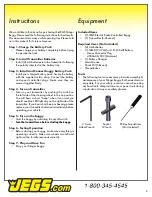
Page 3: ... stay on the right side of the transmitter If you hear short beep or beeping please replace your transmitter batteries immediately before operating your vehicle Step 5 Turn on the Buggy Start the buggy by activating the on off switch Turn the transmitter on before starting the buggy Step 6 Testing Operation Before driving your buggy make sure everything is operating correctly Make sure wheels turn...

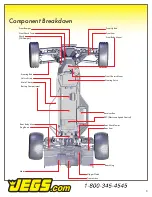
Page 4: ...cro Strap Main Chassis Battery Compartment Rear Body Mount Dog Bone Motor Transmission Slipper Clutch Rear Wing Rear Arm Rear Shock Tower ESC Electronic Speed Control Receiver Box Steering Servo Front Chassis Mount Front Body Mount Front Arm Front Up Rod Shock Oil Damper ...

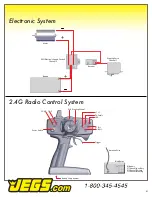
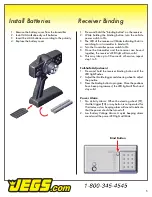
Page 5: ...UNC CH3 D R Steering Wheel ST L ST R TH Fwd TH Rev Trigger LED Battery Compartment Antenna Wire Bind Button B Battery 3 Channel Auxiliary 2 Channel Throttle 1 Channel Steering Motor ESC Electronic Speed Control Channel 2 Battery Receiver Steering Servo Channel 1 ...

Page 6: ...r are bound together the receiver s LED light will turn solid 6 This may take up to 30 seconds otherwise repeat step 1 to 5 Fail Safe Adjustment 1 Press and hold the receiver binding button until the LED light flashes 2 Adjust the throttle trigger and steering wheel to adjust the position 3 Press the binding button to program Once the positions have been programmed the LED light will flash and sta...

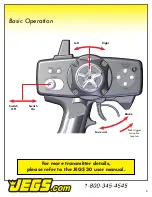
Page 7: ...Basic Operation 6 For more transmitter details please refer to the JEGS 30 user manual Left Right Switch Off Switch On Forward Brake Push trigger twice for reverse ...

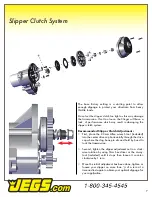
Page 8: ...pper Clutch Adjustment First place the 2 0mm Allen wrench tool included into the center drive cup horizontally through the drive cup where the dog bone pin sits and hold by hand to lock the transmission Second tighten the slipper adjustment nut in a clock wise rotation by using 7mm hex driver or the 4 way tool included until it stops then loosen it counter clockwise by 1 turn Once the initial adju...

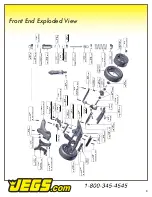
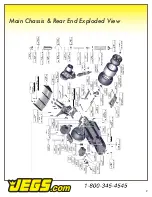
Page 9: ...933 5x8x2 5mm Bushing 44918 Steering Bushing 44893 5 8mmBall_S 44880 Steerin_g_ Rack 44918 King Pin Phillips Head 44945 M3xl6mm TP Round head Screw 44936 3x27mm 9111 44936 3x27mm 44873 CHub_L I 44945 M3xl6mm TP Round head Screw I 44877 Buggy Steering Rod I I 1448927 44873 ontKnuC 44892 5 8mm Ball_L 44933 5xllx4mm Bushing 44869 Buggy FrontArm L 44928 Wheel Axle_F 44872 Wheel Hub 44883 Shock Cap 449...

Page 10: ...J9Y Shock Cap Adapter 4 l _ 9 1 Shock Tower Holder I I 44952 44922 Wheel Axle_R M3xl5mm 44949 M3x8mm TP Flat head screw TP Flat head screw 44872 Wheel Hub Spacer 44883 Shock Cap 44956 12xl 5mm O Ring 44959 2 6x6x0 5mm Washer 44885 Shock Body_Long 44884 Imm Shaft Spacer 44884 Shaft Spacer 44956 8xlmmORing 44884 Shock Piston 44956 P3 0 Ring_ 44883 O R ing_Cap 44892 5 8mm Ball_L 1448847 44890 Spring ...

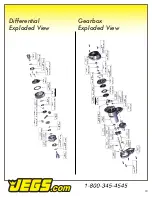
Page 11: ...w 44940 M3x7mm Sr ur Gear Cover 44960 3x8x0 Smm Washer Gear Box_R 44925 44926 Slipper Ring 44913 I lRound head Screw Spur Gear 44920 Drive Cup 44934 10xl5x4mm Bearing 44961 Sx8x0 25mm Washer 44944 M3xl2mm TP Round head Screw 44899 I I 44899 Diff Gear 9T Diff Gear 14 T 44955 PS O Ring 44876 DiffCap 44900 Diff Cap Seal 44920 Drive Cup 44961 Sx8x0 25mm Washer 44934 10xl5x4mm Bearing 44937 M2 6xl0mm T...

Page 12: ...nd workmanship only Problems that arise from normal wear abuse neglect or any damage that arises as a result of improper use incorrect batteries overheating are not covered by this warranty The warranty also does not cover any problems resulting from crashes JEGS is not liable for any loss or damages resulting from the use or misuse of this product or any of the accessories or chemicals related to...

Reviews: