FUNCTIONAL DESCRIPTION
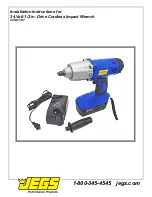
1. Button 2. Battery cartridge
CAUTION:
Always be sure that the tool is switched off and the battery cartridge is removed before adjusting or checking
function on the tool.
Installing or removing battery cartridge
1. Always switch off the too l before insertion or removal of the battery cartridge.
2. To remove the battery cartridge, withdraw it from the tool while pressing the buttons on both sides of the cartridge.
3. To insert the battery cart ridge, align the tongue on the battery cartridge with the groove in the housing and slip it
into place. Always insert it all the way until it locks in place with a little click. If not, it may accidentally fall out of the
tool, causing injury to you or someone around you.
4. Do not use force when inserting the battery cart ridge. If the cartridge does not slide in easily, it is not being inserted
correctly.
Charging
1. Remove the battery pack from the wrench, by depressing the two side release clips. WARNING! DO NOT touch
metal terminals.
2. Place wrench in carry case and remove the battery charger.
3. Connect the charger to the mains electricity supply. The green LED will light.
4. The battery pack and charger have the positive (+) and negative (-) terminals marked. Align the correct
terminals and insert the battery into slot.
5. NOTE: The battery pack is designed so that it will only enter the charger unit the correct way. When placed in
the charger, a very slight downward pressure will seat the pack firmly into the power terminals.
6. When inserted correctly, the red charge light will flash whilst the battery is charging.
Summary of Contents for 555-81747
Page 2: ......


