


Page 26 of 28
Technical Support
1 866 228-3762
Systems Engineer
321-243-0600
12.
Save Results
At the conclusion of the test, enter Customer name, Technician Name,
Test Location, and Comments at the prompt. Select the Append option,
and tap
[Yes]
to save the test report to the T-BERD 6000A hard drive in
PDF format. The filename, including a time and date stamp, will be
displayed in the Progress log.
13.
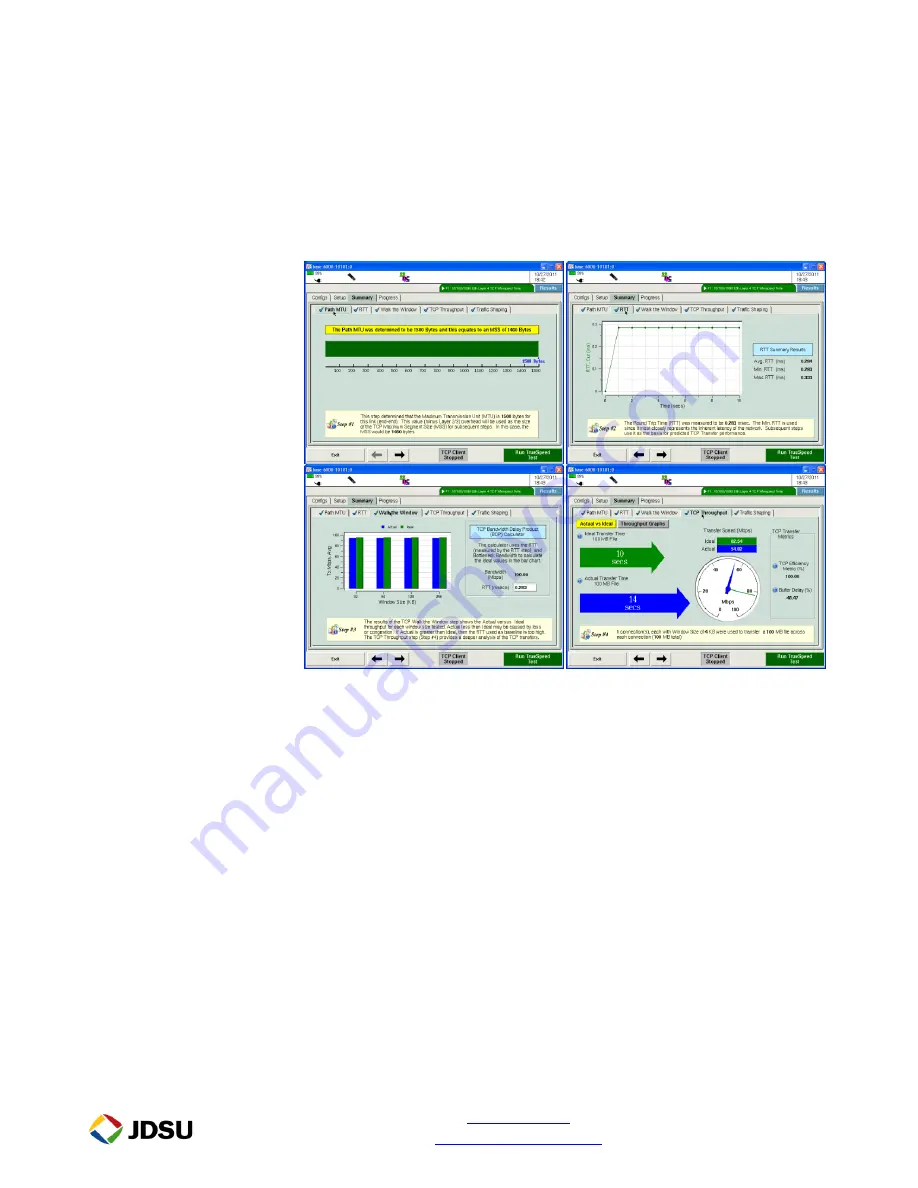
View Summary
Select the
Summary
tab to view status of all tests. Verify that all tests
PASS and the displayed values meet the performance objectives of the
line under test.
14.
Exit
Tap
[Exit]
to return to the main Results view.


