


GEN2U™ Printer
© 2016, JCM Global Corporation
12
Part No. 960-000177R_Rev. A
ABOUT THE JCM PRINTER BASIC DRIVER
The JCM
®
Printer Basic Driver allows full testing of a connected
Printer.
C
ONNECTING
TO
THE
JCM P
RINTER
B
ASIC
D
RIVER
To connect to the JCM Printer Basic Driver:
1.
Click the Start Button on the PC Desktop, then click on
Programs
.
2.
Scroll down to
JCM
, then click the
JCM Printer Basic Driver
icon.
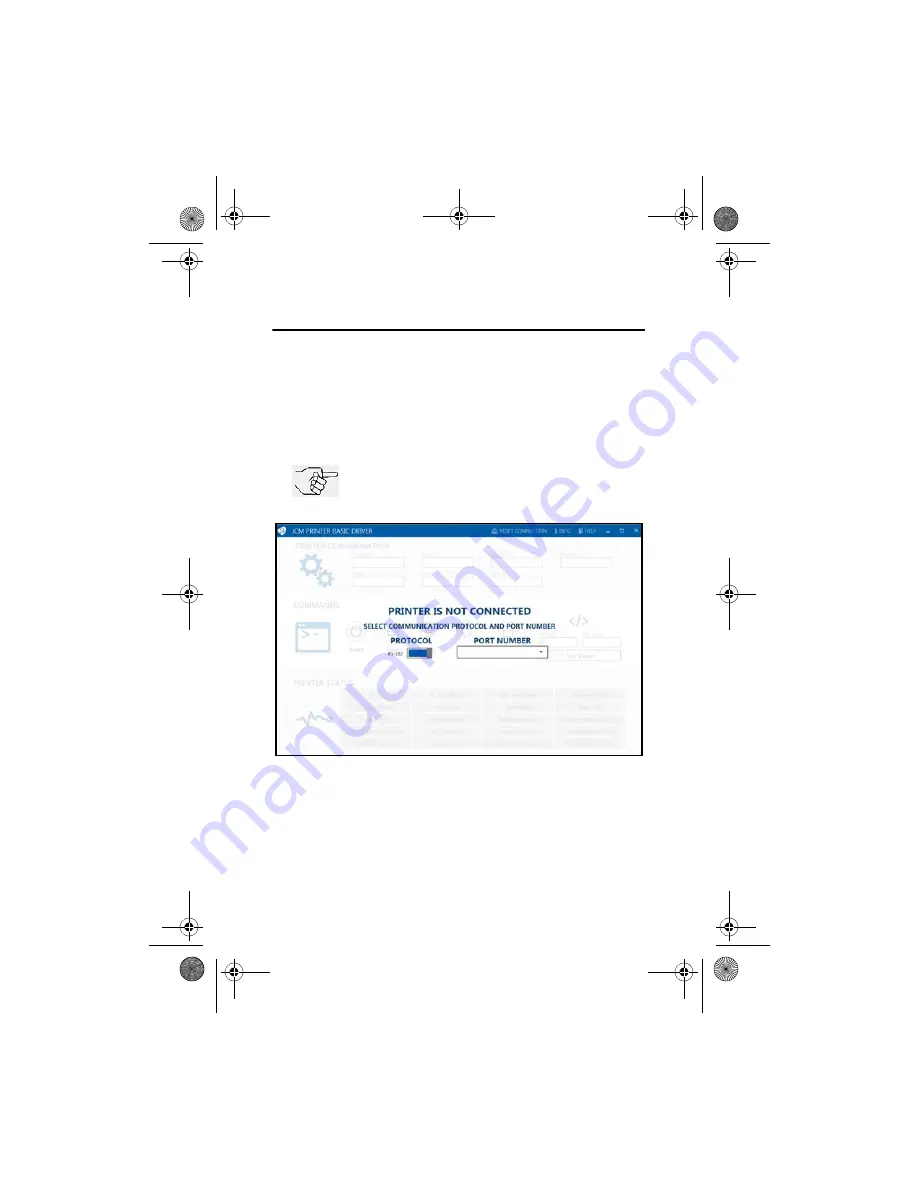
The
JCM PRINTER BASIC DRIVER
Opening Screen appears (Figure 11).
3.
Select the
PROTOCOL
(
RS-232
or
Netplex
) and
PORT NUMBER
.
NOTE: Printers supporting USB
Communications also have RS-232 Active.
Test connectivity using an RS-232 connection.
Figure 11
JCM Printer Basic Driver Opening Screen
GEN2U_Fl
ipBoo
kRev
A_v12
.fm Page 12 Thursd
ay, Octob
er 6,
2016 1:2
9 PM


