background image

ENGLISH

OPERATION MANUAL

JB SYSTEMS®

7/67

CD670

PAUSE MODE:

normally the JOG WHEEL is used to search very precisely (1frame

precision) for the exact cue point. When the fast search mode is turned on, you can
use the JOG WHEEL to search very quickly forward/backward inside the current
track.

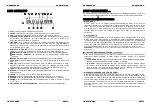
16. LCD DISPLAY:

Shows all important information needed during playback. Refer to the

next chapter for more information.

17. SGL/CTN button:

You can choose between “single track mode” and “continuous

play”.

Continuous play:

the complete CD will be played without interruption. (mostly used

in pubs)

Single track:

player stops at the end of each track and waits at the beginning of the

next track. (mostly used by deejays)

Push the SGL/CNT button for more than 1second to switch between normal and “auto
cue” mode. In “auto cue” mode the player waits at the first music note of each track.
This means that badly indexed CDs will not interfere with the instant start capabilities
of this CD player. This is a very useful feature for deejays!

18. TIME Button:

The TIME button switches between elapsed playing time, remaining

time in a selection and total remaining time of the disc. (standard = remaining /track)

19. FADER START Sockets:

If you are using a mixer with fader start function, connect

the player with the fader start of the mixer. Please note that these sockets must never
be connected with any voltage.

Attention:

This remote control is only compatible with certain (Synq

®

or Pioneer

®

compatible) mixers.

20. CONTROL CONNECTOR:

Connect the main unit here, using the supplied mini-DIN

cable.

LCD DISPLAY:

1. PLAY:

appears while the unit is playing a CD.

2. PAUSE:

appears while the player is in pause or cue mode.

3. CUE:

appears when the CD-player wait at the cue point.

ENGLISH

OPERATION MANUAL

JB SYSTEMS®

8/67

CD670

4. ELAPSED, TOTAL REMAIN:

indicates that the time shown on the display is the track

elapsed, remaining or total remaining time.

5. TIME BAR:

shows either time remaining or elapsed depending on the setting of the

TIME button. Starts flashing at the end of each track to alert the user to take action.

6. BPM/PITCH DISPLAY:

(see PITCH button(11) and TAP button(10) to learn how to

switch between the 3 display modes)

BPM indicator ON:

the automatic beat counter shows the number of Beats Per

Minute on the display.

BPM indicator BLINKING:

the manual beat counter shows the number of Beats

Per Minute you manually “tapped” on the display.

PITCH indicator ON:

The display shows the actual speed variation (in %)

compared to zero pitch.

7. AUTO CUE:

appears when the “auto cue” function is active. See SGL/CTN-button(17).

8. SINGLE:

appears when the unit is set to play just one track at a time. When it is not

shown, the CD plays continuously through all tracks. The function is controlled by the
SGL/CTN button(17).

9. LOOP:

shows when a loop is playing.

10. RELOOP:

shows when a loop is programmed so you can use the reloop button.

11. TRACK:

Shows current track number.

12. MINUTE:

Shows “minutes” time information of current track.

13. SECOND:

Shows “seconds” time information of current track.

14. FRAME:

Shows “frame” time information of current track. (1 frame = 1/75

th

sec.)

15. ANTI SHOCK AND BUFFER INDICATOR:

Shows the status of the anti shock

memory.

HOW TO USE …

Most of the common functions are explained in the previous chapter “controls and
functions” In this chapter we talk about the functions that need a little more explanation.

SOME GENERAL FUNCTIONS:

SLEEP MODE:

The CD player automatically shuts off the transport and laser after about 15 minutes
(when in pause or cue mode). This extends the life of your motor drive and laser. During
sleep mode the display shows the word “SLEEP”. To wake up the player, just press the
cue or play button, the display turns to normal and is ready to receive instructions.

RELAY FUNCTION:

First open the 2 faders of the CD inputs on your mixer. Press the RELAY button to
enable the relay function, the relay LED turns on. Put a disc in both players and start
playback on one of the units. Alternately a track will be played from both units until the
relay function is disengaged. You can always put a new CD in the player that is waiting
in pause. In this way you can create an endless program, perfect for use in pubs etc.

NOTE:

by switching on the relay function you automatically put both players in single mode.

PITCH BENDING:

This function is used to synchronize the beats of two tracks. This can be done in two
ways:

Summary of Contents for CD 670

Page 1: ...duction or publication of the content in any manner without express permission of the publisher is prohibited The Power Source for DJ s Operation Manual Mode d emploi Gebruiksaanwijzing Bedienungsanleitung Manual de instrucciones Manual do utilizador EN FR NL DU ES PT ...

Page 2: ...t toestel en de gebruikte batterijen op een milieuvriendelijke manier conform de in uw land geldende voorschriften DU ENTSORGUNG DES GERÄTS Entsorgen Sie das Gerät und die Batterien auf umweltfreundliche Art und Weise gemäß den Vorschriften Ihres Landes ES DESHACERSE DEL APARATO Reciclar el aparato y pilas usadas de forma ecologica conforme a las disposiciones legales de su pais PT COMO DESFAZER S...

Page 3: ...it Control unit User manual Mains cable Pair of cinch cables mini DIN cable Pair of fader start cables mini jack mini jack SAFETY INSTRUCTIONS CAUTION To reduce the risk of electric shock do not remove the top cover No user serviceable parts inside Refer servicing to qualified service personnel only The lightning flash with arrowhead symbol within the equilateral triangle is intended to alert the ...

Page 4: ...eaned with special designed cloth and cleaning products Do not use CDs that are badly damaged scratched or deformed they can damage your appliance To prevent fire or shock hazard do not expose this appliance to rain or moisture In order to prevent electric shock do not open the top cover If a problem occurs contact your dealer Do not place metal objects or spill liquid inside the CD player Electri...

Page 5: ... ENTER EDIT LOOP MODE When a loop is programmed LOOP IN and OUT EXIT buttons are on you can enter loop edit mode by pressing the RELOOP STUTTER button until the display shows Ed 7 SEARCH buttons These buttons are used to search at high speed inside a track 8 TRACK SEARCH Buttons These buttons are used to select the track to be played Forward skip back skip Press the 10 button to skip 10 tracks at ...

Page 6: ...Y see PITCH button 11 and TAP button 10 to learn how to switch between the 3 display modes BPM indicator ON the automatic beat counter shows the number of Beats Per Minute on the display BPM indicator BLINKING the manual beat counter shows the number of Beats Per Minute you manually tapped on the display PITCH indicator ON The display shows the actual speed variation in compared to zero pitch 7 AU...

Page 7: ...p is programmed and playing RESTART A LOOP This can be done in 3 ways When a loop is programmed and you left it by pressing the OUT EXIT button just press RELOOP to restart the loop When a loop is programmed and you left it by pressing the OUT EXIT button just press OUT EXIT again to restart the loop The point where you pressed OUT EXIT is now programmed as the new endpoint of the loop When the lo...

Page 8: ... le vendeur Important Cet appareil a quitté notre usine en parfaite condition et bien emballé Il est primordial que l utilisateur suive les instructions de sécurité et avertissements inclus dans ce manuel La garantie ne s applique pas en cas de dommage lié à une utilisation incorrecte Le vendeur ne prend pas la responsabilité des défauts ou de tout problème résultant du fait de n avoir pas tenu co...

Page 9: ...l des amplificateurs des Spot s etc peut entraver le bon fonctionnement de l appareil et peut même l endommager L appareil peut être monté dans des racks 19 pouces Fixez l appareil en utilisant les 4 trous à vis qui se trouvent dans le panneau frontal Utilisez toujours des vis au diamètre adapté les vis ne sont pas fournies avec l appareil Evitez au maximum les chocs et les vibrations pendant le t...

Page 10: ...ant la roue dans le sens des aiguilles d une montre la roue jog augmente temporairement la vitesse de lecture jusqu à 10 Tournez dans le sens inverse des aiguilles d une montre pour ralentir la vitesse de lecture temporairement Le changement de vitesse de lecture est déterminé par la vitesse de rotation de la roue Quand la fonction recherche rapide 15 est activée vous pouvez chercher à grande vite...

Page 11: ... réglage de vitesse Vous pouvez aussi choisir une des 3 échelles de variation de la vitesse 4 8 16 Appuyez sur la touche PITCH BEND 9 pendant que vous tenez la touche PITCH enfoncée regardez les LEDs Pitch range pour vérifier quelle échelle de variation de vitesse vous avez sélectionnée FRANCAIS MODE D EMPLOI JB SYSTEMS 18 67 CD670 12 Curseur PITCH Appuyez sur la touche PITCH pour l allumer La vit...

Page 12: ...s parlerons des fonctions qui nécessitent un peu plus d explications QUELQUES FONCTIONS SLEEP MODE Le lecteur CD éteint automatiquement le moteur du chargeur CD et le laser après environ 15 minutes d inutilisation en mode pause ou CUE Ceci prolonge la durée de vie du moteur et du laser Pendant le mode veille l écran affiche le mot SLEEP Pour réveiller votre lecteur CD appuyez juste sur la touche C...

Page 13: ...en appuyant sur la touche OUT EXIT appuyez juste à nouveau sur la touche OUT EXIT pour redémarrer la boucle L endroit ou vous avez appuyé sur la touche OUT EXIT est maintenant programmé comme nouveau point de fin de boucle Quand une boucle est lue appuyez sur la touche RELOOP pour redémarrer la boucle immédiatement Vous pouvez répéter cette action plusieurs fois de suite afin de créer un effet de ...

Page 14: ... apparaat verliet de fabriek in uitstekende staat en goed verpakt Het is erg belangrijk dat de gebruiker de veiligheidsaanwijzingen en raadgevingen in deze gebruiksaanwijzing uiterst nauwkeurig volgt Elke schade veroorzaakt door verkeerd gebruik van het apparaat valt niet onder de garantie De dealer aanvaardt geen verantwoordelijkheid voor mankementen en problemen die komen door het veronachtzamen...

Page 15: ...laatsen en het gebruiken van het toestel tijdens lange periodes in de nabijheid van warmtebronnen zoals versterkers spot s enz zullen de prestaties van het toestel negatief beïnvloeden en kunnen het toestel zelfs beschadigen Het toestel kan in een 19 inch rack ingebouwd worden Bevestig het toestel door middel NEDERLANDS HANDLEIDING JB SYSTEMS 26 67 CD670 van de 4 schroefsleuven die zich in de fron...

Page 16: ...et jog wiel de snelheid van de weergave tijdelijk verhogen door het wiel in wijzerzin te draaien of verlagen door het wiel in tegen wijzerzin te draaien tot 10 De waarde van de snelheidsverandering wordt bepaald door de snelheid van de rotatie van het wiel Als de snelle zoekfunctie 15 actief is dan kan U tegen hoge snelheid in het huidige nummer zoeken Als de loop edit functie actief is dan gebrui...

Page 17: ...als U de PITCH BEND toets 9 kort indrukt zal het regelbereik veranderen kijk naar de pitch range leds 12 PITCH schuifregelaar Druk op de PITCH toets 11 zodat deze aan is De snelheid kan bijgeregeld worden tot 16 door de schuifregelaar te verzetten De snelheid zal niet veranderen als de PITCH leds uit zijn 13 RELAY toets wanneer u de Relay functie aanzet wordt er afwisselend een nummer afgespeeld v...

Page 18: ...at meer uitleg nodig hebben ENKELE ALGEMENE FUNCTIES SLEEP MODE De CD speler zet na 15 minuten inactiviteit automatisch de motor en de laser uit wanneer in pauze of in cue modus Dit verlengt de levensduur van de motor en de laser Tijdens de Sleep Mode wordt het woord SLEEP weergegeven op het scherm Om de CD speler te doen ontwaken moet u enkel op de Cue of Play toets drukken het scherm keert terug...

Page 19: ...dpunt van de Loop Wanneer de Loop wordt afgespeeld druk dan op de RELOOP toets om de Loop onmiddellijk terug te starten U kunt dit verschillende keren na elkaar doen om een stotter effect te creëren EEN LOOP BEWERKEN Wanneer er al een loop geprogrammeerd is druk dan gedurende ongeveer 2 seconden op de RELOOP STUTTER toets om de loop te kunnen bewerken Terwijl de loop naadloos wordt weergegeven kun...

Page 20: ...gen bitte aufbewahren Bei Verkauf oder sonstiger Weitergabe des Gerätes bitte Bedienungsanleitung beifügen Aus Umweltschutzgründen Verpackung bitte wiederverwenden oder richtig trennen Überprüfen Sie den Inhalt Folgende Teile müssen sich in der Geräteverpackung befinden Laufwerkseinheit Steuereinheit Bedienungsanleitung Netzanschlusskabel Paar Chinch Kabel Mini DIN Kabel Paar Fader Start Kabel Min...

Page 21: ... Ihre CD s sehr sorgfältig Berühren Sie sie nicht mit nassen oder schmutzigen Fingern Wählen Sie einen staubfreien trockenen Ort zur Installation des CD Players Vermeiden Sie starke Hitzequellen und Vibrationen Verschmutzte CD s müssen mit einem speziellen Tuch und Reinigungsprodukten gereinigt werden Verwenden Sie keine beschädigten CD s zerkratzt oder deformiert Ihr Gerät kann beschädigt werden ...

Page 22: ...ange wieder bis Sie die Taste noch einmal drücken Ist ein Loop programmiert aber nicht aktiv können Sie ihn neu starten Der Punkt wo Sie die Taste drücken wird als der Endpunkt gespeichert Drücken Sie im Loop Edit Modus die OUT EXIT Taste wird die Loop Bearbeitung gestoppt und sichert den neuen Loop Endpunkt 5 PLAY PAUSE Taste Jedes Mal wenn Sie die PLAY PAUSE Taste drücken wechselt der Player zwi...

Page 23: ...chste Kapitel um mehr Informationen zu erhalten 17 SGL CTN Sie können zwischen Einzelwiedergabe und kontinuierlicher Wiedergabe wählen Einzelwiedergabe Die Wiedergabe endet nach jedem Track und wartet am Anfang des nächsten Tracks Funktion wird meistens von DJ s benutzt Kontinuierliche Wiedergabe Die komplette CD wird ohne Unterbrechung abgespielt Funktion wird meistens von Gaststätten benutzt Drü...

Page 24: ...FNEHMEN VON CD R UND CD RW Ausser normalen Audio CD s kann der CD670 auch CD R und CD RW abspielen Bitte verwenden Sie beim brennen einer CD ausschliesslich den disc at once und track at once Modus Obwohl der CD670 in der Lage ist CD R und CD RW zu lesen die mit höheren Geschwindigkeiten aufgenommen sind empfehlen wir keine Aufnahmen die mit mehr als 12facher Geschwindigkeit gebrannt wurden zu ver...

Page 25: ...formidad y las declaraciones y documentos relevantes se han depositado por el fabricante Inicio rápido de buffer con efecto stutter tartamudeo de cue Seamless loop bucle sin fin con reloop y efecto stutter Función de edición de loop en tiempo real Contadores de beat completamente automáticos con función TAP Memoria antichoque 20 segundos Función Auto cue 48dB Cue en tiempo real Cue al vuelo Contro...

Page 26: ...po largo o antes de cambiar la bombilla o comenzar una reparación La instalación eléctrica debería ser llevada a cabo sólo por personal cualificado acorde a las regulaciones para seguridad eléctrica y mecánica de su país Compruebe que el voltaje disponible no es superior al que aparece en el panel trasero de la unidad Enchufe siempre accesible para desconectar la alimentación El cable de alimentac...

Page 27: ...a bandeja de discos y colocar el CD en su sitio 3 Botón OPEN CLOSE Pulse este botón para abrir y cerrar la bandeja de discos Estos botones están desactivados durante la reproducción Si la bandeja no se cierra después de 60 segundos Se cerrará automáticamente para evitar daños ESPAÑOL MANUAL DE INSTRUCCIONES JB SYSTEMS 50 67 CD670 UNIDAD PRINCIPAL PARTE TRASERA 4 Conector Control Utilice el cable m...

Page 28: ...ando el reproductor de CD se encuentra en la modalidad de beat manual el BPM pequeño encima de BPM display parpadea Cuando selecciona otra pista el contador de beats regresa ESPAÑOL MANUAL DE INSTRUCCIONES JB SYSTEMS 52 67 CD670 automáticamente a la modalidad automática También puede volver manualmente a la modalidad automática pulsando el botón TAP hasta que la pantalla muestre Auto bPm El BPM pe...

Page 29: ... loop 10 RELOOP Se muestra cuando hay un loop programado por lo que puede utilizar el botón reloop 11 TRACK Muestra el número de pista actual 12 MINUTE Muestra la información de tiempo de la pista actual en minutos 13 SECOND Muestra la información de tiempo de la pista actual en segundos 14 FRAME Muestra la información de tiempo de la pista actual en frames 1 frame 1 75th seg 15 INDICADOR ANTI SHO...

Page 30: ...o el botón OUT EXIT pulse OUT EXIT de nuevo para reiniciar el loop El punto donde ha pulsado OUT EXIT se ha programado como el nuevo punto de loop Cuando el loop todavía se está reproduciendo pulse el botón RELOOP para reiniciar el loop inmediatamente Puede repetir esto varias veces para crear un efecto Stutter EDITAR UN LOOP Cuando programe un loop pulse el botón RELOOP STUTTER durante 2 segundos...

Page 31: ...ável por quaisquer danos ou problemas causados pelo incumprimento das instruções deste manual Guarde este manual num local seguro para consulta futura Caso venda esta unidade forneça este manual Proteja o ambiente Recicle o material desta embalagem Verifique o conteúdo Certifique se que a caixa contém os seguintes artigos Unidade CD670 Unidade de controlo Manual do utilizador Cabo de alimentação 2...

Page 32: ...Evite locais onde há a presença de vibrações poeira ou humidade O leitor irá funcionar normalmente quando colocado numa superfície com a inclinação máxima de 15 Tenha cuidado ao manusear CDs não o faça com as mãos sujas ou molhadas Discos sujos deverão ser limpos com panos próprios e produtos de limpeza indicados Não utilize CDs danificados riscados ou com deformações poderão prejudicar a unidade ...

Page 33: ...vo ponto cue 4 Botão OUT EXIT Utilizado para estabelecer o final dos loops O leitor dá início ao loop perfeito até que este botão seja pressionado novamente para sair Quando um loop é programado mas não está activo poderá também reiniciar o loop O ponto em que o botão é pressionado será memorizado como o novo final do loop Quando o leitor está em modo loop edit pressione este botão para parar a ed...

Page 34: ...será reproduzido na sua totalidade sem interrupção Geralmente utilizado em bares Single track O leitor pára no fim de cada faixa e aguarda no início da faixa seguinte Geralmente utilizado por deejays Pressione o botão SGL CNT durante mais de 1 segundo para alternar modo normal e auto cue No modo auto cue o leitor irá aguardar na primeira nota musical de cada faixa Isto significa que os CDs mal ind...

Page 35: ... CDs normais de áudio o CD670também reproduz CD R CD gravável e CR RW CD regravável Lembre se que deve utilizar sempre as opções de gravação disc at once e track at once no seu gravador Embora o CD670 tenha capacidade para ler CD Rs e CD RWs gravados a alta velocidade sugerimos que não utilize velocidades de gravação superiores a 12x de forma a optimizar a capacidade de leitura Utilize sempre CD R...

Page 36: ...a 1 20 4sec Grupo Óptico Sony KSM 213CCM 780nm 3 pontos de detecção Pesquisa electrónica Pesquisa digital totalmente automática Saída digital 0 5Vpp 0 1 load 75Ω Temperatura para uso 5 C a 35 C Humidade 25 to 85 RH sem condensação Dimensões Unid Principal 482 W x 88 8 H x 262 5 D mm Unid Controlo 482 W x 88 8 H x 94 D mm Peso Unid Principal 5 0kg Unid Controlo 1 8kg Estas informações estão sujeita...

Reviews: