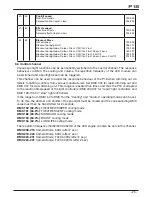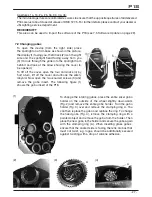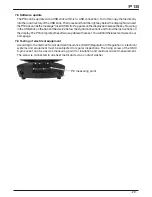
- 16 -
P18
5.6 STANDALONE operation
In standalone operation, up to 20 program steps can be stored in the P18, which can then run
in an endless loop. The images can be saved in two ways. Either you program the desired DMX
values directly on P18 and save them, or you set the DMX values via a connected DMX console
and then store them in the P18.
The menu items MODIFY, RUN and REMOTE can only be called up using a specific key
combination. To do this, press and hold “ENTER”, and also press “ESC”. Before activating these
menu items, remove all other devices in the DMX line that send DMX, e.g. consoles or other
spotlights that are not configured as slave devices, as otherwise damage to the DMX drivers
may occur.
Programming the standalone programme on the spotlight display:
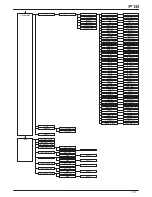
Call up the STANDALONE, EDIT menu item. In the STEP NR+/- menu item, select the desired step
and you can change it and its channel parameters in the following menu items: In the MODIFY
menu item, set the desired lighting scene and position and determine the individual sequence
times of the steps with FADE TIME and NEXT TIME (time for the complete step).
Use INSERT to insert an additional programming step. The DMX values of the previous step are
copied to the new step.
Use DELETE to delete a step. The display shows STEP NR: 1/X. Use the selection keys to move
to the desired step.
With RESET STEP you reset one step to its default values (DMX 000). The display shows STEP
NR: 1/X. Use the selection keys to select your step. CLEAR ALL resets the complete standalone
programming steps. Under MODIFY you will find STEP1/1 again. In the STANDALONE, TIMEBASE
menu item you have the possibility to change the Fade Time and Next Time from 1 second to
1/10 second.
Launch the standalone program:
Call up the STANDALONE menu and navigate to the RUN submenu. Confirm the selection by
pressing the key combination “ENTER” (press and hold) and simultaneously “ESC”. The display
then shows: S-ALONE: 01/XX and the program runs in an endless loop.
Deactivation: Press and hold the “ESC” key and then also press "ENTER". The menu jumps back
one level and RUN appears in the display.
Operation via master-slave function:
Connect the P18 via DMX lines and activate the REMOTE menu item for all slave devices.
To do this, navigate in the STANDALONE menu to the REMOTE sub-menu. Activate the REMOTE
function by pressing and holding “ENTER”, and also pressing “ESC”. The spotlight is in slave
mode when the display shows the status REMOTE INACTIVE or REMOTE ACTIVE.
REMOTE INACTIVE: The P18 is in slave mode but does not receive a DMX signal.
REMOTE ACTIVE: The P18 is in slave mode and receives a DMX signal.
The master device is programmed via the MODIFY menu item and started via RUN (press
and hold “ENTER” and also press “ESC”).
Accept the DMX values from an external console:
To accept the DMX values of a connected console, you must first enable the Capture DMX input.
To do this, go to the CAPT DMX menu item. The display now shows CAPTURE DMX 01/01, press
the Enter key to switch to START CAPTURE. Now the P18 reacts to the signals from the external
console.
From Spotlight Software 1.5 the standalone operation can also be programmed via the App
we offer.


