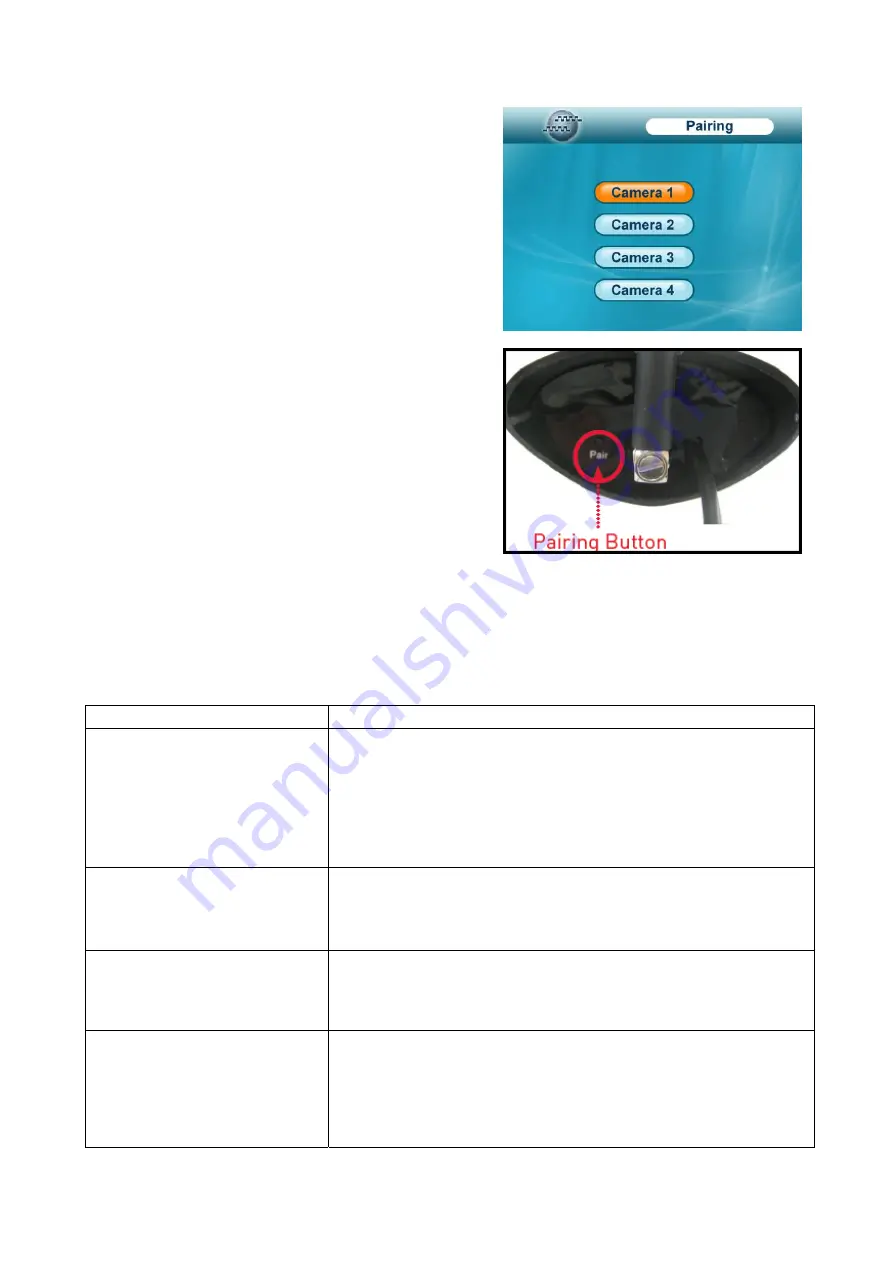
Paring the Camera to System
Before permanently mounting the camera, it is highly
recommended to pair the camera to the receiver.
1. Press
Menu
on the wireless receiver or remote control.
2. From the Main Menu, select
Pairing
and press the
enter button.
3. Select one camera and press the enter button.
4. Following the on-screen prompt, press the
Pair
button
on the rear panel of the camera. You have 30 seconds to
press the
Pair
button on the camera. Once paired, the
camera will be immediately displayed on-screen.
5
Note:
If you don’t press the
Pair
button on the camera
during the 30 second pairing window, repeat steps 1~4 to
try the pairing process again.
The Pairing Function assigns each camera to a different
channel on the wireless receiver (connect up to 4
cameras), and is necessary for configuring additional
cameras. By default the camera that came with the system is assigned to channel 1.
Troubleshooting
If you have problems with the product, there is often a quick and simple solution. Please try the following:
Problem Solution
No picture from a camera
1. Check all connections of this camera, including the connection
between the camera and battery pack, the connection between
battery pack and solar panel.
2. Make sure the battery pack has sufficient power.
3. Make sure that the camera is in range of the receiver.
The picture is dropping
1. Move the camera closer to the receiver.
2. Try repositioning the camera, receiver or both to improve the
reception.
Audio problems
1. Increase the volume when there is no sound.
2. Make sure that there is sound within range of the camera
microphone.
The picture is or has become
choppy
The picture may become choppy when experiencing a lower frame
rate (i.e. 10 frames per second vs. a higher 20 frames per second).
Try moving the camera closer to the receiver. Remove obstructions
between the receiver and camera.


