background image


- 3 - 

CLONE: 

Please note the below conditions before clone: 

-


Bay ‘A’ = SOURCE HDD, 

-


Bay ’B’ = TARGET HDD 

-


TARGET HDD ‘s capacity 

MUST

 be larger than SOURCE 

HDD, otherwise the CLONE cannot be completed. (Same 
capacity is also not acceptable) 

-


Before CLONE function starts, make sure the information 
in 

TARGET

 HDD is not important; once CLONE started, all 

information from  the  SOURCE HDD will be 

covered into 

TARGET HDD

.. 

-


Once the docking is connected to USB interface, the offline 
Clone will be invalid. Clone can only process by using USB 
Clone Function. 

 
1,


Offline clone 

a

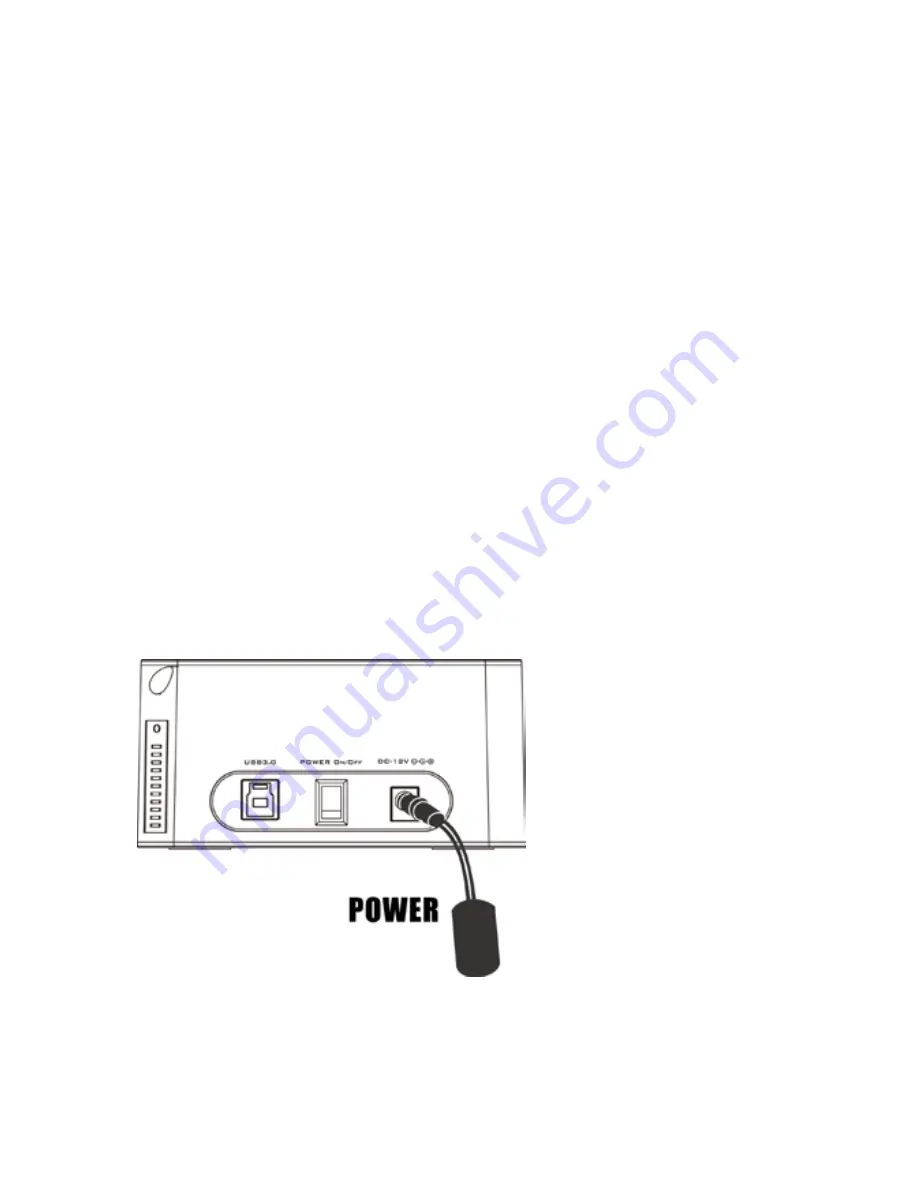
Insert source HDD to Bay ‘A’; target HDD to Bay ‘B’, and then 

turn on the power 


Summary of Contents for XC4697

Page 1: ...of USB 3 0 can reach 5Gbps The actual transfer speed of XC4697 is 400M s It supports Offline Clone which is able to copy data and system files from Source HDD to Target HDD completely via finger touch...

Page 2: ...2 6 Supports SATA II Asynchronous Signal Recovery Hot Plug feature Supports SATA to SATA pass through Complies with USB 3 0 Specification USB Mass Storage Class Bulk Only Transport Specification Supp...

Page 3: ...acceptable Before CLONE function starts make sure the information in TARGET HDD is not important once CLONE started all information from the SOURCE HDD will be covered into TARGET HDD Once the docking...

Page 4: ...ndicators are on that means XC4697 is ready for clone c Press and hold the clone button for 3 seconds until the indicator light is on press the button once more for Clone confirmation Offline clone is...

Page 5: ...5 d Clone progress indicator flashes and shows the progress 25 50 75 100 e Once clone is finished all progress indicators will light up f Turn off power and take out the HDD carefully...

Page 6: ...6 2 USB Clone Drive Installation a Please insert the CD drive and click setup exe Choose your language and click Next b Fill in the S N accordingly you can find the S N on the cover of CD drive...

Page 7: ...7 c Click Install for installation d Installation progress is showed...

Page 8: ...m Source HDD to Target HDD a Please insert Source HDD and Target HDD well to the docking connect XC4697 to PC via USB cable Turn on the power you can find the clone icon on the right bottom of window...

Page 9: ...9 b Clone drive activated please click Start c Press start to proceed with Clone...

Page 10: ...10 d Clone progress is showed e Click OK once clone is finished...

Page 11: ...the system will allocate it to unallocated area automatically please refer to the below picture Windows system only allows a maximum of four primary partitions if the original disc already exist four...

Page 12: ...12 HDD Partition a Open Disk management and select the unallocated area b Right click New partition for further action...

Page 13: ...13 c Next d Base on your need and click Next...

Page 14: ...14 e Please enter the new partition capacity and click Next for further action f Assign the drive letter and Next...

Page 15: ...15 g Select quick format to format the new partition h Click finish...

Page 16: ...16 i Partition completed the new partition can be found...

Reviews: