19
⇒
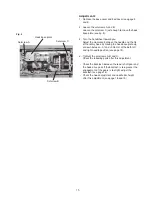
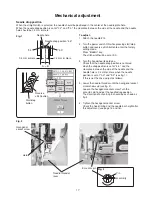
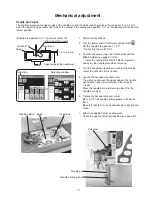
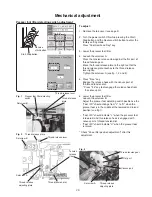
1. Attach the needle #14.
2. Turn the power switch ON. Select straight stitch
.
Set the needle drop position at "0.0".
* Do not turn the switch OFF.
3. Remove the presser foot, the needle plate and the
bobbin holder (see page 4 and 5).
* Cover the needle plate with the fabric to prevent
damaging the needle plate when removing.
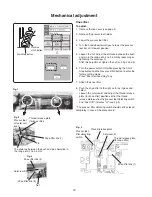
4. Turn the handwheel toward you until the tip of hook
meets the right side of the needle.
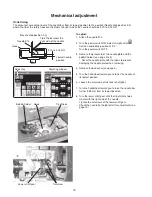
5. Loosen the hexagonal socket screw.
The distance between the upper edge of the needle
eye and the hook race should be in the range of
1.8 mm.
Move the needle bar up or down to adjust the the
needle bar height.
6. Tighten the hexagonal socket screw.
Be sure that the needle settimg groove is facing the
front.
Be careful not to turn the needle bar when tighting the
screw.
7. Attach the bobbin holder, needle plate.
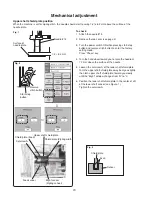
• Check the upper shaft shield position (see page 20).
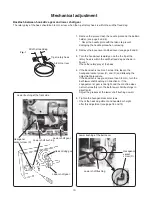
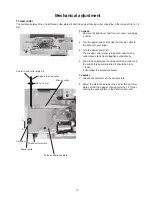
Needle bar height
The distance between the upper edge of the needle eye and the hook race should be in the range of 1.6 to 2.0 mm
when the tip of the hook meets right side of the needle in the needle drop position "0.0" as the needle ascends from its
lowest position.
1.6 to 2.0 mm
Upper edge of the needle eye
Needle #14
Hook
Tip of hook meets the
right side of the needle
(Needle drop position 0.0)
Hook race
Mechanical adjustment
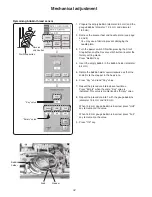
Adjust key
Adjusting window
Bobbin holder
Hook
Tip of hook
Setscrew
Needle bar
Needle setting groove


