20
4
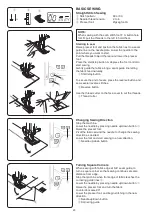
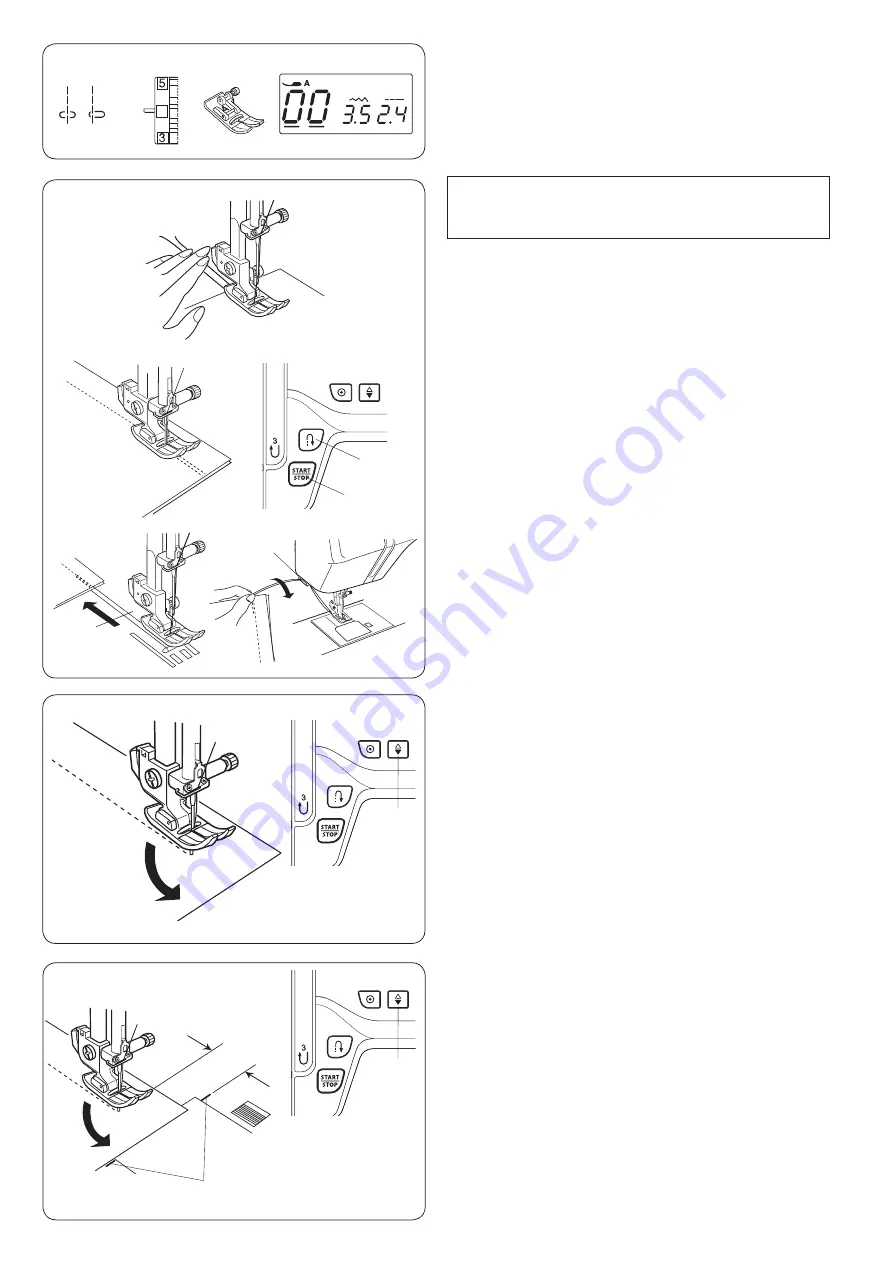
Straight Stitch Sewing
q
Stitch pattern:
00 or 03
w
Needle thread tension:
2 to 6
e
Presser foot:
Zigzag foot A
NOTE:
When sewing with the satin stitch foot F or buttonhole
foot R, pull the threads to the left to hold them.
Starting to sew
Raise presser foot and position the fabric next to a seam
guide line on the needle plate. Lower the needle to the
point where you want to start.
Pull the threads toward the rear and lower the presser
foot.
Press the start/stop button or depress the foot control to
start sewing.
Gently guide the fabric along a seam guide line letting
the fabric feed naturally.
q
Start/stop button
To secure the end of seam, press the reverse button and
sew several reverse stitches.
w
Reverse button
Use the thread cutter on the face cover to cut the threads.
e
Thread cutter
BASIC SEWING
q
w
e
w
q
e
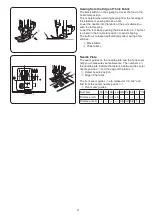
Changing Sewing Direction
Stop the machine.
Lower the needle by pressing needle up/down button
q
.
Raise the presser foot.
Pivot the fabric around the needle to change the sewing
direction as desired.
Lower the foot and start sewing in a new direction.
q
Needle up/down button
q
Turning Square Corners
When sewing with fabric edge at 5/8˝ seam guide, to
turn a square corner so that sewing continues at same
distance from edge.
Stop the machine when front edge of fabric reaches the
cornering guide lines
w
.
Lower the needle by pressing needle up/down button
q
.
Raise the presser foot and turn the fabric
counterclockwise 90°.
Lower the presser foot, and begin stitching in the new
direction.
q
Needle up/down button
w
Cornering guide
q
w
Summary of Contents for JW8100
Page 1: ...Instruction Book...
Page 2: ......
Page 56: ...54 Stitch Chart...
Page 57: ......
Page 58: ......
Page 59: ......
Page 60: ...811 800 202 ENG...


