7
8
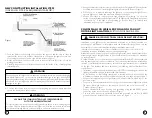
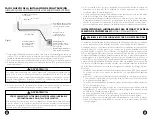
The following steps detail installation of the ColorSplash XG Series LED light fixture
into an existing pool. Read this section in its entirety prior to beginning any installation.
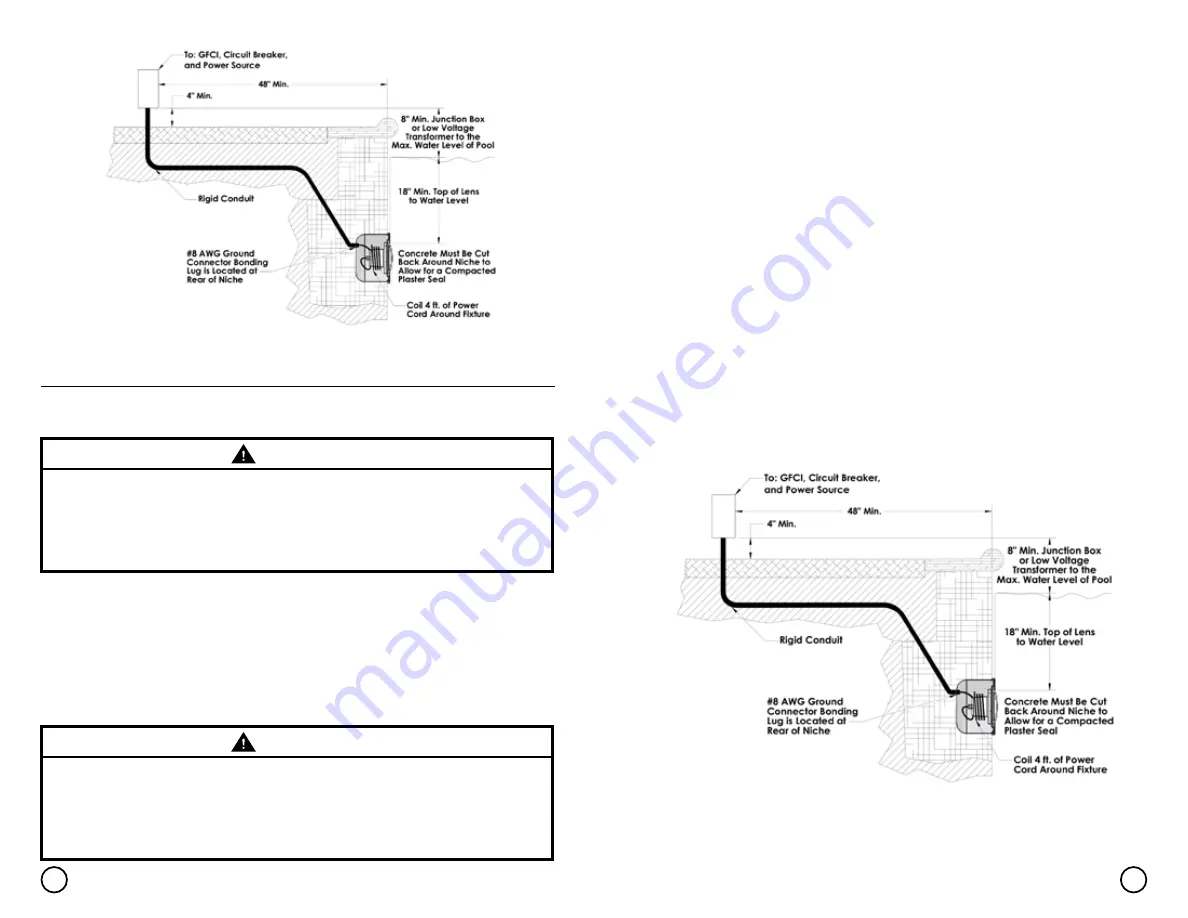
Figure 1
Figure 1
EXISTING CONSTRUCTION INSTALLATION STEPS
(ONCE ALL ELECTRICAL REQUIREMENTS ARE MET)
WARNING
Failure to bring the pool and/or spa electrical system up to current code requirements prior
to light installation may create an electrical shock hazard resulting in death or serious injury
to users, installers, or others due to electrical shock, and may also cause property damage.
POOL OR SPA ELECTRICAL SYSTEM MUST MEET CURRENT
CODE REQUIREMENTS.
WARNING
This special pilot screw secures and electrically grounds the fixture to the mounting ring and
wet niche. Failure to install the stainless steel pilot screw provided could create an electrical
shock hazard, resulting in death or serious injury to pool users, installers or others.
USE ONLY THE STAINLESS STEEL SCREW PROVIDED WITH THIS
UNDERWATER LIGHT.
1. Disconnect the main electrical switch or circuit breaker and the switch which operates
the installed light.
2. Remove the existing light per the original manufacturer’s instructions. Place the light
fixture on the deck.
3. Leaving the light fixture on the deck, cut the light cord. Be sure to leave at least six (6)
inches of cord in order to connect it to the replacement light cord. Discard the light fixture.
4. Remove the existing cord by pulling it up out of the niche and onto the deck. Carefully
strip the outer cord jacket to expose six (6) inches of the underlying three insulated wires.
5. Tape the three existing light wires to the replacement light cord with electrical insulating
tape. Avoid wrapping too much tape around the cords. Otherwise, the thickness will be
too great for the cord to be able to be pulled through the conduit to the junction box.
INSTALLER NOTICE:
This light’s external cord cannot be replaced and should be handled
with care. Any damage to this external cord necessitates replacing the light.
6. After removing the junction box cover, disconnect the light fixture wires. Then, pull the
cord through the conduit until it is visible in the junction box conduit. Remove the tape
from the cords and separate the wires.
7. Carefully strip the outer cord jacket from the new light cord to expose six (6) inches of
the underlying three insulated wires.
1. Connect these three (3) wires to their corresponding junction box circuit wires and
secure the junction box cover in place.
2. Be sure to leave at least four (4) feet of cord at base of the fixture to coil around the light
to ensure ease of servicing; reference Figure 1.
3. Install the ColorSplash XG LED light fixture into the niche.
4. Using the stainless steel pilot screw provided, install the ColorSplash XG LED light fixture
assembly into the niche, carefully tightening the pilot screw. (Reference Figure 1)
5. Make a final check to confirm proper light operation by switching “on” the main switch or
circuit breaker and the light switch. The light should illuminate when power is switched
“on”. If the light is not operating, go back to Step 1 to recheck each installation step for
proper completion.
Summary of Contents for ColorSplash XG LPL-F2C Series
Page 17: ...30 31 NOTES NOTA NOTES NOTA...


